For apps, you install Trackingplan’s iOS SDK, Android SDK or both.
In this section:
- iOS SDK
- Android SDK
Throughout these instructions,
X.X.Xstands for the version number, so the page never shows an outdated one.Before installing, check the latest version in our official repositories:
- iOS SDK → https://github.com/trackingplan/trackingplan-ios/releases
- Android SDK → https://github.com/trackingplan/trackingplan-android/releases
- React Native SDK → https://github.com/trackingplan/trackingplan-react-native/releases
The latest version gives you compatibility, stability and the newest features and fixes.
iOS SDK
Installing Trackingplan’s iOS SDK using Swift Package Manager
With Trackingplan for iOS, you can check your tracking works as planned without changing your analytics stack or your code.
Trackingplan monitors the traffic between your app and your data destinations and sends you warnings when something changes or breaks in your analytics, such as hit drops, missing properties, rogue events and more.
The recommended way to install Trackingplan for iOS is Swift Package Manager: it makes installing and upgrading Trackingplan simpler. Follow these steps.
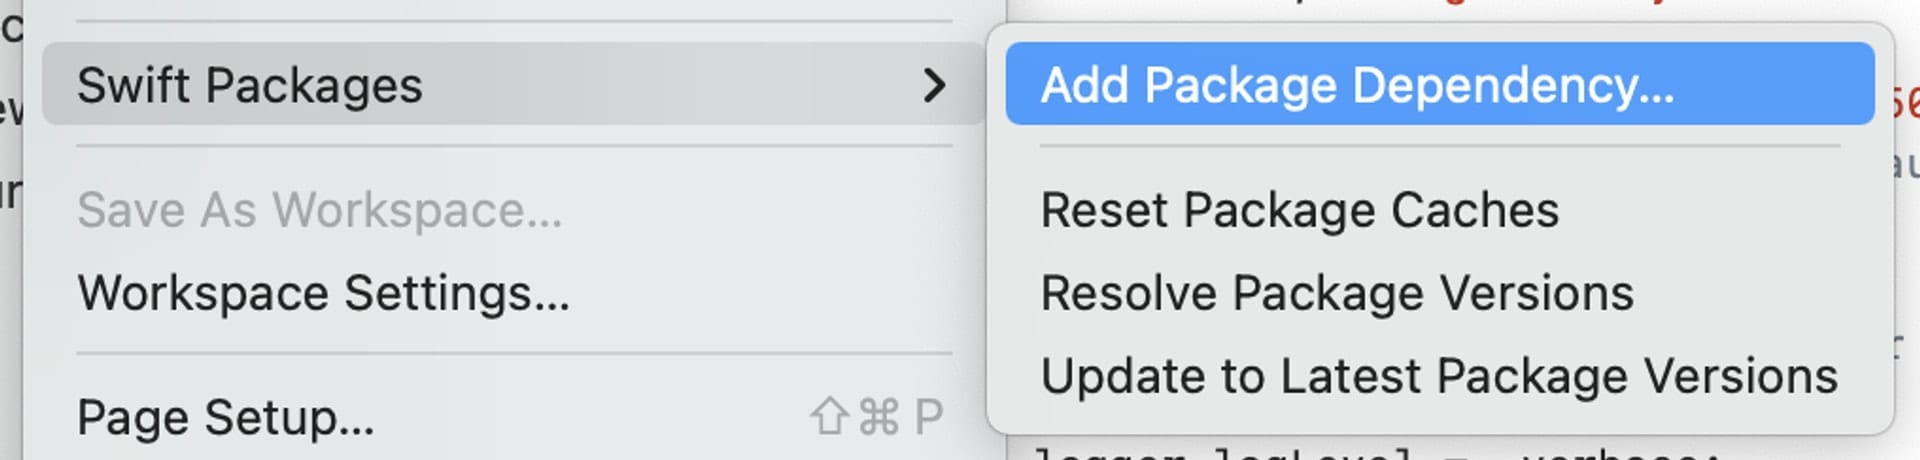
- In Xcode, add the Trackingplan dependency by navigating to File -> Swift Packages -> Add Package Dependency...
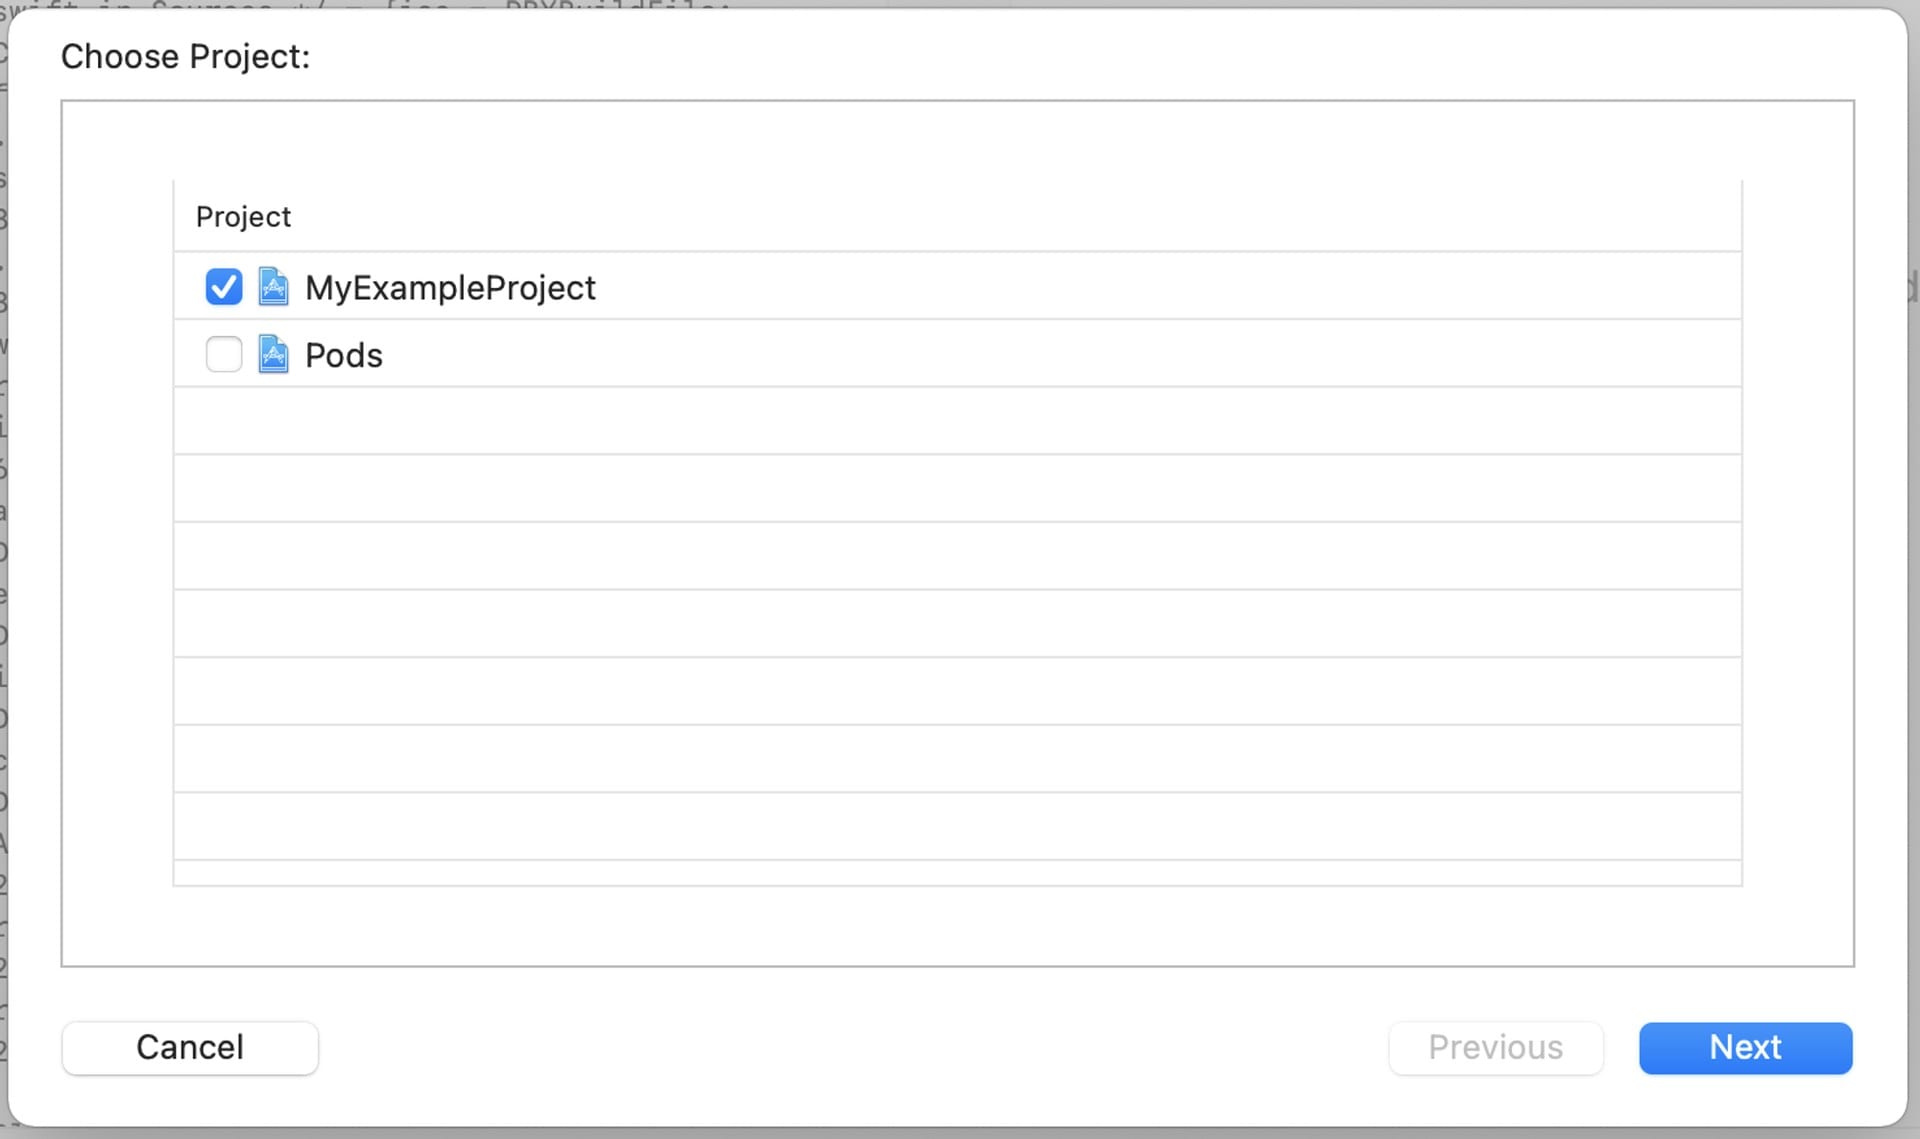
- If you’re asked to choose a project, select the project you want to add Trackingplan to. If not, proceed to step 3.
- When choosing a package repository, copy and paste
https://github.com/trackingplan/trackingplan-iosinto the search box and click Next.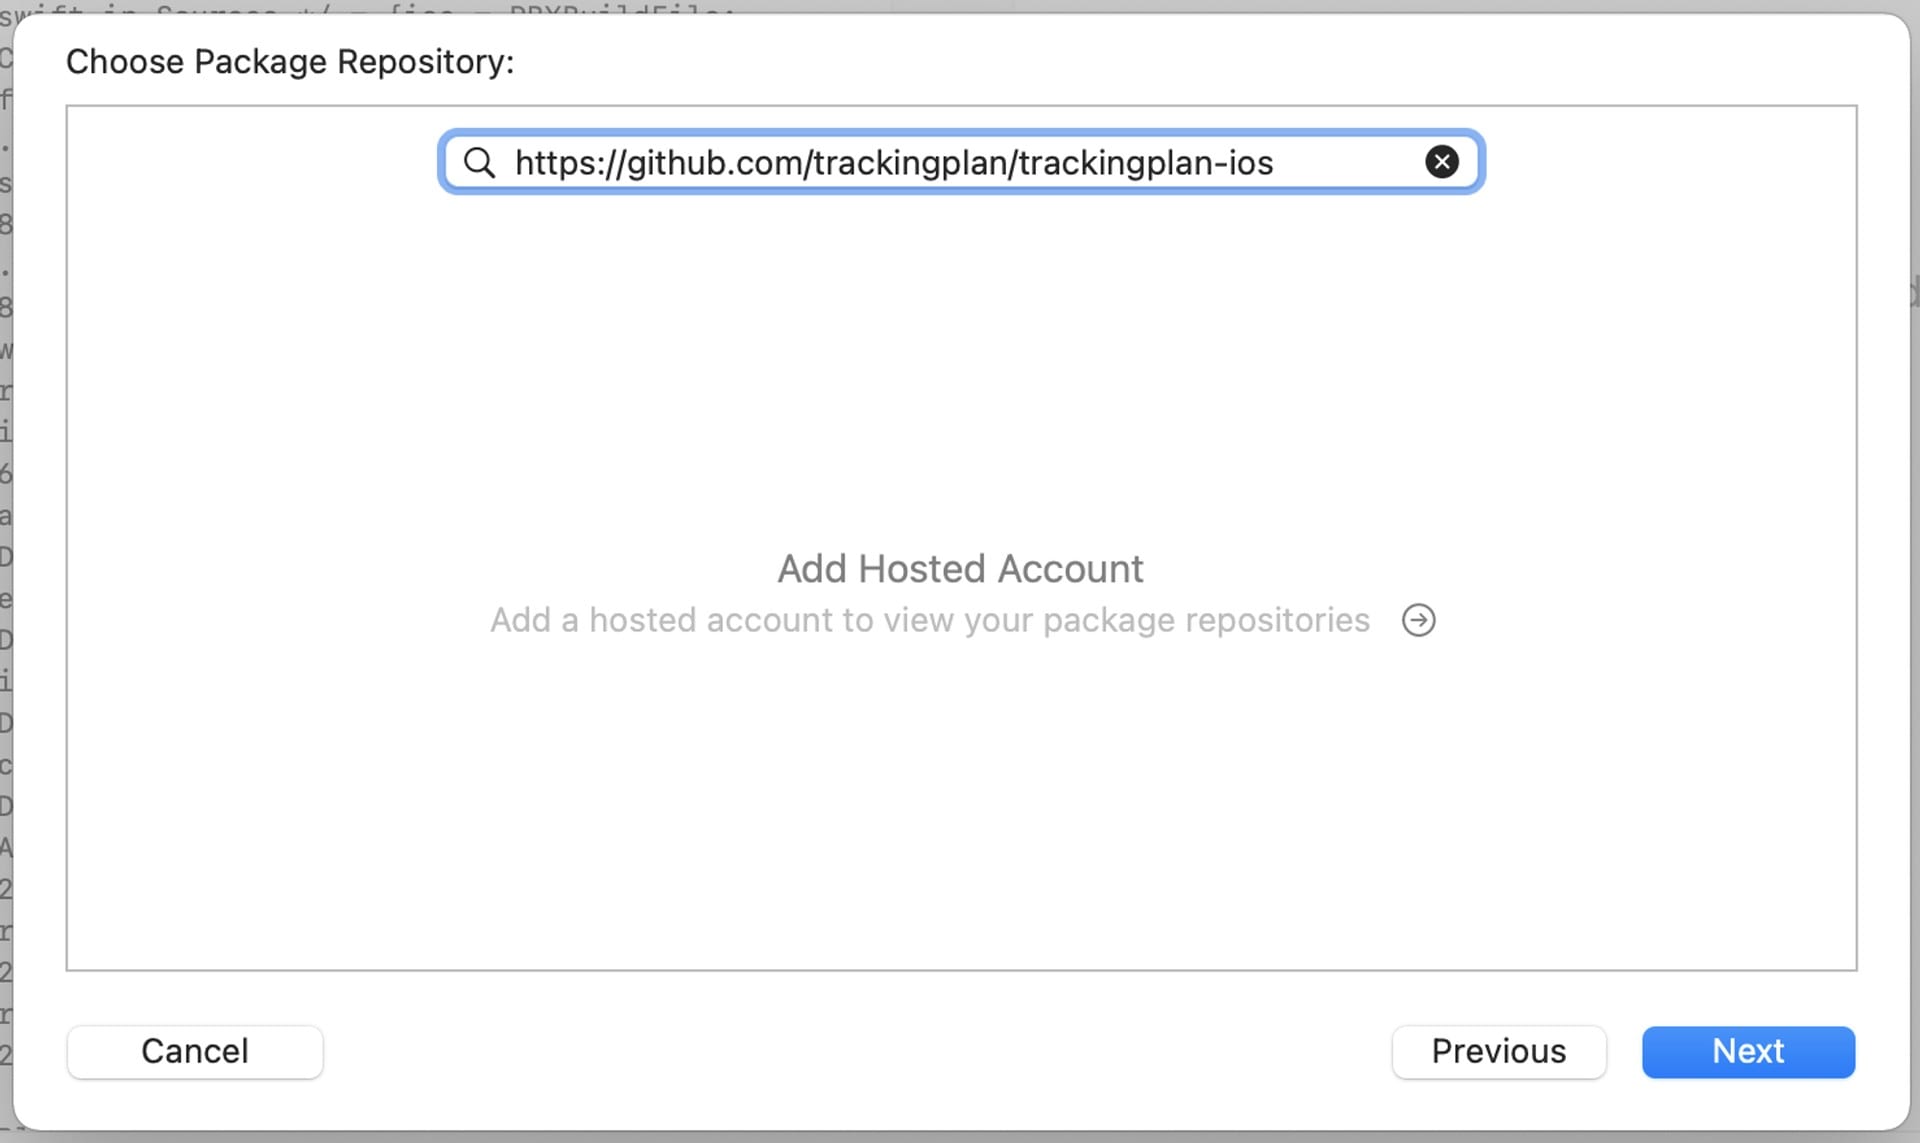
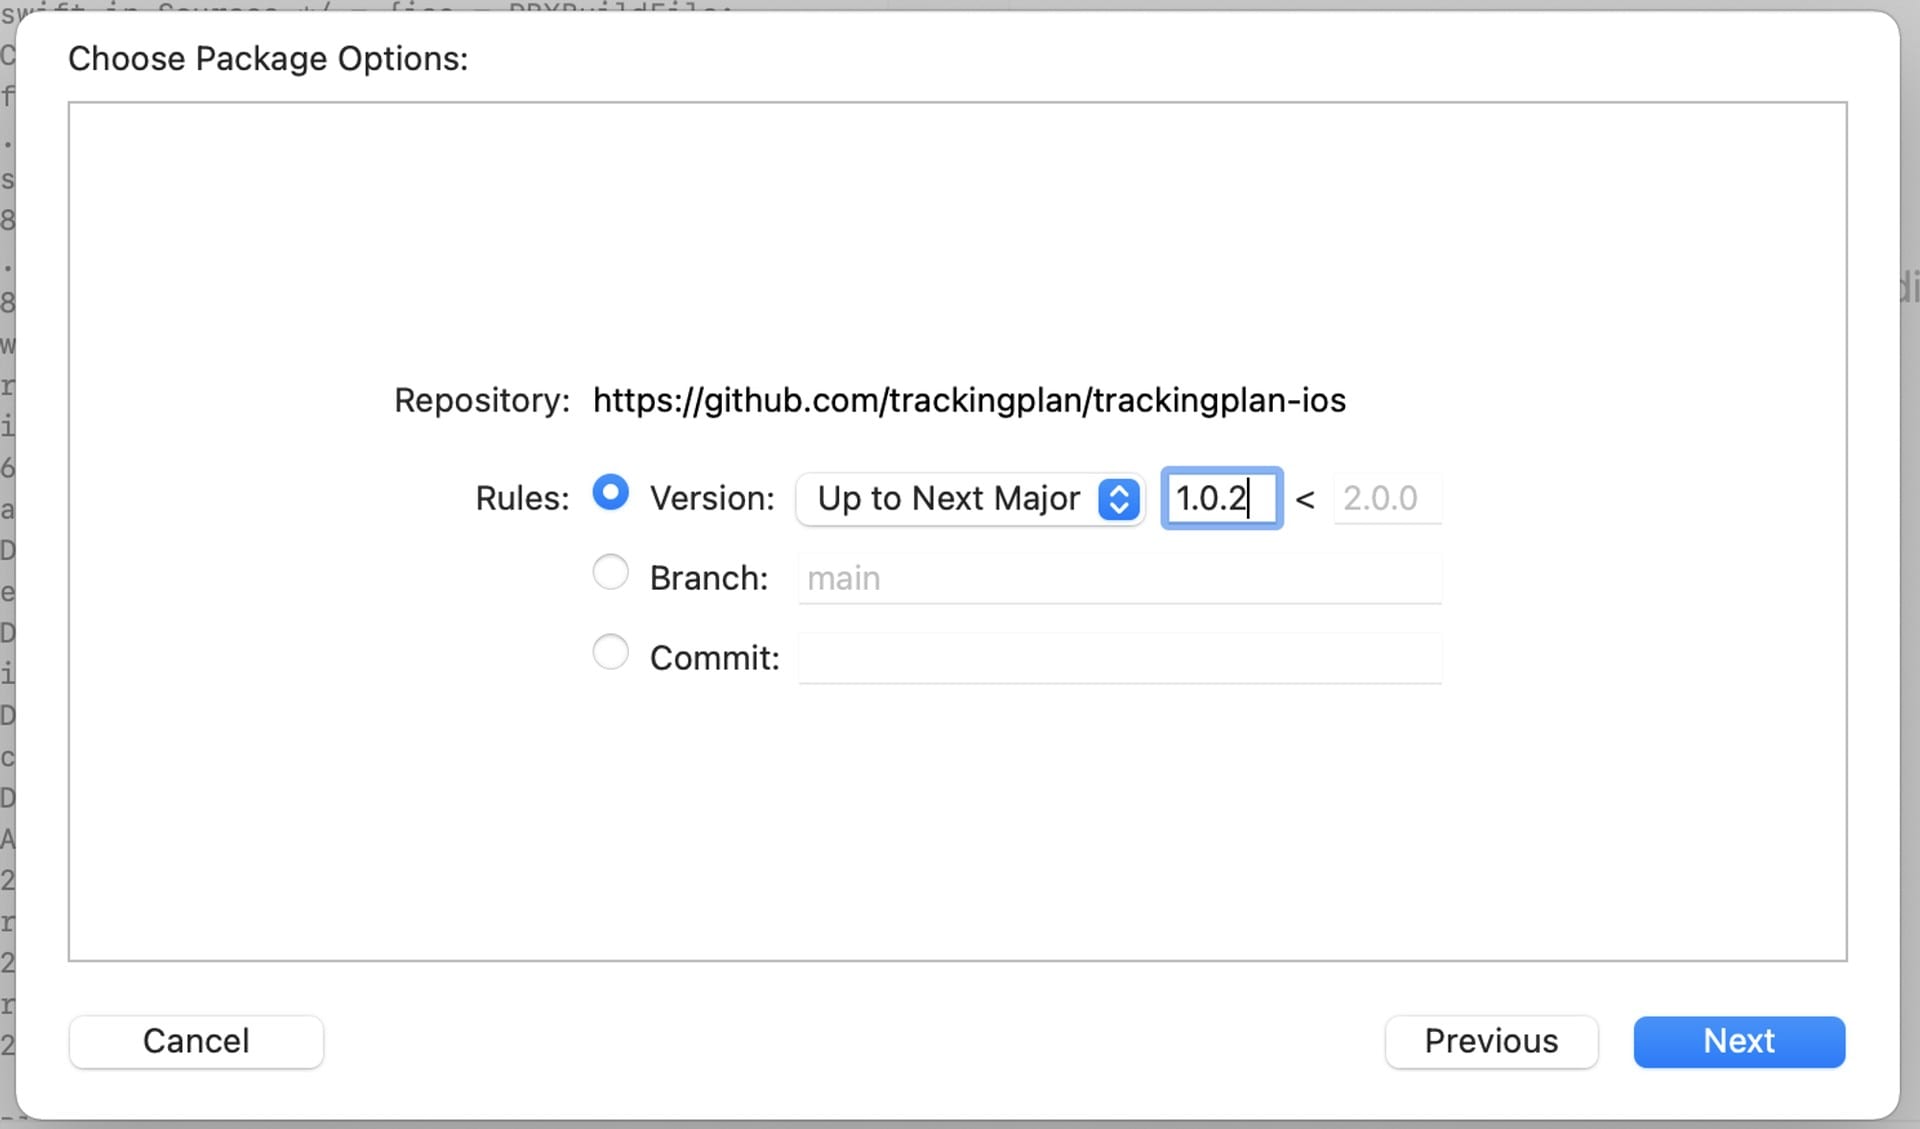
- Choose
Versionand keep the default, the latest version, or change it if you need to. To install an earlier version of Trackingplan, type that version in this field.Check the latest version in the official iOS repository: https://github.com/trackingplan/trackingplan-ios/releases
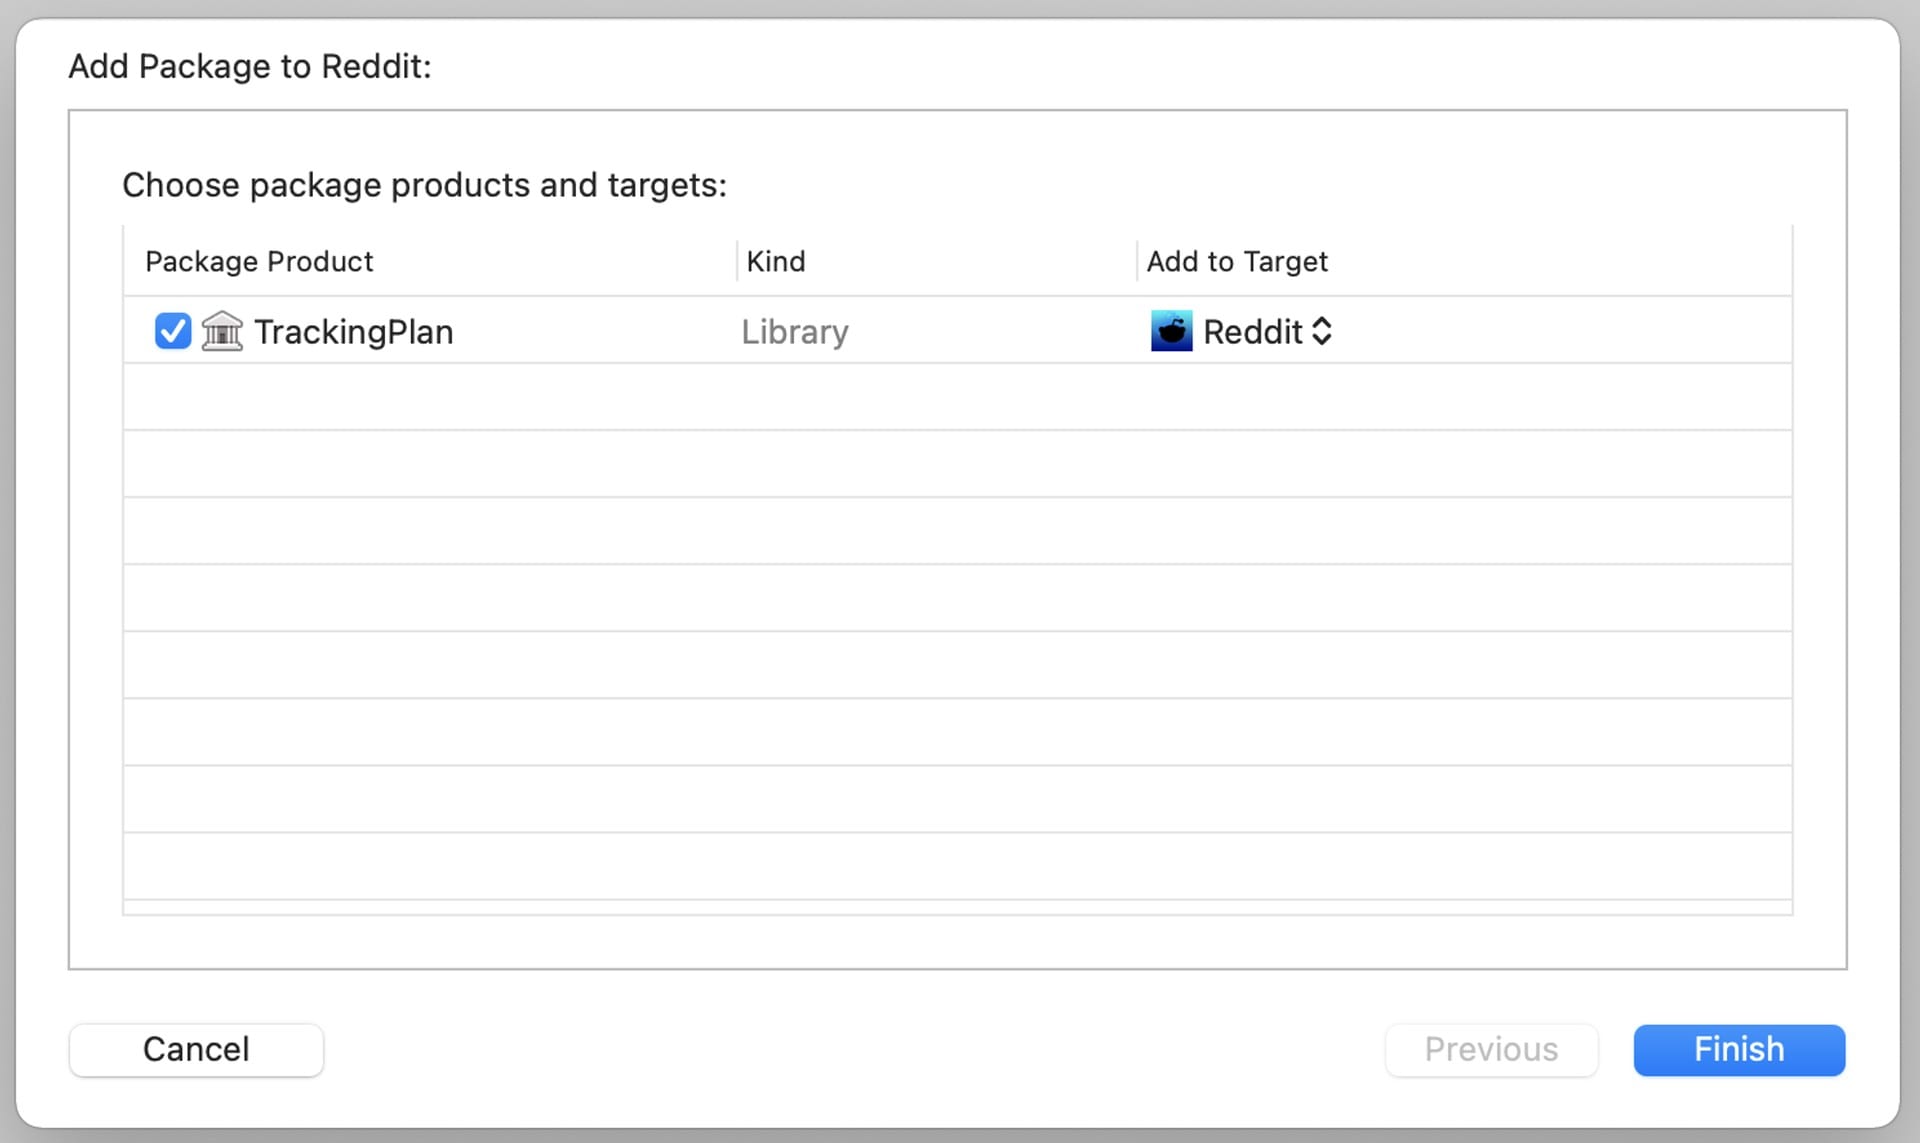
- Check the box next to Trackingplan and click Finish.
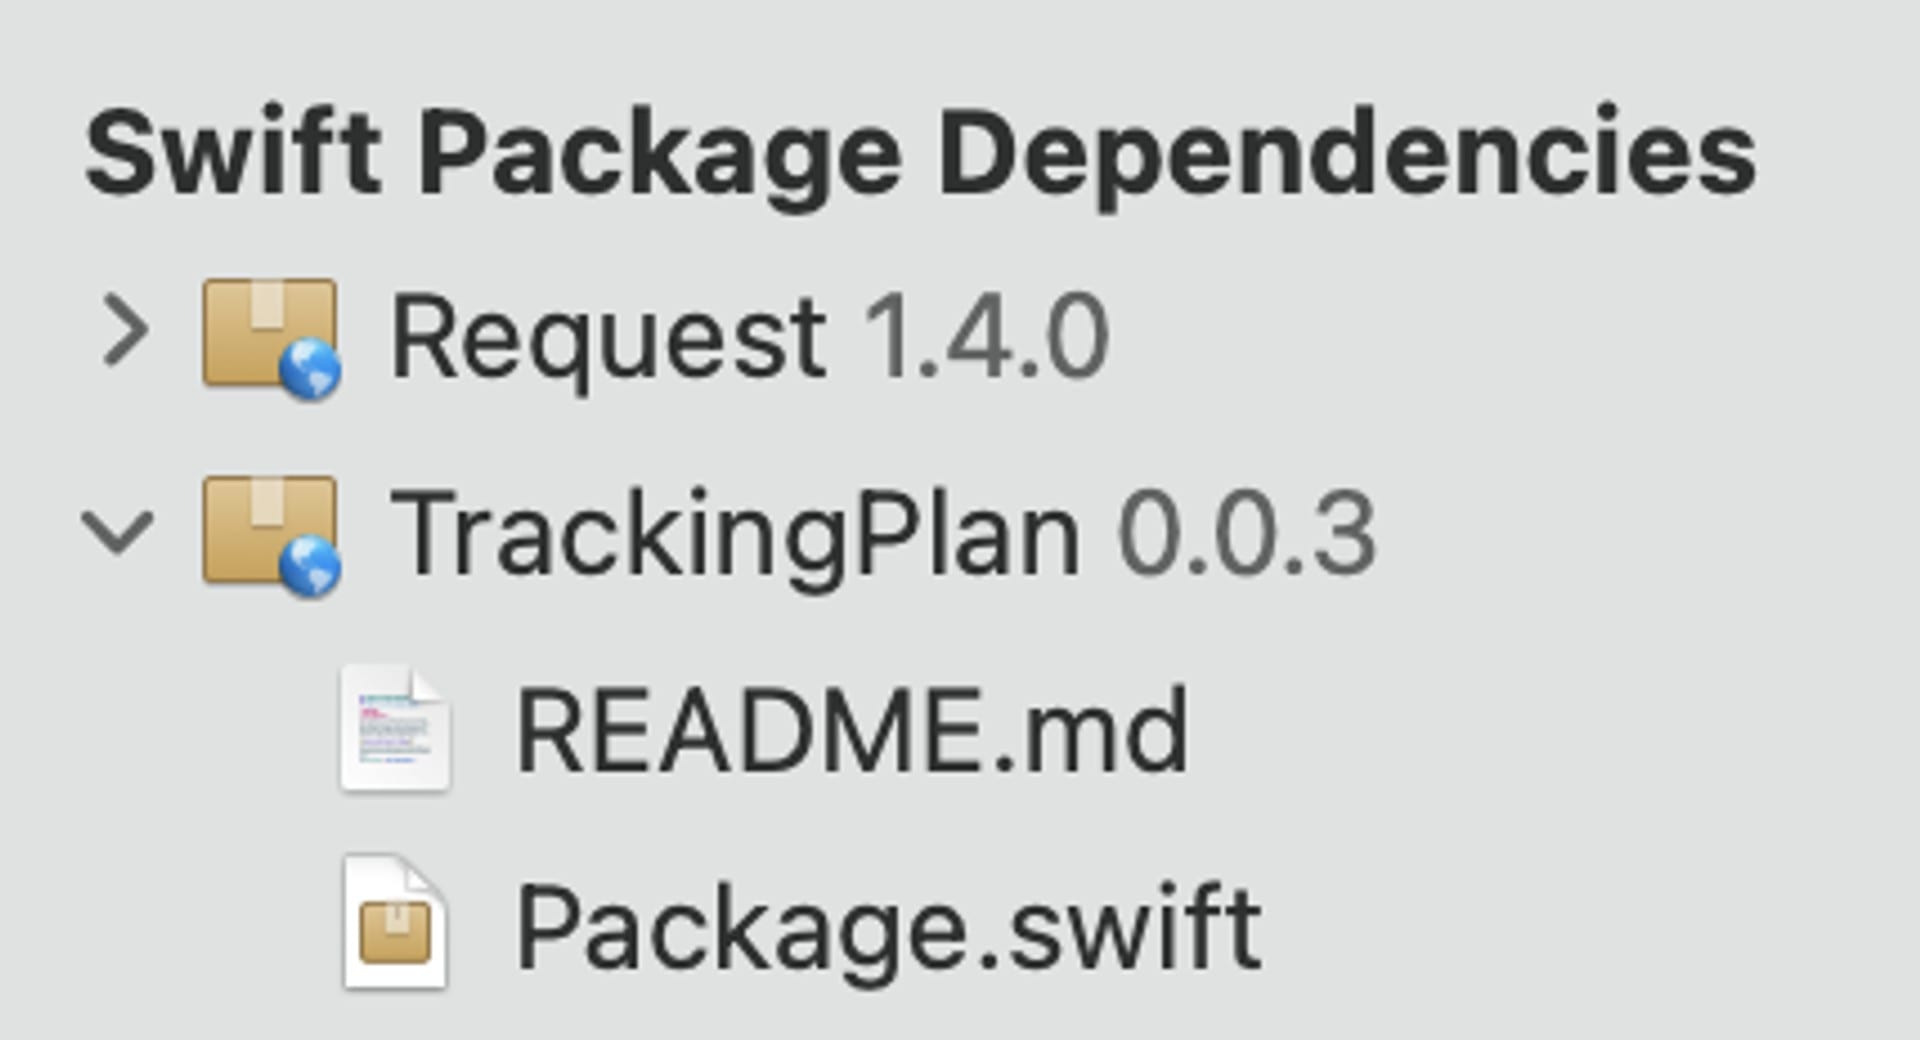
- Verify that the Trackingplan library has been added to the Swift Package Dependencies section.
- Then, in your application delegate’s -
application(_:didFinishLaunchingWithOptions:)method, set up the SDK like so:// // AppDelegate.swift // ... func application(_ application: UIApplication, didFinishLaunchingWithOptions launchOptions: [UIApplication.LaunchOptionsKey: Any]?) -> Bool { // Override point for customization after application launch. // Initialize Trackingplan SDK TrackingPlan.initialize(tpId: "#YourTrackingplanId") return true } - Finally, import the SDK using the following command:
//
//  AppDelegate.swift
//  ...

import TrackingPlan
All set. You have installed the Trackingplan iOS SDK. Now check that Trackingplan is collecting data correctly, so you know it is monitoring and documenting all the customer data you use for analytics, marketing and sales.
Questions or problems along the way? Contact support.
Installing iOS SDK with Cocoapods
Trackingplan also supports iOS installation using Cocoapods. Here is how.
- First, add the Trackingplan dependency to your Podfile, like so:
pod 'Trackingplan', :git => 'https://github.com/trackingplan/trackingplan-ios.git' - In your application delegate’s -
application(_:didFinishLaunchingWithOptions:)method, set up the SDK like so:// // AppDelegate.swift // ... func application(_ application: UIApplication, didFinishLaunchingWithOptions launchOptions: [UIApplication.LaunchOptionsKey: Any]?) -> Bool { // Override point for customization after application launch. // Initialize Trackingplan SDK TrackingPlan.initialize(tpId: "#YourTrackingplanId") return true } - Import the SDK with this command:
//
//  AppDelegate.swift
//  ...

import TrackingPlan
That’s it. Now check that Trackingplan is collecting data correctly.
Questions or problems along the way? Contact support.
Installing iOS SDK in a Flutter project
You can manage the Trackingplan iOS dependency with Cocoapods (https://guides.cocoapods.org/using/getting-started.html#getting-started)
Your Flutter project is not using Cocoapods yet?
- Move to the iOS folder inside your Flutter project folder.
{project_name}/ios/ - Initialise Cocoapods:
$ pod init: this will create thePodfile.
Install:
- Open the
Podfile, uncomment, and set the platform and version at the top.platform : ios, 'X.X.X'
- Add a line for the Trackingplan pod inside the target block:
pod 'Trackingplan', :git => 'https://github.com/trackingplan/trackingplan-ios.git'
- Make sure that
use_frameworks!is in place to disable dynamic frameworks
Sample Podfile (Project without Cocoapods):
platform :ios, 'X.X.X'

...

target 'Runner' do
  use_frameworks!
    # Pods for Runner
  pod 'Trackingplan', :git => 'https://github.com/trackingplan/trackingplan-ios.git'
end- Move to the ios folder path
{project_name}/ios/and run the command$ pod install
Sample Podfile (Project already using Cocoapods):
target 'Runner' do
  use_frameworks!
  use_modular_headers!
  pod 'Trackingplan', :git => 'https://github.com/trackingplan/trackingplan-ios.git'
  flutter_install_all_ios_pods File.dirname(File.realpath(__FILE__))
end
Setup:
- Include Pods files in debug and release config:
- Edit the file
{project_name}/ios/Flutter/Debug.xcconfigand add at the end:#include "Pods/Target Support Files/Pods-Runner/Pods-Runner.debug.xcconfig” - Edit the file
{project_name}/ios/Flutter/Release.xcconfigand add at the end:#include "Pods/Target Support Files/Pods-Runner/Pods-Runner.release.xcconfig" #include "Pods/Target Support Files/Pods-Runner/Pods-Runner.profile.xcconfig"
- Edit the file
- Update
AppDelegate.swiftin{project_name}/ios/Runner/- Import Trackingplan at the top

- Initialise Trackingplan with the identifier provided inside the
didFinishLaunchingWithOptions
- Import Trackingplan at the top
Installing Trackingplan in Ionic for iOS platform
To use Trackingplan in an Ionic app, you set it up on each platform. It works much like installing Trackingplan in any mobile app.
Once that's done, Trackingplan captures and monitors every tracking request from any version of the app.
These instructions are for Capacitor Ionic apps, but they capture data from any analytics and marketing SDK, whether it is Capacitor, Cordova or JS. For Cordova apps without Capacitor, the installation is very similar.
- Open the Podfile, uncomment, and set the platform and version at the top.
- Add the following lines for the Trackingplan pod inside the target block:
use_frameworks! use_modular_headers! pod 'Trackingplan', :git => '<https://github.com/trackingplan/trackingplan-ios.git>' - Move to the
ios/Appfolder and run:pod install - Update AppDelegate.swift in
ios/App/Appto import Trackingplan at the top:import Trackingplan - Initialize Trackingplan with the provided Trackingplan ID inside the
didFinishLaunchingWithOptionsfunction:Trackingplan.initialize(tpId: "YourTrackingplanId") - Run the following commands:
ionic build
npx cap sync ios
npx cap run ios
Installing Trackingplan in Ionic for web apps
You need this step if your analytics and marketing use JS SDKs instead of native ones (Cordova, Capacitor), or if you publish your app as a website.
- Add the Trackingplan snippet to your app's index.html.
- You'll find the snippet in your Trackingplan dashboard. See the instructions here.
Advanced Options
Trackingplan for iOS supports the following advanced options during its initialization:
Parameter | Description | Default |
| Enables debug mode. Prints debug information in the console. |
|
| Allows to isolate the data between production and testing environments. |
|
| Enables dry run mode, which allows you test Trackingplan for Android without actually sending any data to Trackingplan. |
|
| Allows extending the list of monitored domains. Any request made to these domains will also be forwarded to Trackingplan. The |
|
| Allows to differentiate between sources. |
|
| Allows to tag the data sent to Trackingplan. The |
|
| Allows you to capture a real-data representation with browser-captured context, acting as a bridge between your website or applications and various analytics tools and helping essential data move between them. If your data layer isn’t named |
|
| When set to |
|
Tags are key-value pairs of strings that label the data you send to Trackingplan. You choose them, and they help you filter the warnings that affect a specific app version, country and so on, or run root-cause analysis on them.
Automatic tagging. For iOS and Android SDKs, the
app_versiontag is included automatically, with no extra setup. To add other tags, such ascountry,build numberortest name, add them by hand as in the example below:
Trackingplan.init("YOUR_TP_ID")
    .environment("development")
    .sourceAlias("iOS app")
//  .tags(new HashMap<>(){{
//      put("tag1", "value1");
//  }})
//  .customDomains(new HashMap<>(){{
//      put("my.domain.com", "myanalytics");
//  }})
//  .enableDebug()
//  .dryRun()
    .start(this)
Using Custom domains
Trackingplan recognizes requests sent to the standard collection domains of the analytics and marketing platforms it supports, automatically. Each domain maps to a Trackingplan parser, which turns the raw requests into the enriched event format you see across the platform.
If your implementation sends data to a custom collection domain instead of the platform's default one, Trackingplan can't identify it automatically. In that case, configure the custom domain when you install Trackingplan.
To configure a custom domain, you need:
- The custom domain that your implementation sends requests to (for example, your own collection domain instead of the platform's default endpoint).
- The parser ID that tells Trackingplan which platform those requests belong to.
The parser value is not the name you'll see in Trackingplan. It is the internal identifier that tells Trackingplan how to read requests from that domain.
Some common parser IDs include:
Platform | Parser ID |
|---|---|
Server-side Google Tag Manager |
|
Stape |
|
Tealium |
|
Adobe Analytics |
|
Adobe Target |
|
Jentis |
|
Piano |
|
Android SDK
Installing Trackingplan’s Android SDK using Android Studio
With Trackingplan for Android, you can check your tracking works as planned without changing your analytics stack or your code.
The recommended way to install Trackingplan for Android is Android Studio. Follow these steps:
Note: Before you start, make sure your project targets API level 24 (Lollipop) or later.
- First, add the Trackingplan dependency. To do this, expand the
Gradle Scriptssection.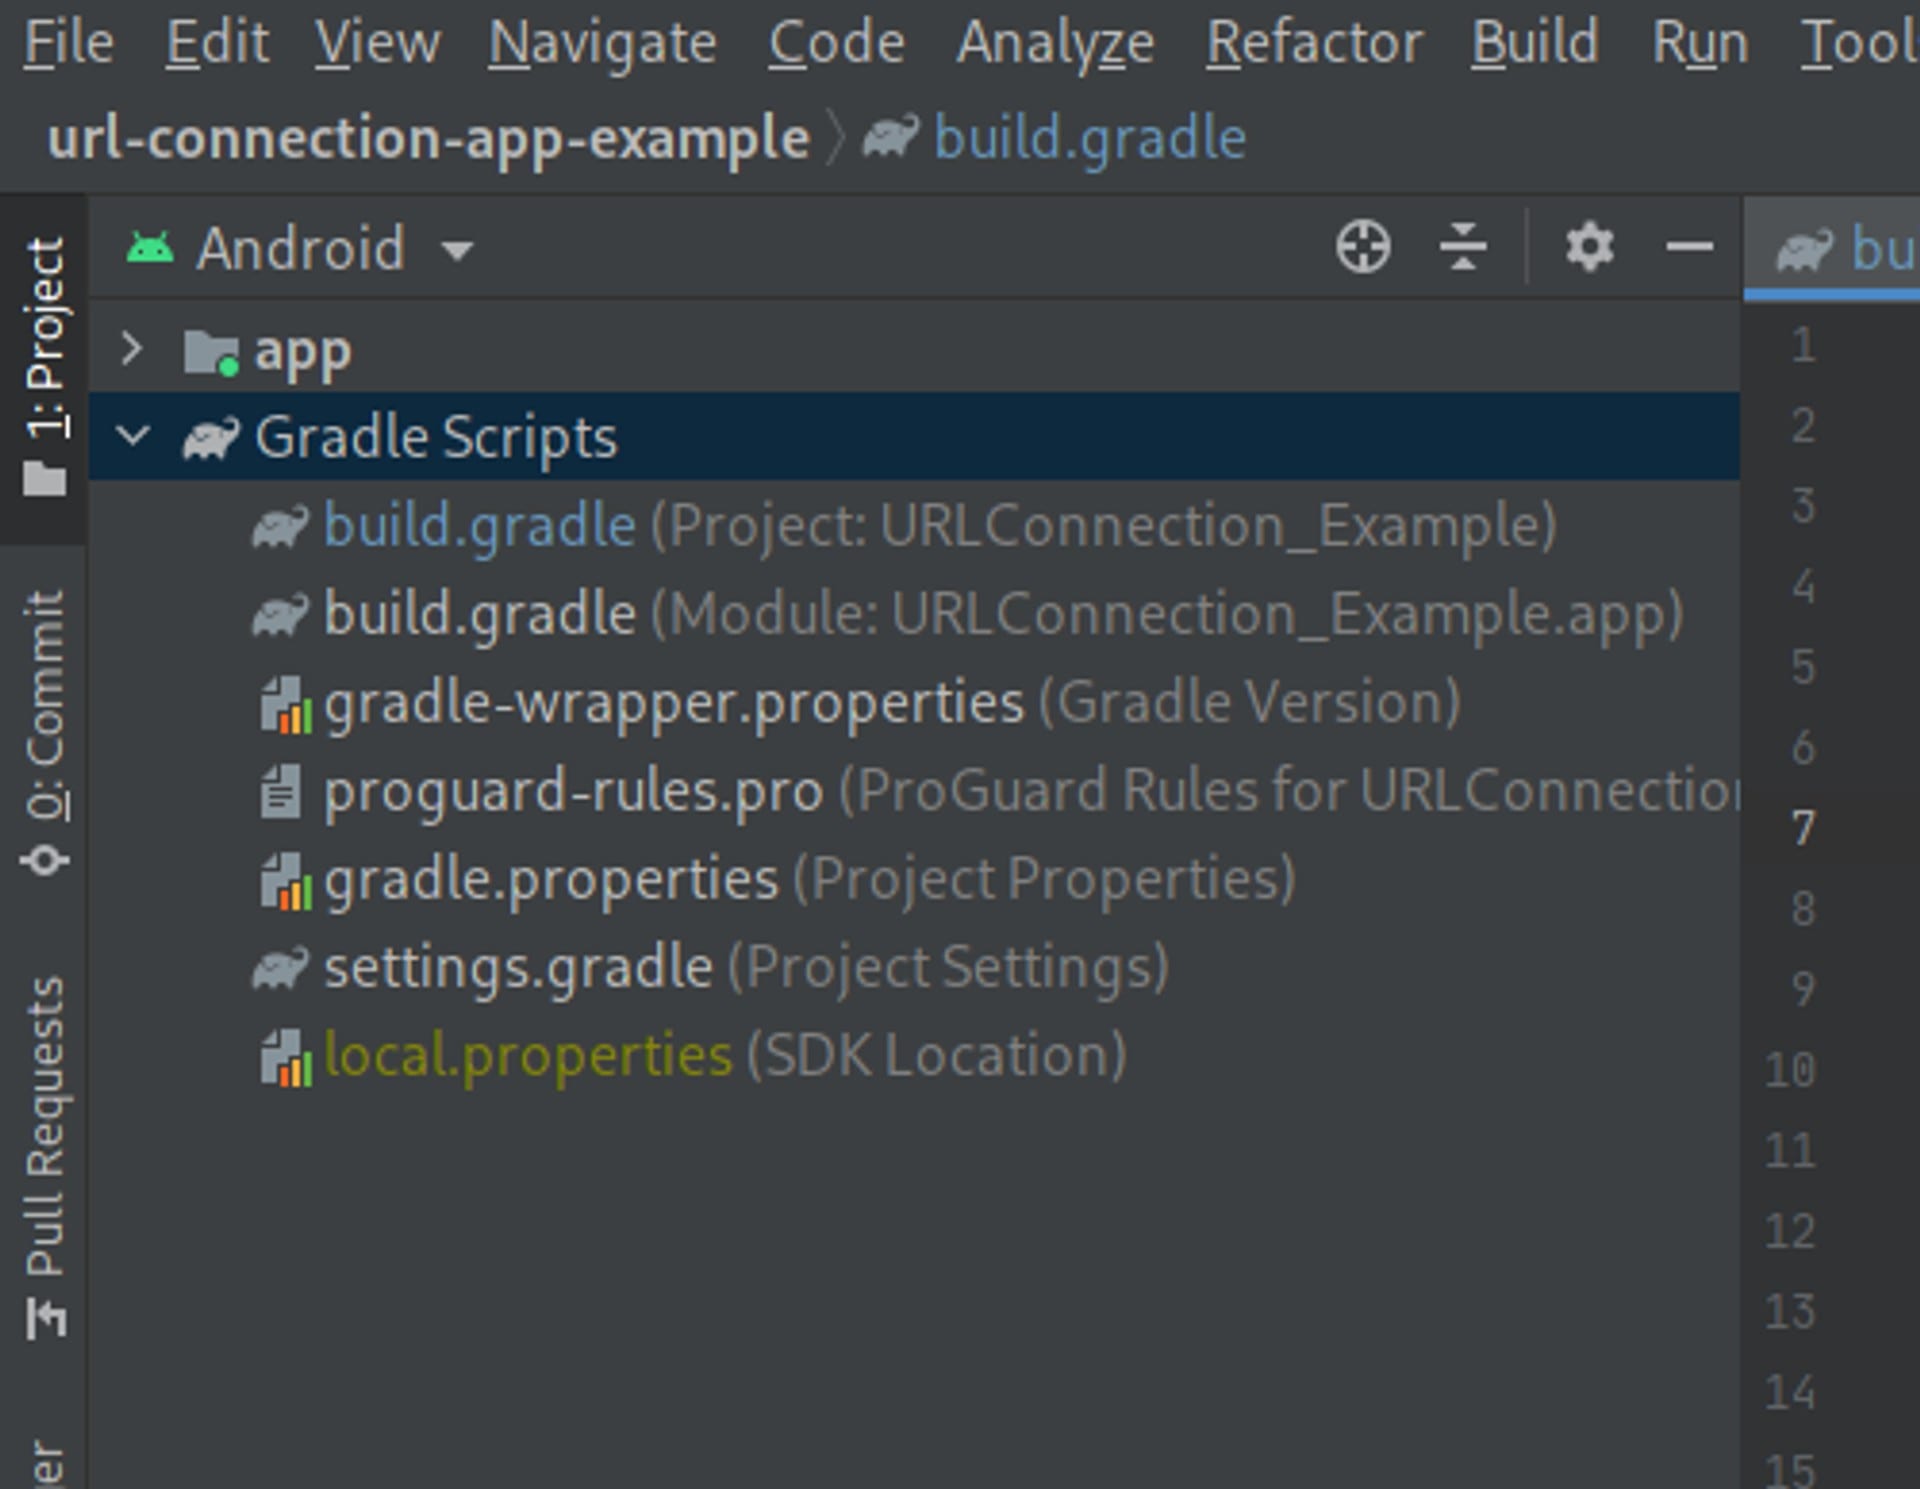
- Then, select the
project-level build.gradlefile and addcom.trackingplan.client:adapter:X.X.Xas a classpath dependency to the dependencies section:dependencies { // ... classpath "com.trackingplan.client:adapter:X.X.X " // ... }Check the latest version in the official Android repository: https://github.com/trackingplan/trackingplan-android/releases
- After that, select the
module-level build.gradlefile and modify it as indicated below:- Add
id 'com.trackingplan.client'to the plugins section.plugins { // ... id 'com.trackingplan.client' // ... } - Add
implementation 'com.trackingplan.client:sdk:X.X.X'to the dependencies section.dependencies { // ... implementation 'com.trackingplan.client:sdk:X.X.X' // ... }
- Add
- Next, in the
onCreatemethod of your Application's Main Activity, set up the SDK like so:Trackingplan.init("YOUR_TP_ID").start(this) - Then import the SDK with the following command:
import com.trackingplan.client.sdk.Trackingplan;
You have installed the Trackingplan Android SDK.
All set. Now check that Trackingplan is collecting data correctly.
You can also build Trackingplan for Android from the source code. To learn how, see our Github documentation.
Installing Android SDK in a Flutter project
To add Trackingplan to your Flutter app, open the android directory inside your Flutter project and add the Trackingplan dependency:
- Add
com.trackingplan.client:adapter:X.X.Xas a classpath dependency to the dependencies section of theandroid/build.gradlefile.
dependencies {
    // ...
    classpath "com.trackingplan.client:adapter:X.X.X"
    // ...
}
Check the latest version in the official Android repository: https://github.com/trackingplan/trackingplan-android/releases
- Add
implementation 'com.trackingplan.client:sdk:X.X.X'to the dependencies section of theandroid/app/build.gradlefile.
dependencies {
    // ...
    implementation 'com.trackingplan.client:sdk:X.X.X'// ...
}- Apply
com.trackingplan.clientplugin in yourandroid/app/build.gradlefile.
apply plugin: 'com.android.application'
apply plugin: 'com.trackingplan.client' // <-- Trackingplan Plugin
Finally, find the MainActivity class (android/app/src/main/kotlin) and, in the onCreate method, set up the SDK like so:
Trackingplan.init("YOUR_TP_ID").start(this)Then import the SDK:
import com.trackingplan.client.sdk.Trackingplan;All set.
Installing Trackingplan in Ionic for Android platform
- Add the Trackingplan classpath dependency to Android/build.gradle (the project-level
build.gradle, not the one insideandroid/app, but the one at the root of theandroidfolder):classpath "com.trackingplan.client:adapter:X.X.X"Check the latest version in the official Android repository: https://github.com/trackingplan/trackingplan-android/releases
- Open the app/build.gradle file (the module-level Gradle file) at
android/app/build.gradle.In the dependencies block, add:
implementation 'com.trackingplan.client:sdk:X.X.X' - At the top level, add:
apply plugin: 'com.trackingplan.client' - Initialize the Trackingplan SDK in your MainActivity.java file located at
android/app/src/main/java/MainActivity.java.Add an
onCreatemethod inside theMainActivityclass and initialize Trackingplan with your Trackingplan ID:import com.getcapacitor.BridgeActivity; import android.os.Bundle; import com.trackingplan.client.sdk.Trackingplan; public class MainActivity extends BridgeActivity { @Override protected void onCreate(Bundle savedInstanceState) { super.onCreate(savedInstanceState); // Initialize Trackingplan with your TP ID Trackingplan.init("YourTrackingplanId").start(this); } } - Set
minSdkVersion = 24or higher inandroid/variables.gradle. - Run the commands:
ionic build
npx cap sync android
npx cap run android
Advanced Options
Trackingplan for Android supports the following advanced options during its initialization:
Parameter | Description | Default |
| Enables debug mode. Prints debug information in the console. |
|
| Allows to isolate the data between production and testing environments. |
|
| Enables dry run mode, which allows you test Trackingplan for Android without actually sending any data to Trackingplan. |
|
| Allows to extend the list of monitored domains. Any request made to these domains will also be forwarded to Trackingplan. The |
|
| Allows to differentiate between sources. |
|
| Allows to tag the data sent to Trackingplan. The |
|
| Allows you to capture a real-data representation with browser-captured context, acting as a bridge between your website or applications and various analytics tools and helping essential data move between them. If your data layer isn’t named |
|
| When set to |
|
Automatic tagging. For iOS and Android SDKs, the
app_versiontag is included automatically, with no extra setup. To add other tags, such ascountry,build numberortest name, add them by hand as in the example below:
Trackingplan.init("YOUR_TP_ID")
    .environment("development")
    .sourceAlias("Android app")
//  .tags(new HashMap<>(){{
//      put("tag1", "value1");
//  }})
//  .customDomains(new HashMap<>(){{
//      put("my.domain.com", "myanalytics");
//  }})
//  .enableDebug()
//  .dryRun()
    .start(this)