
GCLID is the click identifier Google Ads appends to the landing-page URL when auto-tagging is on, and it links that click to later conversions and measurement. A conversion hit can fire perfectly and still teach bidding nothing. The tag works. The lead lands in the CRM. The sale closes. Yet if the identifier dropped out somewhere between the ad click and the form, Google Ads can't join that outcome to the click that caused it. The tag is fine. The chain is broken, and each link in it has a different owner.
What GCLID is and what losing it costs attribution
The most expensive parameter in a Google Ads account is the one that disappears without raising an error. Say a prospect clicks your ad and lands on your homepage. The plain destination, https://www.yourstore.com/, becomes https://www.yourstore.com/?gclid=Cj0KCQjw8anGBhDmARIsAFDqE1xYzAbC in the address bar. That string after gclid= is the whole story. According to Google's auto-tagging documentation, the Google Click Identifier is a URL parameter appended when auto-tagging is enabled, and it links campaign and click attributes to later measurement in Google Ads and Google Analytics.

A join key, not a label
A UTM tells you which campaign sent the visit. A gclid value points to one specific click. The value is case-sensitive, so 123Xyz and 123xyz are different identifiers, and lowercasing them in a spreadsheet or a middleware field breaks the join permanently. Treat it as a database key, never as text you can clean up. The identifier can also be created at impression time rather than at click time, and a repeat click on the same ad can reuse an earlier value while still counting as a separate click. Both behaviors are normal, and both will confuse anyone auditing click counts against parameter counts.
Why the stakes are higher than reporting
Auto-tagging is required for website conversion tracking across browsers and for importing offline conversions, including a sale completed in a physical shop after an online ad interaction. New Google Ads accounts have it enabled by default. That default is also the trap, because the parameter arrives on every click whether or not anything downstream is listening for it. A capture gap looks like ordinary traffic until closed revenue and reported conversions stop agreeing, and by then Smart Bidding has already trained on the subset of conversions whose identifiers survived.
A yes-or-no presence check misses most of this. I treat coverage as a map, with missing values segmented by landing page template, by browser, by consent state, and by upload status, because each failure mode has a different owner and a different fix. Three questions decide whether the setup holds. Which identifiers exist and which one wins. Where the value gets lost between click and conversion. And how you prove coverage instead of assuming it.
GCLID, GBRAID and WBRAID compared
| Identifier | Parameter | Typical click source | Upload priority | Retention for offline import |
|---|---|---|---|---|
| GCLID | gclid | Google Ads web click with auto-tagging on | First | 90 days |
| WBRAID | wbraid | Click on the web that leads to an app | Second | Checked against the conversion action window |
| GBRAID | gbraid | Click in an app that leads to the web | Third | Checked against the conversion action window |
The priority order
The Google Ads API documentation for offline conversion uploads sets a clear order. Google Ads uses gclid first, then wbraid, then gbraid. The API recommends sending every identifier captured from the landing-page URL, and including gclid alongside user identifiers whenever it exists. One rule deserves attention. If an upload contains wbraid or gbraid without a gclid, Google ignores the user_identifiers field in that request. Losing the primary identifier doesn't just remove one signal. It can silence the backup signals you sent with it.
Practical rule: preserve every identifier you receive. Let Google apply its priority. Don't choose on its behalf at capture time.
One column per identifier
Google's documentation states that GCLID, GBRAID, WBRAID and user-provided data can coexist in one uploaded conversion record without an upload error beginning October 3, 2025. That removes any reason to funnel all three values into a single CRM field. Give each identifier its own column. Store the original landing URL and click timestamp beside them. Record the consent status at capture. A single overwritten field destroys information you can't recover later, because the click that produced the value won't happen again.
I would also resist the idea that GBRAID and WBRAID replace GCLID. They cover environments where the classic identifier isn't available, mainly privacy-constrained app and web handoffs. They're additions to the identifier set, not successors. A CRM built for only one parameter will keep losing the other two on exactly the traffic segments that are hardest to measure any other way.
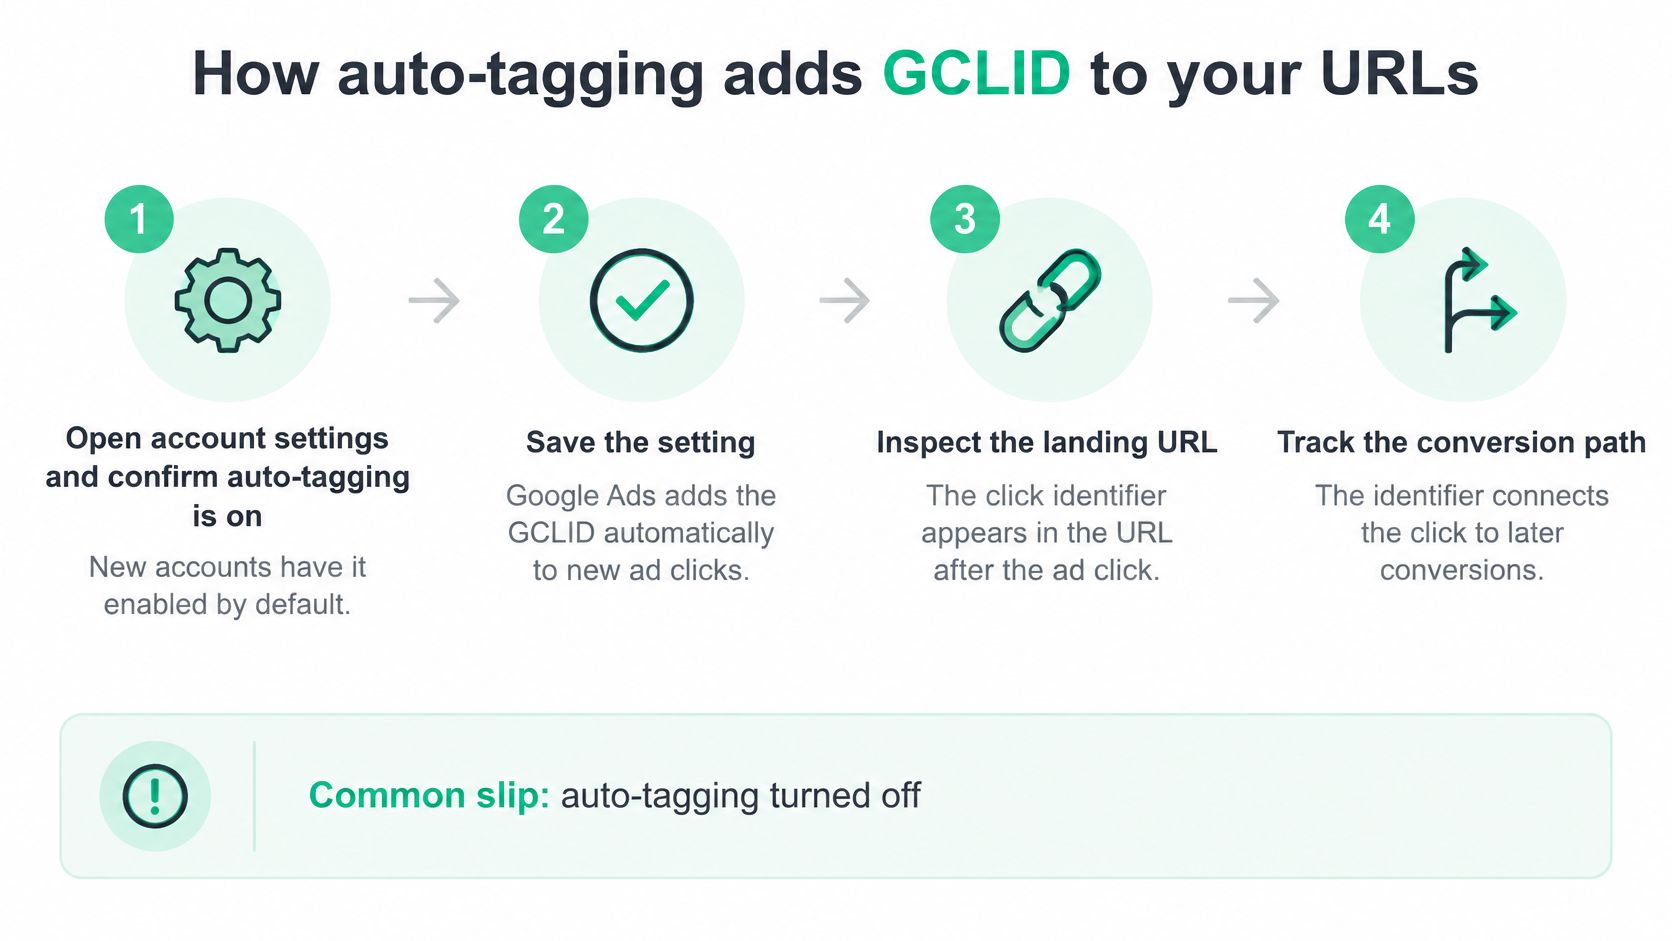
How auto-tagging adds GCLID to your URLs
- Confirm auto-tagging is on in account settings before you test anything else. New accounts have it enabled by default. The common slip is setting a manual UTM template and assuming it replaces auto-tagging. It doesn't do the same job.
- Open a test ad from a clean browser session that isn't logged in to internal tools. You want the request a visitor makes, not the one your extensions and logins produce.
- Read the landing URL and confirm the
gclidparameter carries its full value. Don't copy it from a screenshot. Screenshots invite transcription errors and lost letter case. Copy the text. - Follow every redirect and compare the first URL with the final URL. The parameter must survive the whole trip, including click trackers and domain changes.
- Check persistence on later pages. The value should sit in browser storage or a first-party cookie after the landing page, because the conversion rarely happens on page one.
- Find the test click in GA4 traffic reports. It should appear with
googleas source andcpcas medium. A manual UTM on the same link can hide the expected source and send you chasing the wrong fault.
What correct handling looks like
The Google guide to tracking clicks with auto-tagging describes GCLID as a unique, case-sensitive identifier, and recommends auto-tagging because it supports Google Ads attribution and identifies Google Ads traffic in third-party analytics tools. Capture the query-string value on the first landing-page request. Preserve it through redirects and multi-step forms. Retain it exactly, because normalizing, truncating, or decoding it incorrectly can prevent attribution. QA should cover the full path, including consent-dependent tag firing and cross-domain flows.
One interaction trips up many teams. In GA4, auto-tagging takes precedence over manual UTM tagging. Decide before launch how campaign names and click-derived attribution coexist, instead of assuming UTMs override the identifier. A campaign attribution guide for PPC teams is worth reading if your tracking templates mix both systems. The pass signal is simple. The same value appears in the URL, the stored field, and the CRM record, character for character.
Where GCLID gets lost between click and conversion
| Loss point | What breaks | How to check |
|---|---|---|
| Redirect strips the query string | Google Ads cannot link the conversion to the click | Trace the redirect and compare the first and final URL |
| Form drops the hidden field | Lead saves with no click identifier | Submit a test lead and read the stored CRM value |
| Conversion page on another domain without linker | Identifier does not cross domains | Check the domain linker settings on both domains |
| Script rewrites the URL after load | Value disappears from later pages | Read the URL on each page after navigation |
| Value altered in case, cut short or decoded wrongly | Attribution fails without an error | Compare the stored value with the original character by character |
One sentence per break
A redirect that rebuilds the URL without the query string ends attribution before the landing page even renders. A form that renders in an iframe or rebuilds its fields after a step change can drop the hidden field that carries the value. A checkout or booking engine on a second domain receives nothing unless the linker passes the identifier across. A single-page app router or a clean URL script can strip the parameter seconds after load, which makes the landing page look correct in a screenshot and wrong in storage. A lowercased or truncated value fails, because nothing validates it until the upload or the match attempt.
The fixes, in the order Google frames them
The Google Ads guide to tagging for conversion tracking states that click trackers and server-side redirects must pass the GCLID to the landing page. If the conversion page uses a different domain, the identifier must also pass through the domain linker. With sitewide tagging and auto-tagging enabled, Google can store the value in a first-party cookie on your domain, so a blocked or cleared cookie ends the path just as surely as a bad redirect.
The conversion may still fire, but Google Ads may not associate it with the correct click, campaign, or keyword.
Test in this order. Redirect first, because nothing downstream matters if the value never arrives. Form second, because that's where the value becomes a stored record. Domain third, then the stored value itself. Each step takes minutes with a real test click. Skipping them costs you a debugging session that starts from the CRM and works backwards through systems owned by three different teams. I would run the redirect trace after every release that touches routing, URL rules, or the tag container. That's when these breaks appear.
Storing GCLID for offline and CRM conversions
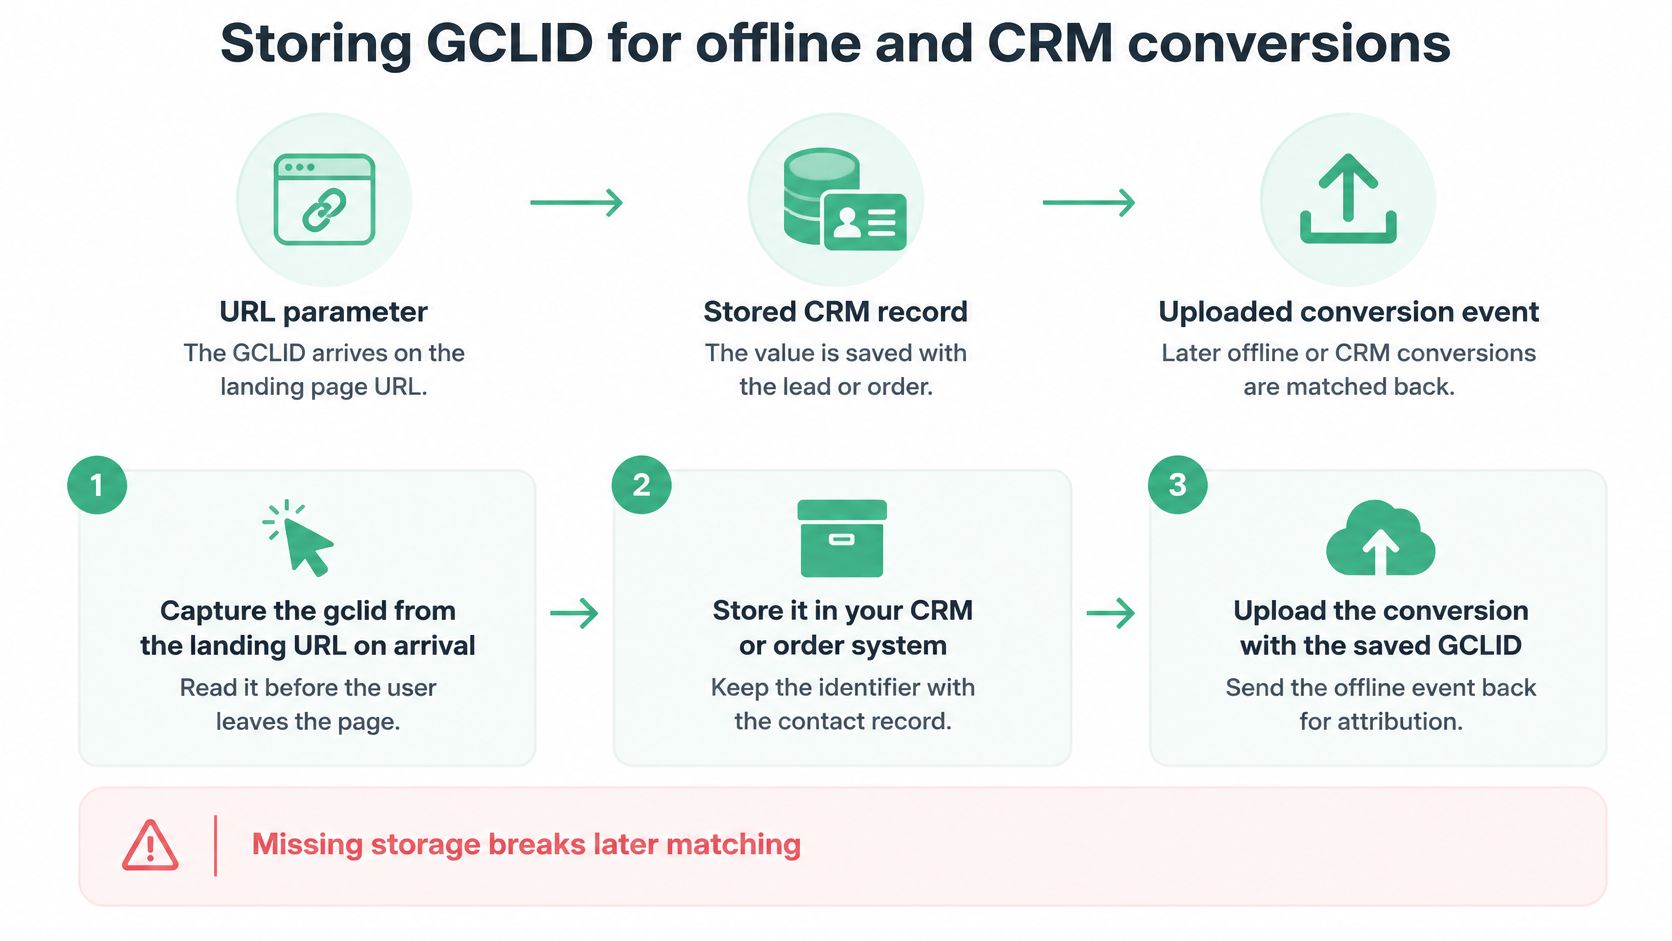
Every offline workflow passes through three stages. The URL parameter on arrival. The stored CRM record tied to the lead. The uploaded conversion event sent back after the sale. A failure at any stage leaves revenue in your CRM that Google Ads never credits.
- Capture on the first request, because later pages may not carry the parameter at all.
- Store it in a required CRM field with the lead, plus the click timestamp and landing URL. Watch for form tools that overwrite the field on resubmit.
- Validate on write and reject empty, malformed, or truncated values at the point of entry, not at upload time.
- Upload after the offline event, such as a contract signing, with the conversion type and conversion time attached.
- Deduplicate with a stable business event ID so a retried upload job doesn't count one sale twice.
- Run the upload on a set schedule so no stored value ages past its usable life in a forgotten spreadsheet.
The retention limit that sets your calendar
Google's documentation on offline conversion tracking with imported click conversions states that GCLID retention for this workflow is limited to 90 days. Uploaded values remain case-sensitive, and GCLIDs should be included whenever possible because they provide click-level attribution. Enhanced conversions for leads can supplement the identifier with user-provided data, but existing GCLIDs should still be imported. Operational controls include immutable storage, monitoring for upload errors and late events, and checks for conversions outside the attribution window.
The attribution window is the period, set in the conversion action settings, during which Google Ads accepts an offline conversion after the click. Check it against the retention limit before each upload batch. A long sales cycle doesn't extend either clock. For the broader upload mechanics, a 2026 guide to tracking ad conversions covers the conversion action setup in detail.
One caveat matters more than the rest. A successful upload proves the record was ingested. It doesn't prove the conversion was attributed. Compare matched status against CRM records after every batch. That's how you separate a real demand drop from a broken pipeline before bidding reacts to phantom decline.
When no GCLID arrives, and what to check next
A blank gclid is a broken join key until proven otherwise, and many blanks are legitimate rather than implementation bugs. Start by separating clicks that never carried an identifier from clicks where the identifier reached the landing page and failed later. That split keeps the team from rewriting tags when the cause is consent, source eligibility, or a CRM handoff.
- Consent declined: the tag or storage never ran. Check the consent state logged at form submit, not the state today.
- Browser or device blocks storage: the parameter arrived but nothing kept it. Segment blanks by browser and device to confirm the pattern.
- Non-Google source or no auto-tagging: the click never carried an identifier. Verify the campaign and account settings before touching the site.
- Form lost the parameter: the value reached the page and died before storage. Reproduce it with a test lead.

The alternative identifier path
Enhanced conversions for leads can match on normalized, hashed first-party data such as an email address or phone number when no click identifier exists. Google's guidance on enhanced conversions for leads still recommends including existing GCLIDs whenever possible, because the identifier connects the offline event to a specific ad click. Treat hashed data as the fallback path while preserving every usable GCLID.
Work through this decision order before you escalate.
- Consent state recorded at the moment of form submit.
- Click source confirmed as an auto-tagged Google Ads ad.
- Email and phone normalized before hashing, with consistent formatting rules.
- Upload timing inside the attribution window.
If conversions still do not appear after those checks, this walkthrough of Google Ads conversion tracking failures and their causes helps isolate whether the fault sits in the tag, the hit, or the upload. Trackingplan sees requests from websites, iOS and Android apps, and server-side endpoints, so a mobile flow can be checked alongside the web journey.
Checks that prove GCLID coverage
| Check | Where to look | Pass signal | Failure signal |
|---|---|---|---|
| GCLID presence | Landing URL and first-request log | Value on every auto-tagged click | Blank on Google Ads clicks |
| Format and case | CRM field and upload file | Exact original value | Lowercase, cut short or URL-encoded |
| Lead linkage | CRM record ID | One GCLID per lead | Same GCLID on several leads |
| Upload result | Offline conversion status in Google Ads | Imported with conversion time | Rejected or older than 90 days |
| Consent outcome | Consent log beside each lead | Consent state recorded | Consent state blank |
Why a coverage map beats a yes or no check
A binary present or absent check hides the mixed population you're managing. Your conversions split into GCLID-attributed, enhanced-conversion matched, unmatched, and rejected uploads. Each group has a different cause and a different owner. Google's documentation on enhanced conversions for leads and click identifiers says advertisers should include GCLIDs whenever possible, while hashed first-party data such as email addresses and phone numbers can match conversions when a click identifier is unavailable. It also recommends continuing to send existing GCLIDs even when enhanced conversions are enabled.
Segment the map by landing page, browser, consent outcome, CRM stage, and upload status. Then compare identifier presence, format, lead linkage, upload result, and matched status by device and campaign type. A blank concentrated on one landing page points at that template. Blanks across one browser point at storage. Rejections in one CRM stage point at the handoff, not the tag.
Routing each failure to its owner
A presence failure goes to the tag owner. A format failure goes to whoever owns the form integration or the CRM field mapping. An upload failure goes to the team running the import job. Trackingplan checks the tracking hits and conversion data behind these segments, so each failure lands with the right owner instead of in a shared inbox. A structured campaign attribution audit for accurate data turns these checks into a repeatable review. Run the coverage check on a daily or weekly schedule. Gaps caught before the next bidding cycle cost you a fix. Gaps caught at month end cost you a month of learning.
Confirm GCLID capture before the next campaign launch
A launch with an unverified GCLID path is a launch that teaches Smart Bidding from incomplete data. Treat it as a go or no-go gate, with four checks and a clear pass signal for each.
- Landing URL gate: run the auto-tagging test on every landing page in the campaign. Pass when the
gclidvalue is present and exact on the final URL. - Redirect and form gate: send a live click through every redirect and submit a test lead. Pass when the stored value matches the click exactly.
- CRM and upload gate: confirm the required CRM field, the upload schedule, and the retention limit. Pass when every test lead holds one stored identifier.
- Coverage gate: set the coverage check per landing page, browser, and consent state. Pass when no check shows a failure signal.
Each gate answers a different question, so a pass on one never substitutes for a fail on another. A landing page can carry a perfect gclid while the form drops it, and a stored value means nothing if the upload job rejects it. This campaign tracking checklist for reliable launches gives the gate a permanent home in your launch process. For paid media teams, Trackingplan checks the tracking requests sent to 170+ analytics and ad providers, and scheduled checks run daily or weekly.
Run the four gates on your highest-spend campaign this week and count how many test leads keep their exact gclid value from click to CRM record. That number tells you how much of your bidding is learning from real clicks.