Master enhanced conversions Google Ads with our guide. Learn browser and server-side setup to boost conversions and maximize your ROAS.
Enhanced conversions are a core Google Ads feature designed to sharpen your conversion measurement. It works by securely using hashed first-party data, like an email address, to connect ad interactions with conversions, even when they happen on different devices or browsers. This gives you a more complete and accurate picture of your campaign performance, especially as third-party cookies fade away.
Why Enhanced Conversions Are No Longer Optional

In today's advertising world, relying only on traditional tracking methods is like navigating with an incomplete map. With the decline of third-party cookies, standard pixels often miss huge parts of the customer journey. This leaves you with data gaps and a skewed view of your return on ad spend (ROAS). This is exactly the problem enhanced conversions for Google Ads was built to solve.
Just think about a common scenario: a customer clicks your ad on their smartphone during their morning commute but only completes the purchase later that night on their laptop. Without a way to connect these two actions, your standard tracking would likely miss this conversion entirely, making your campaign look less effective than it truly was.
Closing the Attribution Gap
Enhanced Conversions bridges this gap. When a user converts on your site—by making a purchase or filling out a form—you can securely capture the first-party data they provide, such as an email address or phone number.
This data is then hashed directly in the user's browser using a one-way algorithm called SHA256 before it ever gets sent to Google. Hashing scrambles sensitive data into an unreadable string of characters, keeping user privacy at the forefront. Google then tries to match this hashed string against its own database of hashed data from signed-in Google users. When a match is found, a conversion is correctly attributed to your ad campaign.
Key Takeaway: The whole point of enhanced conversions is to create a durable, privacy-safe link between ad clicks and conversions, even when cookies aren't there. This leads to more robust attribution and helps you make smarter bidding decisions.
Let's take a quick look at how this method stacks up against older tracking techniques.
Enhanced Conversions vs Traditional Tracking
| Feature | Traditional Conversion Tracking | Enhanced Conversions Google Ads |
|---|---|---|
| Data Source | Relies on third-party cookies and pixel fires. | Uses first-party data (e.g., email) provided by the user. |
| Accuracy | Prone to data loss from cookie blocking and cross-device journeys. | Recovers lost conversions by matching hashed data. |
| Privacy | Dependent on third-party cookies, which are being phased out. | Uses one-way hashing (SHA256) to protect user data. |
| Resilience | Performance degrades as cookie restrictions increase. | Built to be durable in a cookieless advertising environment. |
This improved measurement isn't just a "nice-to-have" feature; it's becoming essential. Google's own data shows that advertisers using Enhanced Conversions see a median 5% increase in reported conversions for search campaigns. For YouTube, that number jumps to a median of 17%.
Two Paths to Implementation
Ready to get started? You have two main ways to set up enhanced conversions for Google Ads:
Browser-Side (or "Tag-Based"): This method uses your existing Google Tag (gtag.js) or Google Tag Manager (GTM) setup. It's the quicker and more straightforward option, perfect for teams without a ton of developer resources. All the hashing happens right in the user's browser.
Server-Side: This is a more advanced approach where you send conversion data from your website to your own server first, and then forward it to Google. It offers the best accuracy, security, and control, making it the top choice for enterprises or businesses handling sensitive data. If server-side tracking is on your radar, you should learn more about the Google Tag Gateway and its role in this type of architecture.
Enhanced conversions are also vital for accurately measuring the impact of your efforts to improve your website's conversion rate. When you know which ads are truly driving sales, you can optimize your entire funnel with much more confidence.
Choosing Your Implementation Path
Your first big decision when setting up enhanced conversions for Google Ads is choosing how you'll implement it. This choice will fundamentally shape your tracking infrastructure, and you've got two main routes: a browser-side setup or a server-side one. The right path hinges on your technical resources, business needs, and your long-term data strategy.
Think of it as building a house. A browser-side setup is like a high-quality prefab home—it’s faster to assemble with standardized parts and gets you up and running quickly. Server-side is the custom-built route; it demands more architectural planning and effort but gives you ultimate control and unmatched durability.
The Browser-Side Approach
The browser-side method is the most common starting point for a reason. It uses your existing Google Tag Manager (GTM) or global site tag (gtag.js) to capture, hash, and send user data directly from the visitor's browser to Google's servers.
This approach is a great fit for:
- Smaller teams with limited developer time or budget.
- Businesses that need to get enhanced conversions running quickly to see an immediate lift in data accuracy.
- Marketers who are already comfortable working inside Google Tag Manager and prefer a more straightforward process.
The main draw here is speed and simplicity. You can often have it running in a few hours, not weeks. The trade-off is its reliance on the user's browser, which makes it more vulnerable to ad blockers and browser-level tracking restrictions that can erode its effectiveness over time.
The Server-Side Approach
In contrast, a server-side setup is a more robust and future-proof solution. With this method, your website first sends conversion data to your own server-side GTM container. From there, you control exactly what data gets forwarded to Google Ads. This creates a powerful layer of control and security.
Server-side implementation is the gold standard for data accuracy and privacy. By processing data on your own server, you gain complete ownership over the data stream, reduce your site's reliance on client-side scripts, and build a more resilient tracking infrastructure.
This advanced path is the go-to choice for:
- Enterprises and regulated industries like finance or healthcare that require maximum control over data handling.
- Businesses focused on optimizing website performance, as it shifts the heavy lifting from the user's browser to your server.
- Marketers who demand the highest possible data accuracy, since it’s less affected by ad blockers and ITP (Intelligent Tracking Prevention).
Opting for server-side is a strategic move. It requires more technical expertise to set up a tagging server (often on Google Cloud Platform) and maintain it. The payoff, however, is a superior, more secure data collection system that puts you firmly in control.
Making the Right Decision for Your Business
To make an informed choice, you have to weigh the pros and cons against your specific situation. There is no one-size-fits-all answer; the best method is the one that aligns with your resources and goals. If you're curious to learn more about the possibilities of server-side data, exploring topics like how to implement server-side tracking beyond Google Ads can offer valuable context.
| Aspect | Browser-Side Setup | Server-Side Setup |
|---|---|---|
| Speed & Simplicity | Fast and easy to implement, often using GTM. | Slower, more complex, requires server infrastructure. |
| Cost | Minimal cost, uses existing tools. | Involves server costs (e.g., Google Cloud Platform). |
| Data Accuracy | Good, but can be impacted by ad blockers. | Excellent, more resilient to tracking prevention. |
| Security & Privacy | Secure hashing, but data is sent from the browser. | Highest level of control and security over data. |
| Maintenance | Low, managed within GTM. | Requires ongoing server management and oversight. |
Ultimately, many businesses start with a browser-side implementation to quickly benefit from enhanced conversions in Google Ads. As their data maturity and needs evolve, they often migrate to a server-side setup to gain the additional control and accuracy it provides.
A Practical Guide to Browser-Side Setup
If you need to start recovering lost attribution data *fast*, the browser-side setup for **Google Ads Enhanced Conversions** is your best bet. This approach is hands-down the quickest way to get a solution live, especially for marketers who can't afford a long development cycle. It all works right within [Google Tag Manager (GTM)](https://marketingplatform.google.com/about/tag-manager/), an interface you probably know like the back of your hand.
The concept is pretty simple. When a user converts on your site, we'll use GTM to grab the personal data they've shared (like an email address), hash it for privacy, and then package it with the conversion event sent to Google Ads. This little bundle of data helps Google connect the dots between an ad click and a conversion, even when third-party cookies are out of the picture.
And it works. Since rolling out, Enhanced Conversions has boosted reported conversion rates by a median of 5% for search campaigns among Google's clients. This privacy-first method helps you see conversions across different browsers and devices, which in turn feeds Smart Bidding the quality data it needs to optimize more effectively. You can learn more about the impact of these privacy and conversion features to see why this isn't just a nice-to-have—it's a competitive necessity.
Preparing Your Website and GTM Container
Before you even open GTM, there’s a critical prerequisite: the user's data needs to be accessible on the page. When someone fills out a form—for a lead, a newsletter, or a purchase—that information has to be available for GTM to see. The cleanest and most reliable way to do this is with a dataLayer.push().
You’ll need to work with your developers to make sure a successful form submission triggers a push of that user data into the data layer. For a standard lead form, the code might look something like this:
window.dataLayer = window.dataLayer || [];
window.dataLayer.push({
'event': 'form_submission_success',
'user_data': {
'email': 'jane.doe@example.com',
'phone_number': '+1234567890'
// Other fields as needed
}
});
Having this data structure in place is non-negotiable for a browser-side setup. It creates a predictable, stable source for GTM to pull from, making the rest of the process much smoother.
Capturing User-Provided Data in GTM
With your data layer ready to go, the next step is to create variables inside GTM that can catch these values. You'll need to set up a Data Layer Variable for each piece of user information you plan on sending to Google.
Here's how to get it done in GTM:
- Head over to the Variables section and create a new "User-Defined Variable."
- Select Data Layer Variable as the variable type.
- For the "Data Layer Variable Name," you'll point it to the data's path. Based on our example, the variable for email would be
user_data.email. - Give it a descriptive name like
DLV - User - Emailand hit save.
Go ahead and repeat this for any other fields you want to send, such as phone number (user_data.phone_number) or address information.
Configuring the User-Provided Data Variable
Now it's time to bundle all that information into a single, neat package that Google can understand. This is done with the User-Provided Data variable, which was built specifically for Enhanced Conversions.
Back in the Variables section, create another "User-Defined Variable." This time, choose User-Provided Data from the list. You’ll see fields for Email, Phone Number, First Name, and so on. In the "Email" field, simply select the DLV - User - Email variable you just created. Do the same for all the other Data Layer Variables you made, mapping each one to its correct field.
Pro Tip: Google handles all the data hashing automatically, but the input format matters. Phone numbers must include a country code (like
+1), and addresses need to be broken down into individual components (street, city, state, postal code). Clean data going in means accurate matching coming out.
Updating Your Google Ads Conversion Tag
The final piece of the puzzle is telling your existing Google Ads Conversion Tracking tag to actually use this new user data.
Find the tag in GTM that fires on your main conversion event (like our form_submission_success example) and open it up. In the tag configuration settings, you'll see a checkbox labeled "Include user-provided data from your website."
Tick that box. A new field will pop up, asking you to select a User-Provided Data Variable. Pick the one you just configured. That's it! From now on, whenever this conversion tag fires, it will automatically bundle in the hashed user data.
With everything configured, fire up GTM's Preview mode to run a full test. Go through the conversion flow on your website and keep an eye on the Tag Assistant. You should see your conversion tag fire. Click on it to inspect the details and confirm that the user-provided data is included in the hit being sent to Google Ads. Once you’ve verified it’s all working, publish your GTM container, and you're good to go.
The Advanced Path: Server-Side Setup
For businesses that demand the highest level of data accuracy and security, a server-side implementation of enhanced conversions for Google Ads is the gold standard. This isn't just a small adjustment; it's a strategic overhaul of how your conversion data flows, creating a much more robust and future-proof measurement system.
Instead of sending event data directly from a user's browser to Google, you first route it to a server environment that you own. This server, usually a server-side Google Tag Manager (GTM) container, acts as a secure middleman. Only after the data is processed on your end is it forwarded to Google's servers.
This method gives you some serious advantages. Moving the data transfer off the user's browser can slightly improve site performance and makes your setup more resilient against ad blockers and tracking restrictions. It also puts you in control, giving you the power to enrich or validate data before it ever leaves your ecosystem.
Understanding the Server-Side Architecture
The heart of this setup is your tagging server, which typically runs on Google Cloud Platform. This server takes in data from a client-side tag (most often GA4) and then uses its own set of tags to send that data out to various endpoints, including Google Ads.
The diagram below shows the basic browser-side flow, which is where the data originates before being sent to your server.
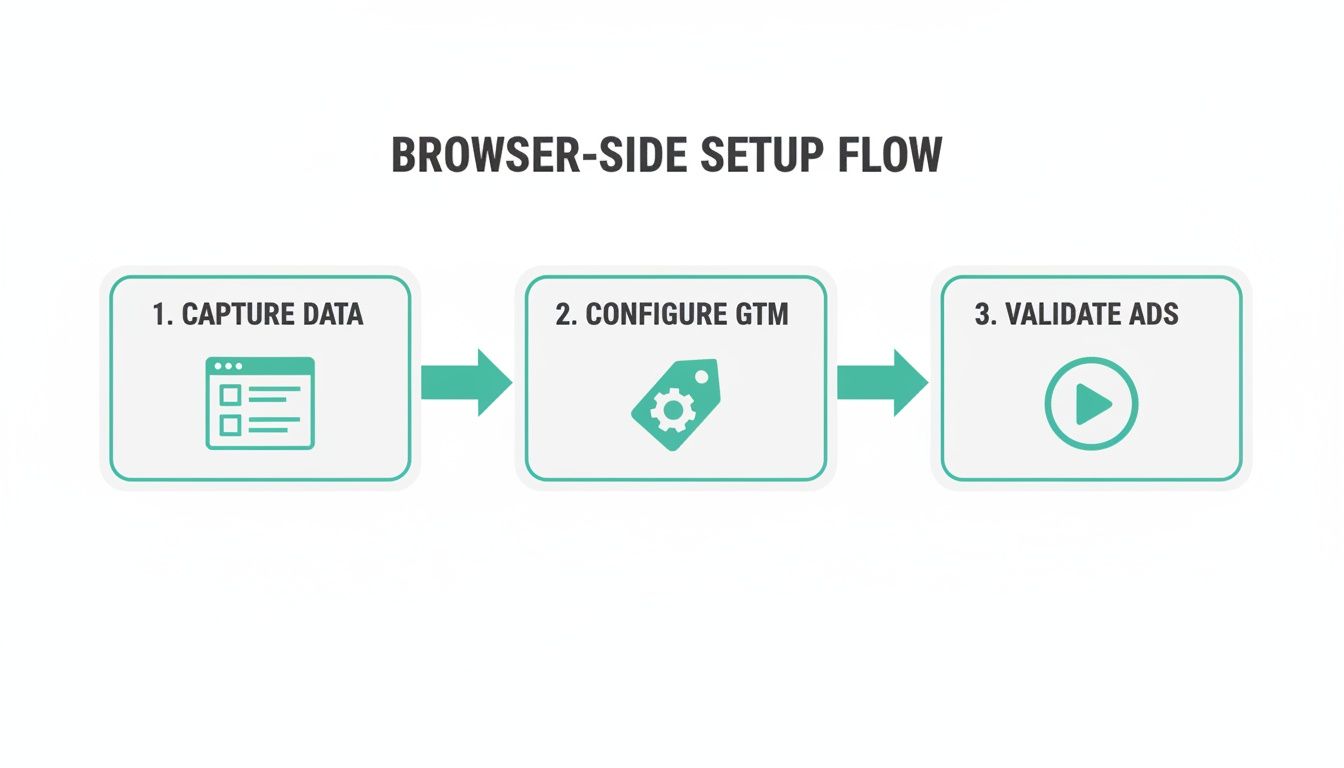
In a server-side model, that "Configure GTM" step is modified. The data goes to your server container first, not directly to Google Ads.
This dual-environment architecture provides incredible control over your marketing data. For a deeper look at building this kind of infrastructure, our comprehensive guide on server-side tagging for platforms like Google Ads and Meta is a great resource.
Configuring Your Server-Side GTM Container
To get your server-side GTM container ready for enhanced conversions for Google Ads, you'll need a few key pieces.
- GA4 Client: This is the entry point. The GA4 client in your server container claims the incoming requests sent from the GA4 tag on your website. It then standardizes this information into an event data object that other tags can use.
- Conversion Linker Tag: Just like on the browser side, the Conversion Linker tag is non-negotiable. In the server container, its job is to scan incoming requests for URL parameters like the
gclid(Google Click ID) and set a first-party cookie to attribute conversions correctly. - Google Ads Conversion Tracking Tag: This is the tag that sends the final conversion data to Google Ads. It uses the event data passed to it from the GA4 client and automatically includes the hashed user information whenever it's available.
This server-side process ensures sensitive user data is handled securely within your own environment before being hashed and forwarded, adding a critical layer of privacy and control.
Handling Consent Mode in a Server-Side Environment
Managing user consent is even more crucial when you're working with a server-side setup. Consent Mode signals, like ad_storage and analytics_storage, are passed from the user's browser along with the event data to your server container.
Your server-side tags must be configured to respect these signals. The good news is the Google Ads Conversion Tracking tag will automatically adjust its behavior based on the consent status it receives, which keeps you compliant while still allowing you to model for lost conversions where permitted.
The impact of this kind of accurate measurement is especially clear on video. For YouTube for Action campaigns, Enhanced Conversions have driven a median 17% increase in reported conversion rates. It’s a powerful demonstration of how much attribution can be recovered in a post-cookie world.
Technical Prerequisites and Considerations
Going down the server-side path requires some technical planning. You'll need to set up and maintain a tagging server, which comes with costs and requires expertise, typically using Google Cloud Platform's App Engine.
You also have to make sure your website is correctly configured to send data to your new server-side endpoint. This means updating your client-side GTM or gtag.js configuration to point to your tagging server's URL instead of directly to Google's.
While this setup definitely demands more upfront effort, the long-term benefits in data fidelity, security, and performance make it a worthy investment for any serious data-driven organization.
Verifying and Automating Your Data Quality

Getting your enhanced conversions for Google Ads implementation live feels like a major victory, but the work doesn't stop there. The real challenge is keeping that data stream clean and consistent over time. A flawless setup is more fragile than you think—it can break without warning, leading to silent data loss and wasted ad spend.
Imagine this: a developer pushes a minor site update, a new feature is deployed, or a consent banner is reconfigured. Suddenly, your enhanced conversion data is corrupted or stops flowing entirely. When that happens, Google’s ability to match conversions plummets, and its Smart Bidding algorithms start making decisions with incomplete, inaccurate information.
The Hidden Costs of Bad Data
This isn't just a technical hiccup; it's a financial drain. When your enhanced conversions setup breaks, your reported ROAS becomes dangerously misleading. You might pull back the budget from a campaign that’s actually performing well or, even worse, pour money into campaigns that look great only because of over-attribution from bad data.
The accuracy of your attribution model depends entirely on the quality of the data you feed it. Intermittent data loss or malformed properties can introduce significant noise, making it difficult to trust your performance metrics and optimize your campaigns effectively.
Manually checking the Google Ads diagnostics page or running test conversions is just a band-aid, not a scalable strategy. You need a system that watches your setup for you, 24/7. This is where automated observability stops being a nice-to-have and becomes a non-negotiable part of your analytics stack.
Introducing Automated Observability with Trackingplan
This is exactly what automated monitoring tools like Trackingplan are built for. Think of it as a dedicated security guard for your entire analytics implementation, including your enhanced conversions for Google Ads. It provides continuous, real-time observability, from the moment data is generated in your data layer all the way to its final destination in Google Ads.
Instead of waiting for your conversion numbers to nose-dive, Trackingplan proactively discovers and monitors every single tracking event on your site. It builds a baseline of what your data should look like and sends instant alerts the moment anything deviates from that standard.
This means you get notified about critical issues like:
- Broken Conversion Tags: Get an immediate alert via Slack or email if your Google Ads conversion tag stops firing after a site update.
- Malformed Data: Instantly know if an
emailproperty is suddenly sent in the wrong format or if aphone_numberis missing its country code. - PII Leaks: Trackingplan can detect if personally identifiable information is accidentally sent in an unhashed format, helping you prevent serious privacy violations.
By creating a single source of truth for your entire data flow, it empowers your marketing, analytics, and development teams to pinpoint and fix issues before they do real damage. The result is a reliable data foundation you can actually trust to make critical business decisions.
Understanding the Nuances of Attribution
A robust data quality process also helps you better interpret the sophisticated outcomes of enhanced conversions. While they typically boost reported conversions, they can sometimes lead to fewer direct attributions to Google Ads. This isn't a failure; it’s a sign of more precise credit redistribution across all your channels. It uncovers the true multi-touch customer journey and prevents over-attribution to a single touchpoint. To explore this counterintuitive result, you can read more about why enhanced data might shift attributions on blog.littledata.io.
To maximize the accuracy of this process, a deep understanding of what is first-party data and how to ethically manage it is essential. Your ability to collect and use this data correctly is the bedrock of a successful enhanced conversions strategy. By pairing a solid implementation with automated monitoring, you ensure your data remains a powerful asset, not a liability.
Frequently Asked Questions About Enhanced Conversions
Diving into enhanced conversions for Google Ads always brings up good questions. It's a powerful feature, but it touches on everything from data privacy and site performance to very specific business scenarios.
Let's walk through some of the most common questions I hear from marketers and developers to clear up any confusion before you get started.
Is Enhanced Conversions Compliant With Privacy Regulations Like GDPR and CCPA?
Yes, but only when it's implemented correctly. The entire system was built with privacy in mind, using a secure one-way hashing algorithm (SHA256) on first-party data like email addresses. This hashing happens directly in the user's browser before any data is sent to Google.
This means Google never sees the raw, personally identifiable information. However, you are still 100% responsible for getting proper user consent to collect and use their data for measurement, just as you would for any other tracking, in line with regulations like GDPR and CCPA.
What Happens If a User Does Not Provide Their Data?
It's simple: if a user doesn't provide an email, phone number, or address—maybe they check out as a guest—then enhanced conversions can't be used for that specific transaction. The system needs that user-provided data to create the hash for matching.
Your standard conversion tracking will still fire and try to attribute the sale. You just miss out on the cross-device and post-cookie benefits for that particular conversion. This is a great reason to encourage users to create accounts or provide their info, as it helps both you and them.
Can I Use Enhanced Conversions If My Conversions Happen Offline?
Absolutely. This is actually one of the biggest advantages of the system, and it's handled through a feature called 'Enhanced Conversions for leads'.
Here’s how that flow typically works:
- A user clicks one of your ads and submits a lead form on your site.
- You capture their information (like an email) and, crucially, the Google Click ID (gclid) from the URL.
- Later, when that lead converts offline—maybe they sign a contract or make a purchase over the phone—you upload a file to Google Ads.
That file contains the hashed user data and the gclid you saved, which allows Google to tie the final offline revenue back to the original ad click.
This offline capability is crucial for businesses with longer sales cycles, like B2B services or high-ticket retail. It’s the key to connecting ad spend directly to revenue that never even touches your website's checkout.
Will Enabling Enhanced Conversions Hurt My Website Performance?
The impact of the browser-side implementation is negligible. It's comparable to any other tracking tag you’re already running. The hashing process is incredibly fast and happens almost instantly right in the user’s browser.
But if site speed is a top-level priority for your team, the server-side implementation is the way to go. By moving the data-sending process from the user's browser to your own server, you can shave a little off your page load times and get tighter control over the data flow.
Maintaining the integrity of your enhanced conversions for Google Ads setup is critical for accurate reporting and efficient ad spend. Trackingplan offers automated observability to continuously monitor your entire analytics implementation, alerting you in real time to broken tags, malformed data, or PII leaks. Ensure your data is always reliable by visiting https://trackingplan.com.
.avif)