
You have the tables. Now you give them a voice. This guide creates a data agent on the four tables you built in guide 4, from the first API to a colleague asking it a question. It takes about an hour, most of it reading what the agent does with each thing you give it.
The goal of this first version is not a perfect agent. It is a working one, with its cost capped, that you can test and improve in the next three guides.

Goal of this guide: a published data agent that answers questions about the GA4 sample, with a cost limit, shared with one other person.
You need: the agent_layer tables from guide 4, and a Google Cloud project with billing enabled.
Before you start: billing, APIs, and roles
Billing. Data agents need a project with billing enabled; the sandbox is not enough. You can upgrade your sandbox project or create a new one. BigQuery’s first 1 TiB of queries each month stays free, and Google lists a free trial of its Data Cloud agents until December 31, 2026. If you built agent_layer in the sandbox, check the expiration of those tables after upgrading, so they don’t disappear under you.
APIs. Google’s setup page lists four, all enabled from the console’s API library by someone with Owner or Service Usage Admin on the project:
- BigQuery API (
bigquery.googleapis.com) - Gemini Data Analytics API (
geminidataanalytics.googleapis.com) - Gemini for Google Cloud API (
cloudaicompanion.googleapis.com) - Dataplex API (
dataplex.googleapis.com), for Knowledge Catalog
Roles. To create agents you need Gemini Data Analytics Data Agent Creator (roles/geminidataanalytics.dataAgentCreator), which also makes you the owner of the agents you create, and read access to the tables. Adding knowledge sources needs Data Catalog Viewer (roles/datacatalog.viewer). If you own the project, you already have all of it.
Step 1: Create the agent
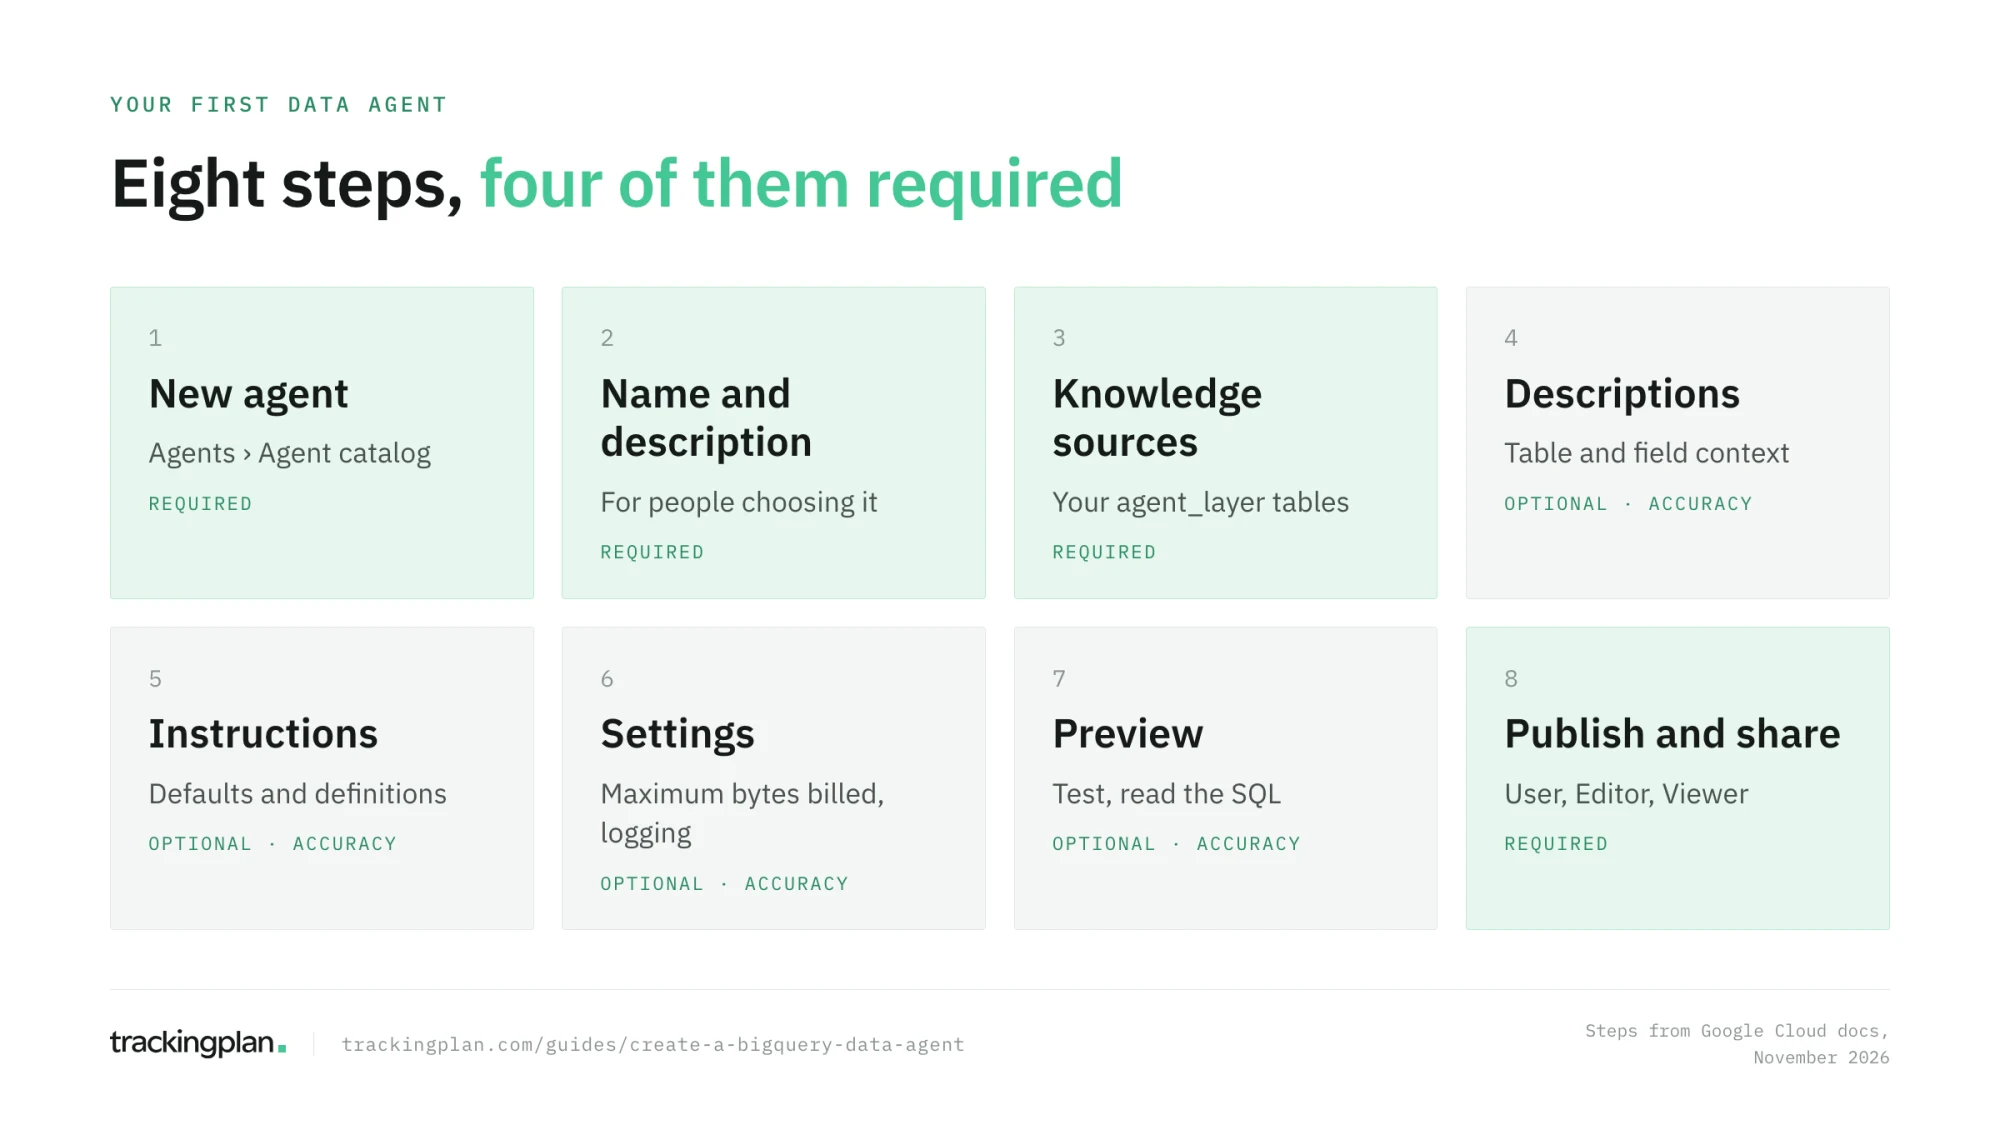
In the BigQuery console, open Agents. The page has two tabs: Agent catalog, with the agents you can use, and Conversations. On Agent catalog, click New agent.
Give it a name and a description. The description is for people choosing an agent from the catalog, so say what it answers and from which data: “Answers questions about the Google Merchandise Store’s traffic, sessions, and purchases from November 2020 to January 2021. Built on the GA4 sample.”
The agent’s region, US, EU, or Global, can’t be changed after you save. Pick the one that matches your data. The public sample and your agent_layer dataset are in US.
Step 2: Add the knowledge sources
Under Knowledge sources, click Add source and choose the tables the agent can read: agent_layer.sessions, purchases, purchase_items, and page_views. An agent can have up to 100 sources, which is far more than it should.
Resist adding the raw export too. Every source you add is one more place the agent can look for an answer, and the raw table is the one where it goes wrong. If a question needs it, that is a sign your layer is missing a table.
Step 3: Review table and field descriptions
For each source, Customize opens its description and the description of every field. If you wrote descriptions in guide 4, they are already here. If not, Gemini can suggest them; accept or reject each suggestion, and read them before you accept, because a confident wrong description is worse than none.
This is the cheapest accuracy you will ever buy. Ten minutes here saves you from a whole class of wrong answers.
Step 4: Write first instructions
Agent instructions tell the agent how to behave on every question. Keep the first version short, and write what a new analyst on your team would need to be told on day one:
You answer questions about the Google Merchandise Store's website, using GA4 data
from 2020-11-01 to 2021-01-31.

- "Sessions", "traffic" and "visits" mean rows in agent_layer.sessions.
- "Channel" means the session's medium. Never use the user's first source.
- "Revenue" means SUM(revenue) in agent_layer.purchases.
- "Conversion rate" means converted sessions divided by all sessions.
- If no period is given, use the last 30 days of available data, and say so.
- If a question is ambiguous, ask one clarifying question before answering.
Google’s own advice is to add instructions only where the agent’s behavior needs to change, and to give it structured context first: descriptions, examples, and a glossary. The six lines above are that kind of behavior change.
Guide 7 makes these instructions precise and adds the two stronger tools, verified queries and a glossary. For now, these six lines already remove the most common mistakes.
Step 5: Cap the cost
Under Settings you choose the model, add labels, turn on conversation logging, and set Maximum bytes billed. Set it. A value of 1 GB is generous for the tables in this guide; any query the agent writes that would read more fails before it runs, and you pay nothing for it. The minimum allowed is 10 MB.
Turn on conversation logging too: choose a dataset and a table, and BigQuery writes every question and answer there. You will use that record in guide 8. Conversations in the preview pane are not logged.
Step 6: Test in preview
The Preview pane lets you chat with the agent before anyone else can. Ask it five questions you can check against the tables yourself:
- How many sessions were there in December 2020?
- What was the revenue by channel in January 2021?
- Which ten products sold the most units?
- What was the conversion rate by device category?
- Which landing pages brought the most sessions?
Each answer shows text and often a chart. Show thinking reveals the agent’s reasoning, and How was this calculated? shows the SQL it ran and its result, which you can open in the query editor. Use the five-point checklist from guide 2 on every one: table, dates, filters, what is counted, duplication.
When an answer is wrong, don’t fix the question. Fix the agent: a description, an instruction, or, in guide 7, a verified query.
Step 7: Publish and share
Save keeps the agent as a draft that only you can use. Publish makes it available, and only a published agent can be shared. Published agents can also be made available in Data Studio and other channels.
To share, open the agent, click Share, add a person or group, and choose a role: User to chat, Editor to change it, Viewer to see its configuration. To chat, the person also needs, from Google’s conversation page:
- Gemini Data Analytics Data Agent User (
roles/geminidataanalytics.dataAgentUser) - Gemini for Google Cloud User (
roles/cloudaicompanion.user) - BigQuery Data Viewer on the tables and BigQuery Job User on the project
If any of these is missing, they will see “Schema_Resolution: Access Denied.”
An agent or a direct conversation?
You don’t need an agent to chat with a table. On the Conversations tab, New conversation lets you pick sources and ask directly, and BigQuery Studio offers a Chat button on tables and query results. Those direct conversations skip everything you configured: no descriptions beyond the table’s own, no instructions, no verified queries.
Google’s overview puts it plainly: a direct conversation can be less accurate, and it suits one-off questions. For anything a team will rely on, use an agent.
Exercise
Create the agent, run the five preview questions, and write down for each one whether the answer was right, and if not, which of the five checklist points failed. Keep the list. It is the start of the test set you build in guide 8.
How to know you got it right
- The agent is published, with four knowledge sources and a maximum bytes billed set.
- Every field the agent uses has a description you have read.
- You can open the SQL of any answer and check it.
- A colleague can chat with the agent without an access error.
Resources
- Create data agents and create conversations, Google Cloud docs: the reference for every screen in this guide.
- Introduction to the Conversational Analytics in BigQuery, Google Codelabs: the same flow on the Google Trends public dataset, with Gemini-generated metadata and verified queries. Free codelab; your project needs billing.
- Conversational Analytics: Build a Data Agent in BigQuery, DataCamp, by Aryan Irani: a longer walkthrough on the Austin bikeshare dataset, including a forecast with BigQuery ML.
FAQ
How do I create a data agent in BigQuery? In the BigQuery console, open Agents, go to the Agent catalog tab, and click New agent. Give it a name and a description, add the tables it can read as knowledge sources, write its instructions, set a maximum bytes billed, test it in the preview, and publish it. The project needs billing and four APIs enabled.
Which roles do I need to create a BigQuery data agent? Gemini Data Analytics Data Agent Creator (roles/geminidataanalytics.dataAgentCreator) to create agents, plus read access to the tables. Enabling the APIs needs Owner or Service Usage Admin on the project. People who only chat with a published agent need the Data Agent User role, Gemini for Google Cloud User, and BigQuery Data Viewer and Job User.
What is the difference between a data agent and a direct conversation? A direct conversation asks questions of a table with no extra context. A data agent adds the context you configure: descriptions, instructions, verified queries, and a glossary. Google’s documentation says direct conversations can be less accurate and suits them to one-off questions.
How do I stop a data agent from running expensive queries? Set Maximum bytes billed in the agent’s settings. Any query the agent writes that would read more fails before it runs, at no charge. Point the agent at narrow, date-filtered tables rather than the raw export, so most answers read little anyway.
Next: Check an agent’s answer.