
The Definitive Answer Block
Signing Up for Adobe Analytics: Your Gateway to Data Insights
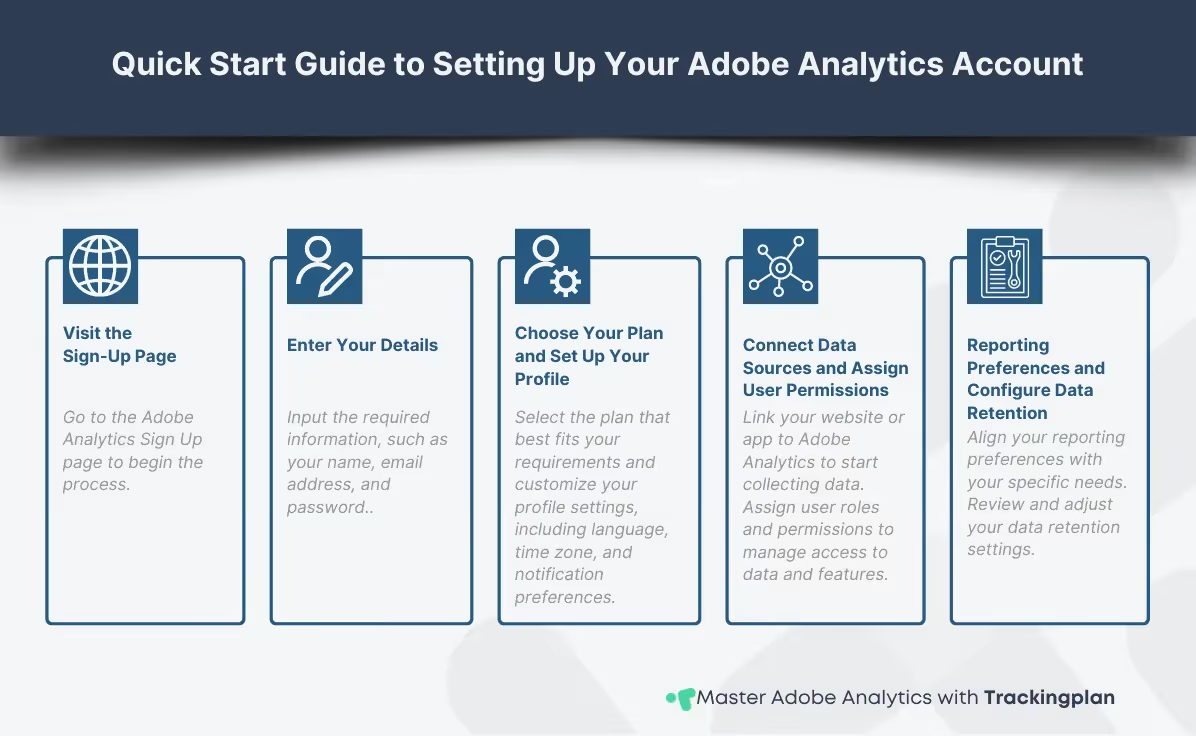
To start with this Adobe Analytics guide tailored for Adobe Analytics beginners, we'll provide a detailed introduction on creating your account, mastering basic reporting setup, and offering key recommendations for configuring your settings for optimal interface navigation. This beginner's guide will help you get started quickly and efficiently.
Step-by-Step Account Creation
- Visit Adobe's official page for new accounts: Begin the sign-up process by navigating to the Adobe Analytics Sign Up page.
- Enter your details: Input the required information to create your account. Use an email address that you frequently check to receive important notifications and updates from Adobe regarding your account.
- Choose your plan: In interface navigation in Adobe, you can find a range of plans designed to suit diverse business requirements. Select the plan that best fits your requirements, whether you're an individual analyst or part of a larger organization.
- Set up your profile: Customize your profile settings to personalize your Adobe Analytics experience. This includes preferences such as language, time zone, and notification settings.
Key Initial Settings and Configuration Recommendations
- Data Sources Connection: Use Adobe Launch (formerly DTM) to install and manage your tracking codes. Proper installation ensures that visitor and hit data are accurately recorded.
- Data Retention Policy: Review and adjust your data retention settings to comply with GDPR, CCPA, and internal storage requirements.
- Implement SSL: Ensure secure data collection by enforcing SSL protocol for all tracked pages.
Interface Navigation: An Efficient Workflow for Beginners
In this section, you will learn to navigate the Adobe Analytics dashboard thoroughly, which is essential for effective data analysis and basic reporting.
Exploring the Workspace and Key Navigation Tools
When you log in to Adobe Analytics, you will be directed to the Workspace. Here’s what you can find in the interface navigation:
- Analysis Workspace: The primary environment for advanced reporting. This drag-and-drop interface allows you to create custom visualizations, segments, and calculated metrics.
- Components: This panel houses the building blocks of your reports: Metrics (what happened), Dimensions (where it happened), and Segments (who did it).
- Dashboards: Create personalized high-level views to monitor key KPIs for stakeholders who do not require deep analysis.
Tips for Efficient Interface Navigation
Improve your Adobe Analytics experience with these practical interface navigation tips:
- Use the Search Bar: Quickly locate specific metrics, dimensions (e.g.,
eVar1,Prop2), or reports using the global search function. - Bookmark Key Reports: Save frequently used Workspace projects to your favorites list for instant access.
- Customize Your Workspace: Rearrange panels, resize windows, and organize tabs to suit your preferences and workflow.
- Stay updated with training resources: Take advantage of Adobe's tutorials, webinars, and documentation to enhance your proficiency.
Basic Reporting: Crafting Insightful Reports
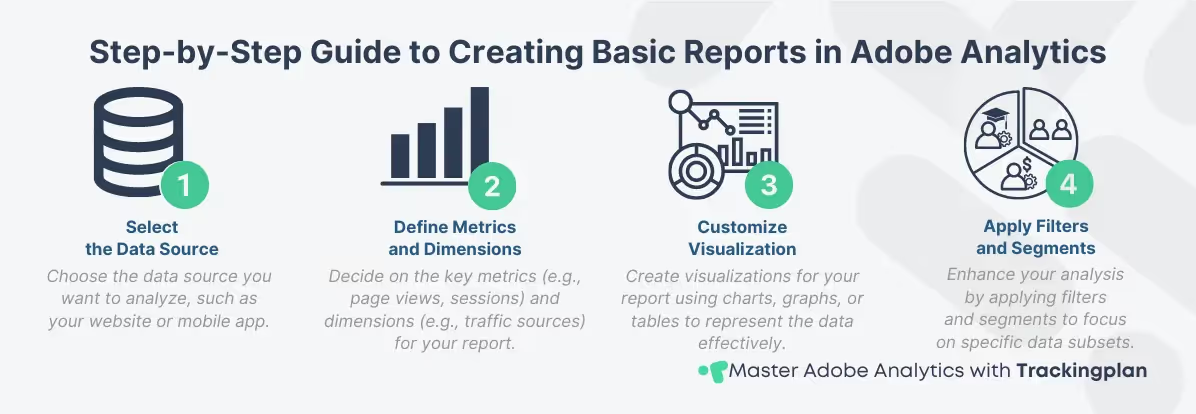
This section of our Adobe Analytics guide for beginners focuses on basic reporting, teaching you how to develop insightful reports, understand key metrics, and use them for data-driven decision-making.
Crafting Your First Reports
Starting to create basic reports in Adobe Analytics is simple:
- Define Your Objective: Start with a question (e.g., Which traffic source leads to the highest purchase conversion on mobile?).
- Select Metrics and Dimensions:
- Drag Visits (Metric) onto the main panel.
- Drag Marketing Channel (Dimension) next to Visits.
- Apply Segments and Filters:
- Apply the "Mobile Devices" Segment to filter the entire report.
- Use the "Conversion Rate" calculated metric to sort channels by performance.
- Visualize Data: Use charts like Funnel visualizations to show drop-off points or Line charts to track trends over time.
Understanding Different Metrics: Prop vs. eVar
Adobe Analytics relies on two core variable types that must be understood to create effective reports:
Practical Example: Crafting a Simple Traffic Analysis Report
In this beginner's guide, we will create a traffic analysis report to demonstrate how to begin with basic reporting:
Objective: A digital analyst for an e-commerce site noticed a high bounce rate on mobile devices coming from Social Media campaigns. They want to isolate the problem.
Comparing Adobe Analytics with Other Tools
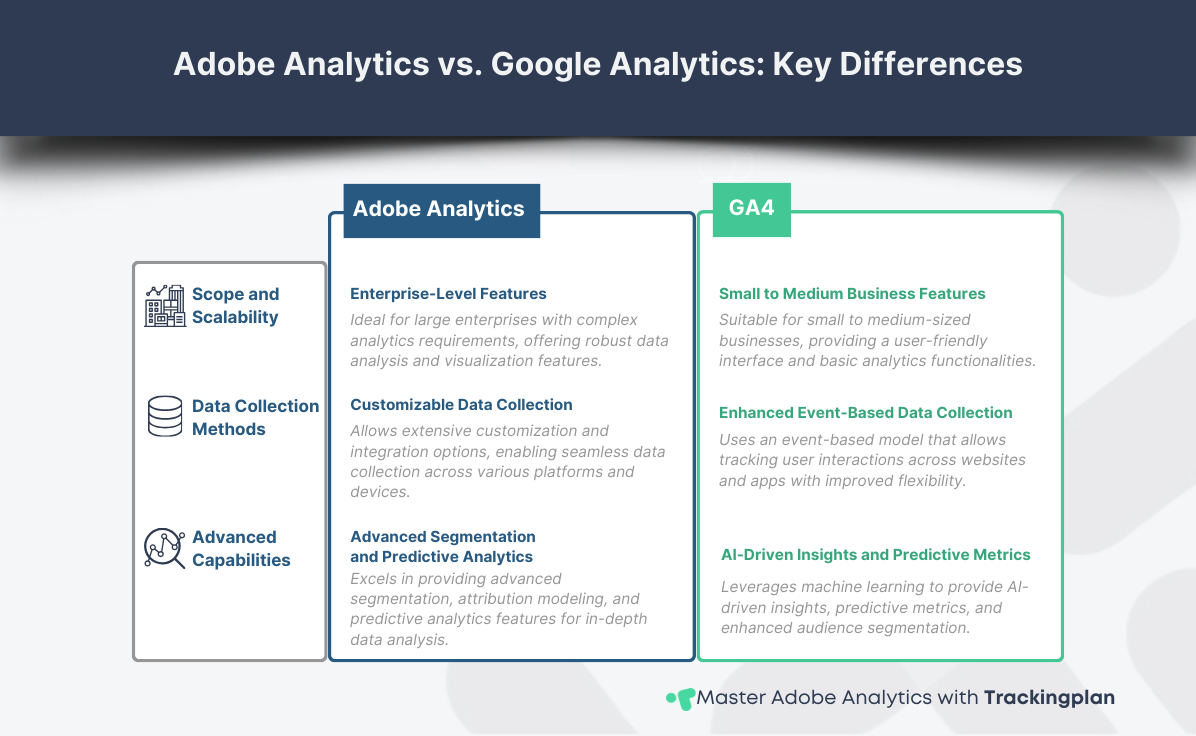
In the ambit of digital analytics, Adobe Analytics and Google Analytics stand out, especially for beginners exploring interface navigation and basic reporting tools. While both platforms provide valuable insights, you must understand their differences to select the right tool for your analytics needs.
Adobe Analytics vs. Google Analytics: A Deeper Comparison
While both are industry leaders, they serve different organizational needs. Understanding these differences is crucial for any analyst evaluating tools.
Common Beginner Implementation Errors
Factors to Consider When Choosing Adobe Analytics
- Business Complexity: Consider the size and complexity of your business operations. Adobe Analytics is well-suited for large enterprises with diverse data sources and complex analytics requirements. In contrast, Google Analytics is a cost-effective option for smaller businesses with simpler analytics needs.
- Integration with Existing Systems: Evaluate how well the analytics tool integrates with your existing systems and technologies. Adobe Analytics offers seamless integration with Adobe Experience Cloud and other Adobe products, facilitating comprehensive data analysis and optimization. Google Analytics integrates effortlessly with Google Marketing Platform and Google Ads, streamlining data collection and reporting processes.
For a comprehensive comparison between Adobe Analytics and its competitors, explore Adobe's official page.
The 4 Most Common Adobe Analytics Implementation Failures
- Report Suite Mismatch: The tracking code is implemented, but it’s sending data to the wrong Report Suite ID (RSID), resulting in "no data." Action: Verify the RSID in Launch/DTM matches the RSID in your Workspace view.
- Duplicating Hits (Double Counting): When the tracking code fires multiple times per page load. Result: Inflated page views, visits, and revenue. Action: Check for multiple instances of the tracking library (
AppMeasurement.jsorsatellite.js) in the page source code. - eVar Persistence Issues: An eVar is set, but it’s not attributing conversion correctly because the persistence setting (e.g., "Hit," "Visit," or "7 Days") is incorrect. Action: Review the eVar settings in the Admin section and align the persistence with the desired attribution window.
- Missing
pageNameImplementation: Critical for content analysis and pathing. Ifs.pageNameis not set on every page, pages are tracked as the URL instead of a human-readable title. Action: Ensure thepageNamevariable is mapped and populated for all templates.
Conclusion
In this Adobe Analytics guide tailored for beginners, we've covered essential skills in interface navigation and basic reporting, from navigating the interface to creating insightful reports. This beginner's guide aims to help you build a solid foundation in using the platform.
However, your journey doesn't stop here—this is just the beginning. This Adobe Analytics guide equips you with tools to understand user behavior, optimize website performance, and drive business growth. Adobe Analytics' user-friendly interface and advanced features serve both novices and experts.
As you continue your journey, use our Adobe Analytics expert guides for additional support and guidance. For further insights, our master guide for digital analysts awaits your discovery.
Embrace the power of Adobe Analytics and let your data-driven journey unfold with confidence. The possibilities are endless, and valuable insights await your discovery. This Adobe Analytics beginner's guide is just the beginning of your journey. Happy analyzing!