Find answers to the most commonly asked questions about Trackingplan's onboarding process in order to better leverage the great potential of our tool.
Mariona Martí
Digital Marketing Specialist
October 6, 2023
8
min
Collecting and analyzing multiple data points can be a tedious process especially prone to bugs and breakages.
Trackingplan’s fully automated observability and analytics QA solution eliminates these obstacles by detecting errors in your websites and apps as soon as they happen, or even before they happen, to empower companies with accurate and reliable analytics.
Whether you are a data analyst, a developer, or you manage marketing campaigns, Trackingplan can help you prevent data quality issues before reaching production to avoid compromising your digital analytics, maximizing the ROI on your MarTech and product analytics stack.
Getting started with Trackingplan
Getting started with Trackingplan is as easy as 1-2-3.
1. Installing Trackingplan
Unlike other SaaS with setups that take between weeks and months or even force you to change how you code your analytics, Trackingplan is installed in minutes, doesn’t require technical skills to set up or use, and will start listening to all the data your sites and apps are sending to your third-party services right after its installation.
For websites, you can install it just by using Google Tag Manager, adding the snippet at the head of your site, or adding Trackingplan as a Segment or Amplitude CDP destination.
For apps, you’ll just need to install the SDKs directly (Android and iOS).
Moreover, as we listen directly to all the customer data that your apps and websites are already sending, you don’t need to give us private access to none of your data destinations. This means that all teams involved in the data collection process will be able to continue working as they used to, without causing any company disruption.
Extending Trackingplan’s capabilities
Do you have multiple environments? Would you need to have different event specifications for each of your platforms so that any error affecting your data quality goes unnoticed? Or maybe you just want to extend Trackingplan's detection capabilities?
Trackingplan has an answer to all these needs. Let’s get into the details.
Environments
Besides production, you can run Trackingplan on other environments – like staging or development – to compare dynamically at run-time what data you have between one environment and another in order to detect bugs before these reach production.
Trackingplan supports complex deployment setups with custom preproduction environments, allowing you to even have one environment per branch or automated test to detect errors with more granularity.
Page-types
In case you don’t define page-types as properties, which, in this case, Trackingplan could automatically document, you can share a definition of how you group your URLs (product page, product listings, etc.) so that we can configure them and take them into account to provide you with an even more powerful view of your pages and pixels to facilitate root-cause analysis.
Sources
At Trackingplan, we know that analytics problems are often very localized, meaning that they can be found even in the smallest details. That's why, to harness the full power of Trackingplan’s detection capabilities and make sure nothing goes unnoticed, you can use sources to have per-platform event specifications (e.g.: web, iOS, Android / frontend, backend, webhook…)
Tags
Additionally, to enhance Trackingplan’s detection capabilities and our RCA algorithms, you can add tags to label your data.
Tags are completely customizable and can be extremely helpful to filter your warnings and perform root-cause analysis on them. Here are some of the possibilities tags can offer you:
1. Filter warnings by tags
Where is this warning happening? Which warnings have appeared after releasing v.1.23? Has any warning appeared from the Verify_orders_list test?
This is what you can quickly answer using Trackingplan’s Tag Filter. Tags will allow you to distinguish your warnings by their custom tag value. That way, you will be able to filter your warnings by their release version, their build number, the app version in which they appeared, or their Test Name in staging or preproduction environments to quickly check if your warnings are happening only in a specific test version or in several of them.
Although their possibilities are endless and there are no specific rules about how and why tags can be used, the following are usually recommended.
template: a path or string that identifies the loaded page, beyond the URL (e.g.: /men/product_details or product_details).
country: to filter warnings by country. (e.g.: PT, US, AU, FR…). Moreover, if you have a CMS/content management system with different configurations for each country, adding the country tag will help each team work on their own data more efficiently.
platform: in case your analytics events are generated from multiple platforms (e.g. web, web-ios, ios, etc.).
version/build number: if you have the deployed code version.
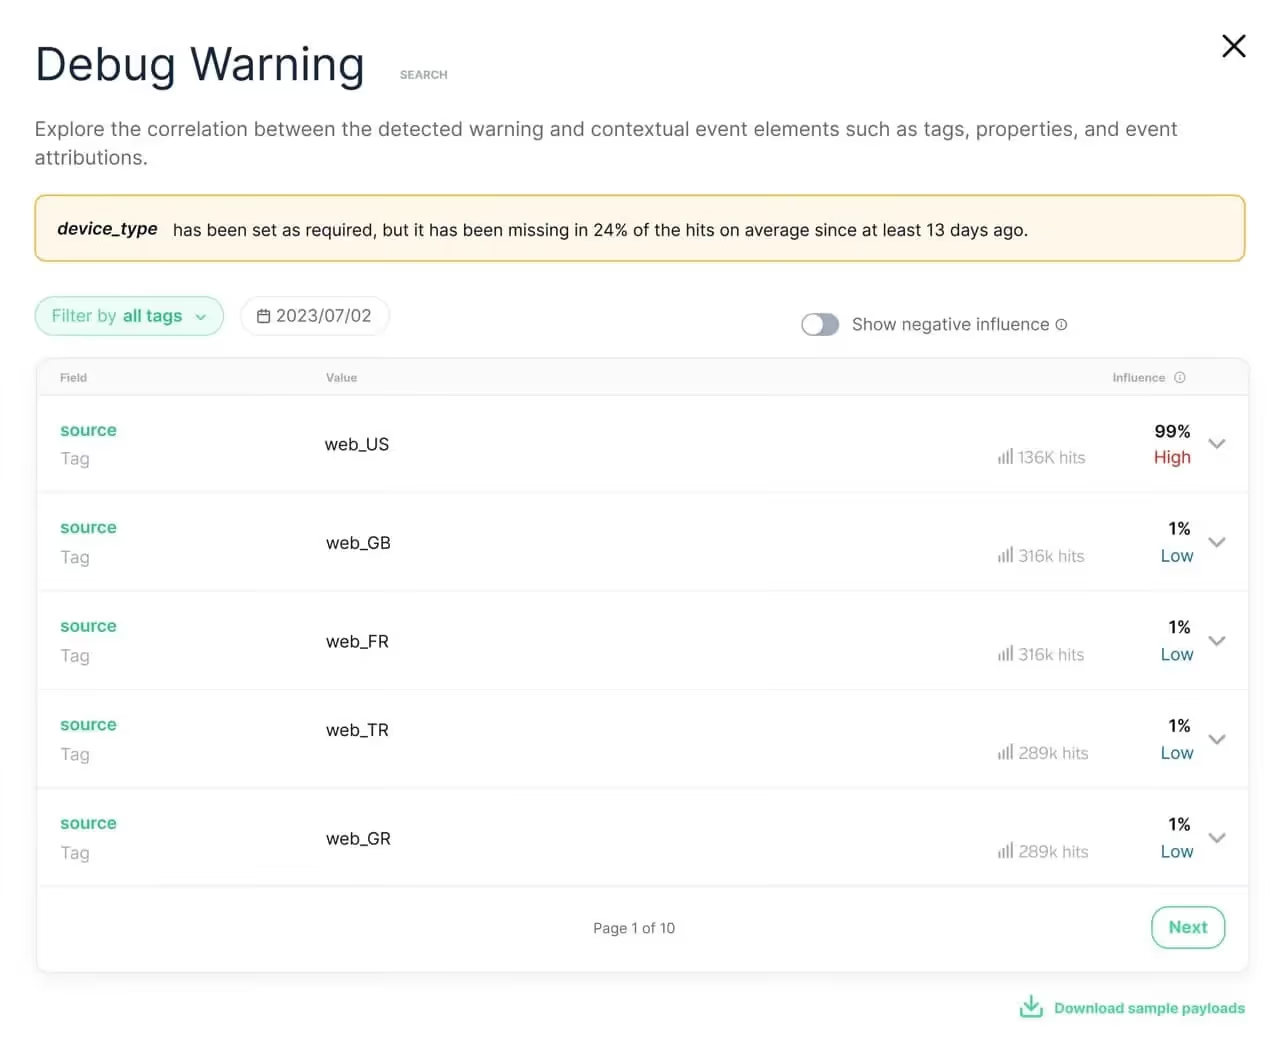
2. Debug warnings and perform root-cause analysis
Tags can also enable you to debug and perform root-cause analysis on your warnings.
For those warnings related to missed properties, or with properties that do not conform to the Regexes, validation functions, or data types you have specified, our Warning Debug feature allows you to see if any of your tags is influencing the appearance of these warnings.
2. Discover & Document
After this easy installation, Trackingplan will automatically start discovering and documenting all the traffic you’re sending to all your integrations. It’s your time to sit back as we automatically create your dashboard.
Depending on your traffic, an hour can be enough to recollect the necessary data for our backend to understand what each piece of data means, identify patterns, detect anomalies, and automatically connect dots to create value from data that was hidden in plain sight. However, for companies with small traffic, this process might take a bit longer, so don’t worry if you enter Trackingplan’s dashboard after installing it and don’t see anything! We will send you a message once we have collected enough data.
3. My tracking plan is ready. Now what?
After automatically documenting all the necessary data to understand what each piece of data means, identify patterns, detect anomalies, and automatically connect dots to create value from data that was hidden in plain sight, it's your time to dig into all the destinations, schemas, events, pixels, and campaigns Trackingplan’s algorithm has discovered for you.
Onboard your data analytics squad or any other members involved in the data collection process to ensure everyone is on the same page, customize your warnings so that we can warn you according to your specifications, add regexes and enums to validate your events, and start tackling all the errors that are compromising the quality of your data and that Trackingplan has spotted.
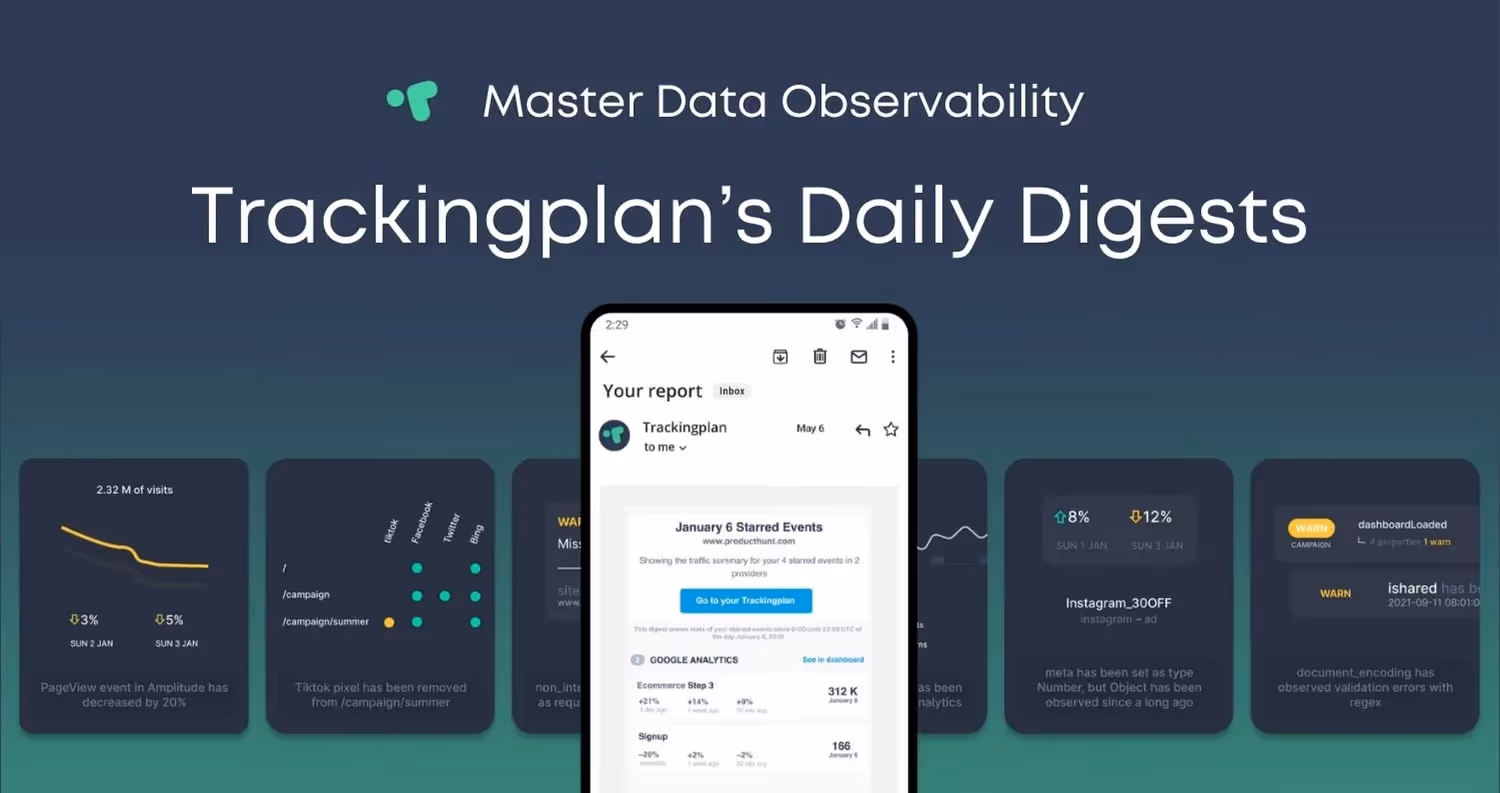
Our Personalized Digests have been created to ensure every department is aware of its responsibilities (#DEV, #PRODUCT, #MKT) and to encourage the ownership of every squad in the analytics generated by their developments. That way, you can ensure each team is provided with all they need to know about the state of their data collection efforts at the beginning of their work day while ensuring only the right information goes to the right people.
Moreover, you will have your own Support Account Manager who will guide you throughout the whole process to make sure you and all the members involved harness the full power of Trackingplan. Our Customer Success manager will know your setup and history to solve all your doubts, take all your needs into consideration, and help you so no time is wasted in fixing problems that come up.
By clicking “Accept All Cookies”, you agree to the storing of cookies on your device to enhance site navigation, analyze site usage, and assist in our marketing efforts. View our Privacy Policy for more information.

.avif)