Master the Tag Assistant Chrome Extension with this guide. Learn how to install, use, and troubleshoot tags for flawless analytics and GTM debugging.
The Tag Assistant Chrome extension is a free, must-have tool from Google that helps you check if your Google tags—like those for Google Analytics, Google Tag Manager, and Google Ads—are set up correctly on your site. It’s an instant diagnostic tool, showing you exactly which tags are present, whether they're firing properly, and flagging any errors that could be messing with your data.
Why Tag Assistant Is Your First Line of Defense in Analytics
Picture this: you've just launched a massive marketing campaign, but you soon realize your conversion data is completely off. It’s a nightmare scenario for any marketer or analyst, and it’s often caused by tiny but critical tagging mistakes. A broken tag can lead to misattributed conversions, inaccurate user behavior data, and, worst of all, bad business decisions based on flawed insights.
This is exactly where the Tag Assistant Chrome extension becomes one of the most valuable tools in your arsenal.
Think of it as the first responder for your entire analytics setup. Before you even think about diving into complex dashboards or reports, Tag Assistant gives you a quick, real-time health check right from your browser. It’s a critical piece among various ad tracking tools because it offers immediate feedback that many others don't, acting as your first line of defense against data disasters.

Building a Foundation of Data Trust
At its core, the extension is all about validation. It confirms that the tags you’ve so carefully implemented are actually working as you expect, stopping data loss before it ever starts.
Its main jobs include:
- Verifying Google Tags: It checks for Google Analytics tags (both Universal Analytics and GA4), Google Ads conversions, and Floodlight tags, confirming they’re present and functioning correctly.
- Debugging Google Tag Manager (GTM): It pairs perfectly with GTM's Preview mode, letting you see how your tags, triggers, and variables are behaving on the live site.
- Spotting Implementation Errors: It flags common slip-ups, like having multiple installations of the same tag or using non-standard implementations that could skew your data.
By running routine checks with Tag Assistant, you move from a reactive "fix-it-when-it-breaks" mindset to a proactive strategy of maintaining data integrity. This simple habit builds a rock-solid foundation of trust in your marketing data.
Not too long ago, Google rolled the functionality of the older Tag Assistant Legacy and the newer Tag Assistant Companion into a single, more powerful extension. This update made it more reliable and indispensable than ever for anyone managing digital analytics.
Throughout this guide, we’ll walk through how to use this simple browser add-on to make sure every decision you make is backed by accurate, trustworthy data.
Installing and Configuring Tag Assistant for Immediate Use
Getting the Tag Assistant Chrome extension up and running is a quick process that immediately pays dividends in data accuracy. The installation itself is just a few clicks, and within minutes, you'll be ready to start validating your website's tags.
First things first, you'll need to grab the extension from the Chrome Web Store. A quick search for "Tag Assistant Legacy (by Google)" will get you to the right place. Just make sure you're getting the official one from Google to avoid any headaches.

Once you click "Add to Chrome," the extension is installed, but don't stop there. There's one more crucial step for an efficient workflow.
Making the Extension Easily Accessible
To save yourself from digging through menus every time you need it, you should pin the extension right to your toolbar. Just click the puzzle piece icon (Extensions) in the top-right corner of Chrome. Find Tag Assistant in the list and click the little pin icon next to it. It’ll turn blue, and the Tag Assistant icon will now be a permanent fixture in your toolbar.
This tiny tweak saves a surprising amount of time and makes you more likely to use the tool for quick spot-checks. Out of sight really is out of mind with browser extensions. For anyone just learning How to Use Google Tag Manager, making Tag Assistant a part of your workflow is non-negotiable for verifying your setups.
Your First Tag Analysis
With the extension pinned and ready, head over to the website you want to inspect. Click the Tag Assistant icon you just pinned and hit the blue Enable button. This tells the extension to start listening for Google tags on this site.
After you enable it, you have to refresh the page. This is a mandatory step; the extension won't start its analysis until the page reloads.
Once the page reloads, you'll see the Tag Assistant icon change. It will now show a number, which is the count of tags it found, and its color will give you an instant status update.
The color-coded icon is your instant health check. Green is what you're aiming for—it means all tags are firing perfectly. Yellow suggests minor issues or non-standard implementations, while red signals a critical error that needs your immediate attention.
This initial, at-a-glance feedback is incredibly powerful. Before you even dive into the detailed reports, you can immediately tell if your analytics setup has serious problems. For a deeper dive into debugging, our guide on https://www.trackingplan.com/guides/ga4-google-tag-assistant-optimization-guide offers more advanced techniques.
How to Interpret Tag Assistant's Findings and Take Action
Once you have the Tag Assistant Chrome extension up and running, the real fun begins. Clicking that little icon opens up a detailed report, but knowing how to read it is what separates a good analyst from a great one. The tool’s color-coded system is your first stop—it’s designed to immediately draw your eye to what matters most.
Think of it like a traffic light for your tags.
A green tag is a beautiful sight. It means everything is implemented perfectly and fired just as you intended. Blue is more of a heads-up, usually flagging a non-standard implementation that probably isn't breaking anything but could be cleaner. A yellow tag is a warning; something could be impacting your data quality. And red? Red means stop what you're doing. Something is critically broken.
This simple system is perfect for prioritizing your fixes. A red tag means you're actively losing data, so it needs your immediate attention. Blue and yellow tags can often wait for a scheduled maintenance day, but don't ignore them forever.
Decoding the Colors with Real-World Examples
Let’s move past the theory and into some scenarios you'll actually encounter.
Imagine you just rolled out a new "add_to_cart" event for Google Analytics 4 (GA4). You pop open Tag Assistant, and the GA4 tag is showing yellow with a "Non-standard implementation" message.
Don't panic—this doesn't mean your event failed. It's often just Tag Assistant's way of telling you the GA4 tag was placed directly on the page with a script tag (gtag.js) instead of through Google Tag Manager. The data is likely still flowing, but GTM is the industry best practice. Your job here is to weigh the pros and cons: is it worth migrating the tag into GTM now for easier management down the road?
Now for a more urgent case. You're verifying your Google Ads conversion pixel after a test purchase, and Tag Assistant throws up a glaring red icon. Clicking it reveals the dreaded "Conversion ID mismatch." This is a five-alarm fire. It means the ID in your tag doesn’t match your Google Ads account, and zero conversions are being recorded. Drop everything, find the ID in your website’s code or GTM, and fix the mismatch immediately.
For more hands-on scenarios, check out our complete guide to testing your website's tags.
A Quick Reference for Common Alerts
You'll get the hang of these messages with time, but a cheat sheet never hurts. The frustration of debugging tags is a universal experience in our field. In fact, a staggering 72% of performance marketers say tag debugging is their biggest headache, and it's no wonder when improper setups can cause 25-35% data loss in attribution models. Mastering a tool like Tag Assistant is non-negotiable. It’s a point echoed by experts across the industry, including the team at Analytics Mania.
To help you get up to speed faster, here’s a quick rundown of what those common alerts really mean and what you should do first.
Decoding Common Tag Assistant Alerts
This table breaks down Tag Assistant's most common color codes and error messages, giving you a clear starting point for your investigation.
Ultimately, debugging isn't just about turning icons from red to green. It's about building your institutional knowledge.
The goal isn't just to make the icons green; it's to understand why they were yellow or red in the first place. This diagnostic process builds your expertise and prevents the same mistakes from happening again.
Advanced Debugging Using the Recording Feature
Some of the most frustrating tagging issues are the ones you can't see on a simple page load. They hide deep inside multi-step user journeys, like a complex checkout flow or a sign-up form, making them nearly impossible to catch with a quick check. This is exactly where the standard Tag Assistant report starts to fall short and its powerful Record feature becomes your best friend.
Instead of just giving you a snapshot of a single page, the recording function follows you along an entire user session, capturing every page you visit until you decide to stop it. What you get is a complete log of every tag that fired, every dataLayer push that happened, and every network request made throughout the entire journey.
Let's say you're trying to figure out why your purchase data in analytics looks a little off. A static check on the "thank you" page might show a perfectly green, happily firing tag. But by recording the entire flow—adding a product to the cart, navigating to checkout, entering payment details, and finally hitting that confirmation page—you might discover the real culprit.
Capturing the Full User Story
To get started, just head to the first page of the user journey you want to QA. Open up the Tag Assistant Chrome extension, but this time, instead of just hitting "Enable," look for the Record button at the bottom and give it a click.
From that moment on, every interaction is being logged. Your job is to go through the user flow just like a real customer would. Add stuff to your cart, click around on different product pages, and finish the checkout. Once you've completed the journey, click "Stop Recording" inside the extension.
You’ll be presented with a full session report, which is an absolute goldmine of diagnostic information. It gives you a chronological view of everything that happened, letting you see exactly when a specific tag fired in relation to a user's action. You can click on any step in that recorded journey to inspect the state of the dataLayer at that precise moment. This makes it so much easier to pinpoint thorny issues, like a purchase event sending the wrong currency or a missing transaction_id.
The real magic of the recording feature is the context it provides. It doesn’t just show you a broken tag; it shows you the entire sequence of events that led to the failure. It turns a frustrating mystery into a solvable puzzle.
Diving Deeper with Tagassistant.google.com
The recording feature gets even more powerful when you use the "Troubleshoot" button. This little button connects your live session directly to the full Tag Assistant web interface at tagassistant.google.com. This is a non-negotiable for debugging complex sites, especially those using iframes for things like payment gateways or third-party widgets, as it can trace activity happening inside those embedded frames.
The story of this tool really speaks to its importance in our workflows. Google's Tag Assistant Chrome extension saw a huge revival after user backlash forced the company to reverse its decision to deprecate it. They ended up merging the old Tag Assistant Legacy with the newer Tag Assistant Companion into the single powerhouse tool we have today. You can learn more about the evolution of this essential extension on the Chrome Web Store.
This unified extension has become indispensable. Developers, in particular, love the "Troubleshoot" button, which fires up tagassistant.google.com for deep diagnostics that can see into iframes, recording sessions to capture 100% of tag firing sequences without tedious manual audits.
This flow chart gives you a simple visual guide for the core diagnostic process—from identifying suggestions and errors to getting everything verified.
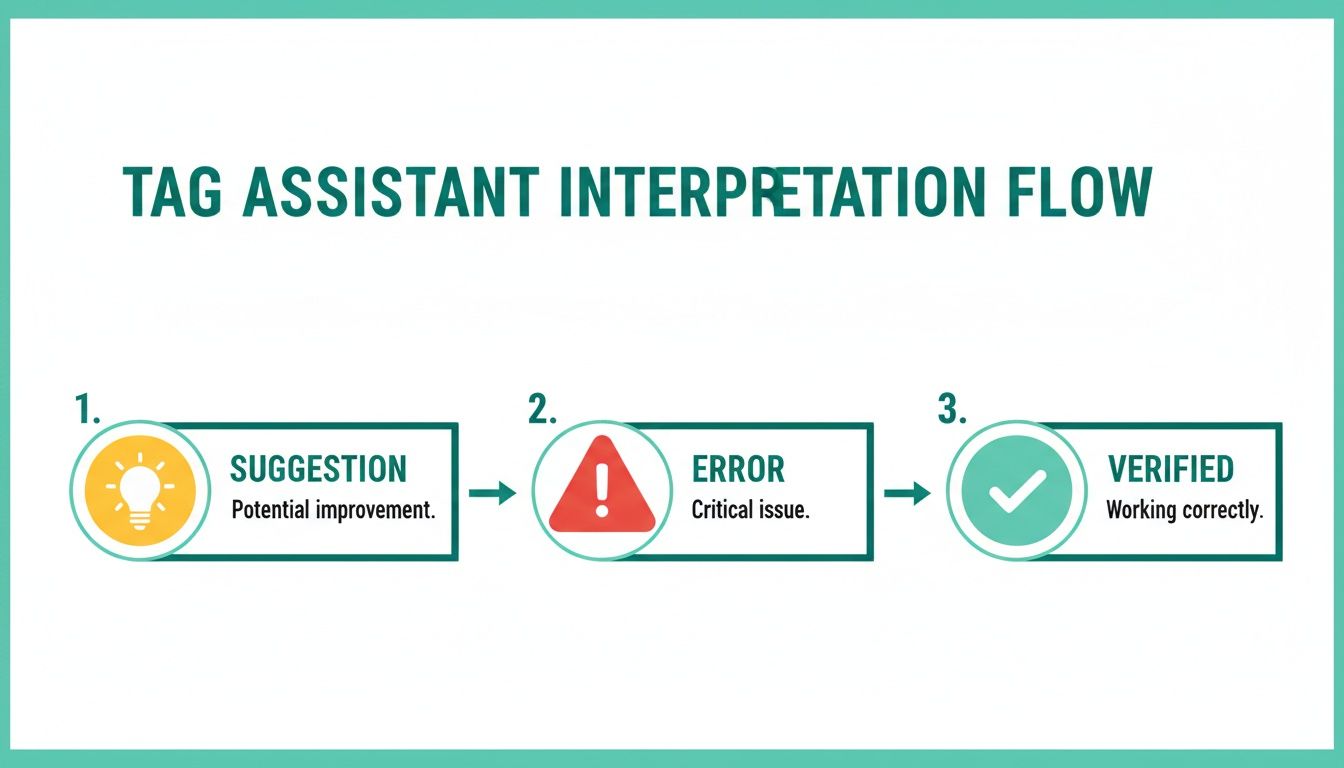
As the diagram shows, the goal isn't just to fix the red errors. It’s about understanding the yellow suggestions, too, which ultimately leads you to a robust, fully verified green implementation that you can trust.
Moving from Manual Spot-Checks to Automated QA
The Tag Assistant Chrome extension is brilliant for targeted, manual debugging. It's my go-to for validating a new tag or digging into a specific user flow I've just deployed. But what about the issues you can't see?
Manual spot-checks, by their very nature, are limited. Tag Assistant can't be everywhere at once. It won’t catch a server-side tag that fails intermittently overnight or an issue that only affects users on a specific browser version you aren't testing. This is the fundamental limitation of manual quality assurance.
The Blind Spots of Manual Tag Audits
While essential, relying solely on manual tools creates some pretty significant blind spots in your data governance strategy. You're only ever seeing a tiny fraction of what's actually happening across your entire digital presence.
Think about these all-too-common scenarios where a manual check just won't cut it:
- Intermittent Failures: A tag might work perfectly for you but fail for 10% of your users due to network conditions or device types.
- Consent Management Gaps: A bug in your consent management platform (CMP) could be preventing tags from firing for users in a specific region, silently eroding your audience data.
- Unexpected PII Leaks: A developer might accidentally push an email address into the
dataLayer, creating a serious privacy risk that you'd likely never find with random checks.
Manual spot-checking is like having a security guard who only watches the front door. You need a system that monitors every window, door, and hallway, 24/7. That's where automated QA comes in.
This is the next level of data governance. Instead of reacting to problems after they’ve already corrupted your dashboards, automated analytics QA continuously monitors your entire implementation in the background.
Bridging the Gap with Automated Observability
Automated platforms work by validating every single tag against a master tracking plan. They act as your always-on analytics QA team, catching issues the moment they happen and alerting you in real-time. This approach turns manual and automated tools into essential partners.
The revival of Tag Assistant itself highlights the industry's need for better troubleshooting. Historical data showed that tagging errors plagued 40% of campaigns before its relaunch, inflating cost-per-acquisition by as much as 22%. This was especially true in server-side setups where pixels can fail silently. As reported by Search Engine Land, Google's decision to bring the extension back addressed a critical gap for analysts everywhere.
This combination of tools ensures a comprehensive data quality strategy. You use the Tag Assistant Chrome extension for hands-on, immediate debugging and rely on an automated platform to catch the silent, systemic errors that manual checks will always miss. For a deeper look into this strategy, you might be interested in the evolution into a QA tool for digital analytics.
Frequently Asked Questions About Tag Assistant
Even a tool as handy as the Tag Assistant Chrome extension can leave you scratching your head sometimes. That's a normal part of the process. I've gathered a few of the most common questions I hear to help you get unstuck and back to debugging.
Why Is Tag Assistant Not Detecting Any Tags on My Site?
This is probably the most common roadblock people hit, and it’s usually a quick fix. First, the simple stuff: make sure the extension is actually enabled for the site you're on. A hard refresh (Cmd/Ctrl + Shift + R) is also a great next step, as it forces your browser to pull the latest version of the page instead of a cached one.
Nine times out of ten, though, the real culprit is another browser extension. Ad blockers or other privacy-focused tools are notorious for interfering with Tag Assistant's ability to see tracking scripts. Try disabling your other extensions one by one to see if that solves it. If you’ve tried all that and still see nothing, the issue might be deeper in the tag's implementation itself.
How Is Tag Assistant Different from GTM Preview Mode?
Think of them as partners with different specialties. The Tag Assistant Chrome extension is your go-to for a quick, high-level health check. It's perfect for seeing which Google tags are present and firing on any live webpage, even on a competitor's site where you don't have backend access. It tells you what's there.
Google Tag Manager's Preview Mode, on the other hand, is the full-blown operating room. It connects directly to your GTM container and gives you a granular, real-time feed of every tag, trigger, and variable firing (or misfiring). You’d use Tag Assistant to quickly spot a problem, then jump into GTM Preview Mode to perform the detailed surgery needed to fix it.
Can Tag Assistant Be Used for Non-Google Tags?
At its core, Tag Assistant is built for the Google marketing and analytics ecosystem. It really shines when validating tags for Google Analytics (GA4), Google Ads, and GTM.
That said, it won't give you detailed debugging reports for third-party tags like the Meta Pixel or TikTok Pixel. However, the "Record" feature can still be useful, as it might show you the network requests for these other tags firing. For a proper deep dive on non-Google tags, you’ll be much better off using a platform-specific tool, like the Meta Pixel Helper, or a dedicated analytics observability platform that can validate your entire setup, regardless of the vendor.
A proactive approach to data quality is the only way to make business decisions with confidence. Trackingplan goes beyond spot-checks by automatically monitoring your entire analytics implementation, alerting you to problems before they corrupt your data. Make sure your analytics are always accurate by visiting https://trackingplan.com.