
Master your Adobe Launch data layer. This guide covers implementation, schema design, and validation to ensure total data accuracy for your analytics.
An Adobe Launch data layer is, at its core, a JavaScript object. But that's the dry, technical definition. For anyone in the trenches of digital analytics, it’s much more: a structured, standardized source of truth for every bit of user interaction and page data on your site. It's the central hub where you gather information before it gets sent to Adobe Launch, and then out to all your analytics and marketing tools.
This simple but powerful concept is the absolute bedrock of reliable, accurate data collection.
Why Your Data Layer Is Your Analytics Foundation
Let’s be honest, the term 'data layer' gets thrown around a lot. For Adobe Launch users, though, it’s not just jargon—it's the definitive source of truth for every piece of data you collect. Think of it as the blueprint for your digital analytics house. Without a solid plan, the whole structure becomes unstable, unreliable, and just waiting to collapse.

The Real Cost of Inconsistent Data
Unlike some other platforms, Adobe doesn't enforce a universal data layer standard. This flexibility can feel liberating, but it’s often a double-edged sword. While it allows for high levels of customization, it also swings the door wide open for inconsistencies—a major headache for any analytics team.
The consequences of a poorly structured data layer aren't trivial. A 2026 survey by the Digital Analytics Association revealed that 68% of Adobe Analytics users pointed to data layer inconsistencies as the main culprit behind tracking errors. This messiness translated to an average 15-20% loss in data accuracy across major e-commerce sites. Because there’s no vendor-agnostic standard, teams often resort to building custom solutions, which can bloat development time by up to 40%. You can find a detailed analysis of this challenge on Jimalytics.com.
The absence of a standardized structure means that without careful planning, your data layer can quickly become a messy, unmanageable collection of variables. This is where most data quality issues begin.
When your data is inconsistent, every report becomes questionable. Imagine your marketing team making budget decisions based on conversion data that’s missing 20% of its transactions. Or your product team prioritizing features based on user behavior that is only partially tracked. These aren't just theoretical problems; they're real-world scenarios that lead to flawed business decisions and wasted resources. We cover this in more detail in our article on the importance of a well-structured data layer.
Establishing a Source of Truth
A well-architected Adobe Launch data layer is your best defense against these issues, creating a single, reliable source for all your information. It’s about making sure every tag, from analytics to advertising pixels, gets the same clean, consistent data.
To help you get there, let's look at the core principles that should guide your data layer design. These aren't just technical nice-to-haves; they are foundational pillars for a scalable and reliable analytics program.
Data Layer Design Principles At A Glance
| Principle | Description | Business Impact |
|---|---|---|
| Standardized | Follow a consistent, documented naming convention and structure. | Reduces developer guesswork and onboarding time. Ensures all teams speak the same data language. |
| Vendor-Agnostic | Design the layer based on business events, not a specific tool's requirements. | Simplifies adding or replacing marketing/analytics tools without re-tagging the entire site. |
| Comprehensive | Include all relevant data about the page, user, and events that might be needed. | Empowers marketing and product teams with rich data for segmentation, personalization, and analysis. |
| Accessible | Make the data easy for developers to populate and for the tag manager to read. | Speeds up implementation and reduces the risk of tracking errors due to complex logic. |
Following these principles ensures your data layer doesn't just work for today's needs but is also prepared for whatever comes next.
This strategic approach offers several key benefits that go far beyond just clean data:
- Data Integrity: It guarantees all teams are working from the same playbook, which eliminates frustrating discrepancies between different analytics platforms.
- Scalability: A structured data layer makes it much easier to add new tools and tracking requirements down the line without breaking your existing setup.
- Efficiency: Your developers get a clear specification to follow, and marketers can deploy tags faster without needing custom code for every new campaign or pixel.
Ultimately, investing the time to get your data layer right from the start isn't just a technical best practice—it's a business imperative. It’s the difference between flying blind and making data-driven decisions with genuine confidence.
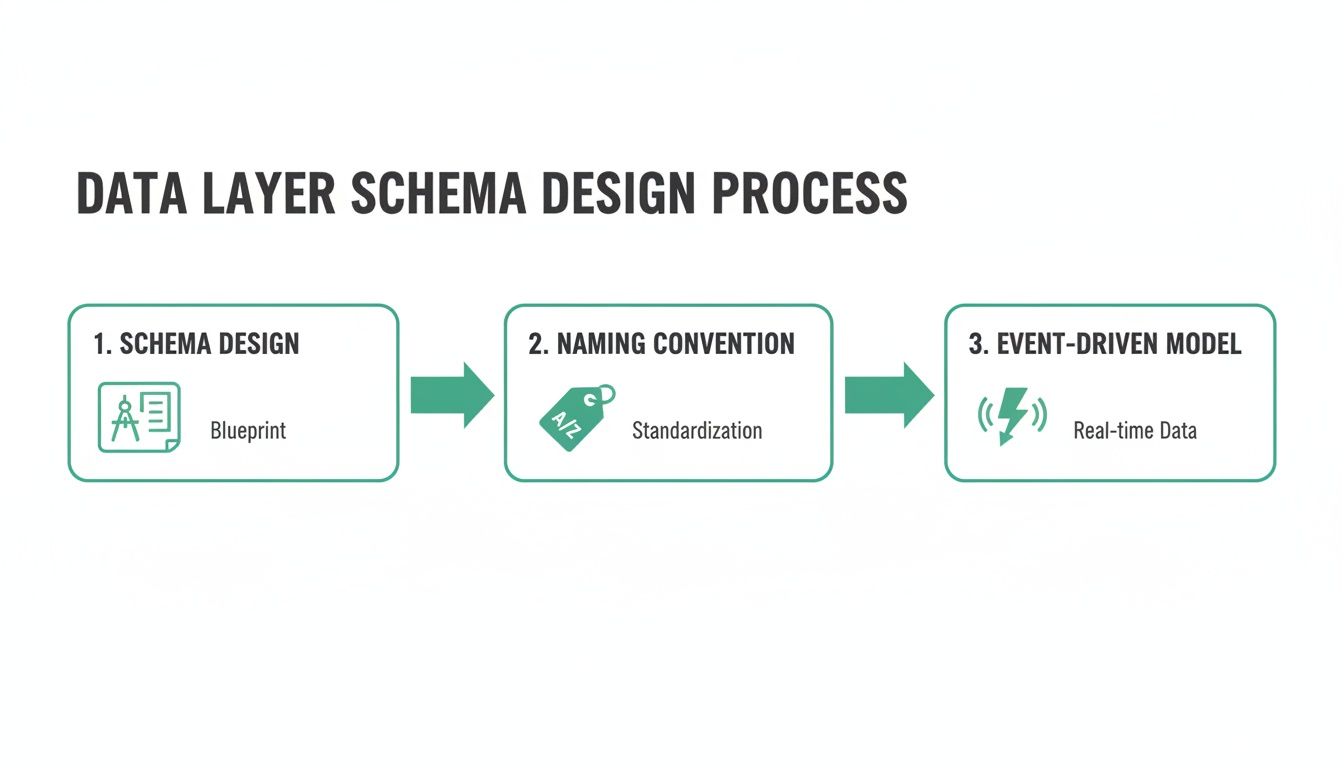
Designing Your Data Layer Schema
This is where you build the blueprint for your data. Before you push a single event or fire a tag, you need a logical, predictable, and scalable data layer schema. Getting this right is the difference between a system that serves your business for years and one that collapses under its own weight.
The most critical first step is shifting your mindset from an outdated page-load methodology to an event-driven model. Modern web applications are dynamic—users don't just load pages; they interact with components, fill out forms, and watch videos. A purely page-based model simply can’t capture this rich behavioral data.
An event-driven data layer tracks these micro-interactions as they happen. For example, instead of just knowing a user landed on a product page, you can track when they select a color, view sizing guides, or interact with a review carousel. This is the kind of granular detail that fuels real personalization and deep user analysis.
Establishing Naming Conventions
Before you start defining objects and properties, you have to lock down a strict naming convention. This might feel like a minor detail, but I've seen inconsistent naming cause countless tracking failures and drive developers crazy. It creates ambiguity and makes any kind of automation a nightmare.
The most widely adopted and recommended convention is camelCase. This means the first word is lowercase, and every subsequent word starts with a capital letter, with no spaces (e.g., pageName, productID, userStatus).
A rigid naming convention like camelCase isn't just about code cleanliness; it's a core governance principle. It eliminates guesswork, ensures consistency across teams and platforms, and makes debugging rules in Adobe Launch dramatically simpler.
Once you’ve settled on a convention, document it and enforce it religiously. It should be the first thing any new developer or analyst learns when touching your analytics implementation. This simple discipline will save you countless hours of headaches down the road.
Core Data Layer Objects
While every business has its quirks, a solid baseline schema for an Adobe Launch data layer usually revolves around a few core objects. Think of these as containers for related information, keeping your data organized and easy to understand.
Let's look at a foundational structure you might use for a typical e-commerce site.
Page Object: This holds all information relevant to the page being viewed, regardless of the user or the specific content on it.
pageName: A unique, clean name for the page (e.g.,home:index,product:detail:running-shoe-x1).pageType: The template or category of the page (e.g.,homepage,pdp,cart).siteSection: The broader section of the site the page belongs to (e.g.,men,women,sale).
User Object: This contains data about the logged-in user. It’s absolutely critical to be mindful of Personally Identifiable Information (PII) here.
userID: An internal, non-PII identifier for the user.loginStatus: A simple flag indicatinglogged inorlogged out.customerType: A segment likeneworreturning.
Product Object: For any e-commerce business, this object is non-negotiable. It should be an array to support multiple products, whether on a category page or in the cart.
productID: The SKU or unique product identifier.productName: The full name of the product.price: The current price of the item.category: The product's primary category.
This structure gives you a flexible yet organized framework. For example, on a product detail page, the product object would be an array with a single item. On a category page, it would contain an entry for each product displayed.
This event-driven, object-oriented approach is the modern standard for a reason. It creates a robust foundation that can scale with your business, adapt to new marketing technologies, and provide the clean, reliable data needed to make intelligent decisions. Without this architectural foresight, your Adobe Launch implementation will always feel like it's playing catch-up.
Implementing The Data Layer In Adobe Launch
Alright, you've designed a rock-solid data layer schema. Now comes the fun part: plugging it into Adobe Launch and bringing it to life. This is where your blueprint becomes a real, active data collection engine. The process boils down to installing one crucial extension, creating data elements to read your variables, and then building rules that listen for specific events.
We’re essentially taking our structured design and translating it into an event-driven model right inside Launch.
This workflow shows how that upfront planning flows directly into the technical implementation we're about to tackle.
Activating the Adobe Client Data Layer Extension
Your first move inside Adobe Launch is to install the Adobe Client Data Layer (ACDL) extension. Honestly, this is non-negotiable. While you could write your own custom code to listen for data layer pushes, the ACDL extension is far more reliable and graceful.
Its biggest advantage is how it handles race conditions. A race condition is what happens when your Launch library loads and tries to grab a data layer value before your website has pushed that value. The ACDL extension elegantly sidesteps this problem by automatically processing any events that fired before it was ready, ensuring you never miss a beat.
This is especially a lifesaver for sites built on Adobe Experience Manager (AEM). Since AEM Core Components version 2.9.0, the Adobe Client Data Layer comes bundled by default, working out-of-the-box in 85% of new AEM Project Archetype setups. This integration standardizes data exposure, firing an initial cmp:show event right after the <body> tag—often long before Launch even loads. If you want to get into the weeds of this native integration, the AEM Core Components documentation is a great resource.
Creating Data Elements to Capture Your Schema
With the ACDL extension in place, it's time to create Data Elements. Think of these as named pointers that tell Launch exactly where to find specific values inside your adobeDataLayer object. They act as the bridge between your schema and the rules that will fire your analytics and marketing tags.
You'll want to create a Data Element for every key variable in your schema. The setup is pretty straightforward:
- Extension: Select
Adobe Client Data Layer. - Data Element Type: Use
Computed State. This ensures you always get the most recent value for a path. - Data Layer Path: Enter the path to your variable using dot notation.
Using our e-commerce schema as an example, the mapping would look like this:
page.pageInfo.pageNamemaps to a Data Element you might callPage Name.user.profile.loginStatusbecomesUser Login Status.product.productInfo.productIDbecomesProduct ID.
Pro Tip: Keep your Data Element names descriptive and human-readable. A name like "Page Name" is much easier for your team to work with inside the Launch UI than "page.pageInfo.pageName". This simple habit dramatically improves usability for everyone.
Building Event-Driven Rules
This is where your implementation truly becomes dynamic. Instead of relying on brittle, old-school triggers like "Page Load" or "DOM Ready," we're going to build rules that fire based on specific events pushed into the adobeDataLayer. This event-driven model is the key to responsive, accurate, and scalable tracking.
Let's say you want to track when a user views a product details page. Your developers would push a dedicated event into the data layer at that moment.
adobeDataLayer.push({
event: 'productView',
product: [{
productInfo: {
productID: 'SHOE-123',
productName: 'Cloud Runner X1',
price: '149.99'
}
}]
});
Now, back in Launch, you create a rule that listens for that specific productView event.
Configuring an Event-Driven Rule
- Event: Under the
Adobe Client Data Layerextension, choose theEventtype. - Event Information: In the "Event Name" field, you'll enter
productView. This tells the rule to only fire when an event with that exact name is pushed. - Actions: Inside this rule, you can now use the Data Elements you already created (
Product ID,Product Name, etc.) to set your Adobe Analytics variables or pass data to other tools like advertising pixels.
This approach completely decouples your tracking from the page’s rendering cycle. It creates a robust system where tracking is tied directly to meaningful user interactions, not just a page view. You can then build out a whole library of rules for addToCart, checkoutStep, and purchase events, each firing independently and carrying the precise data payload needed for that specific moment. To get a better sense of what's possible, our guide on leveraging Adobe Launch for advanced tracking scenarios is a great next step.
A perfect data layer schema is useless if the data doesn't actually go anywhere. After designing and implementing your adobeDataLayer, the next critical step is connecting its variables to your analytics and marketing tags. This is the moment your architectural blueprint becomes a powerful engine for business intelligence, bridging the gap between clean data collection and truly actionable insights.
This process is what transforms abstract variables into the dimensions and metrics that populate your Adobe Analytics reports and fuel your advertising campaigns. It’s the step that finally empowers your entire martech stack with the clean, reliable data you've worked so hard to structure.
Mapping Data Elements to Adobe Analytics Variables
With your Data Elements configured in Adobe Launch, the main task is to map them to your Adobe Analytics variables—specifically eVars (conversion variables) and props (traffic variables). You'll do this within the actions of a rule, typically one that fires on a specific data layer event like pageView or productView.
Inside your rule's "Actions" section, you’ll configure the "Adobe Analytics - Set Variables" action. Here, you'll see the familiar list of props, eVars, and events. Your job is simply to assign the Data Elements you already created to these analytics variables.
For instance, your pageView rule would likely include the following mappings:
- eVar1: Set to your
Page NameData Element (%Page Name%). - prop1: Also set to your
Page NameData Element (%Page Name%). - eVar5: Set to your
User Login StatusData Element (%User Login Status%).
This direct mapping ensures that every time the pageView event fires, the current page name and user status are captured and passed along with the Adobe Analytics beacon.
By consistently using Data Elements to populate your analytics variables, you create a single source of truth. If you ever need to change how
pageNameis defined, you only update it in one place—your data layer—and all downstream tags automatically inherit the change.
A Practical Mapping Example
Let's expand on this with a more complete example. A well-organized mapping strategy is essential for maintaining clarity as your implementation grows, and keeping a reference table like this can be invaluable for your team.
Here is a common way you might map data layer variables to specific Adobe Analytics variables for a standard e-commerce site.
Data Element To Analytics Variable Mapping Example
This table shows a practical example of how to map common data layer variables to specific Adobe Analytics variables.
| Data Layer Variable | Adobe Launch Data Element | Adobe Analytics Variable | Description |
|---|---|---|---|
page.pageInfo.pageName | Page Name | eVar1, prop1 | Captures the friendly name of the page for traffic and conversion analysis. |
user.profile.loginStatus | User Login Status | eVar5 | Segments user behavior based on whether they are logged in or a guest. |
product.productInfo.productID | Product ID | eVar10, product string | Used to tie conversion events to specific products and for merchandising analysis. |
event | Event Name | eVar15, prop15 | Tracks the specific user interaction that triggered the rule (e.g., addToCart). |
This structured approach not only guarantees data consistency but also serves as living documentation for your entire analytics setup.
Firing Marketing Pixels Based On Events
The real power of an event-driven data layer extends far beyond Adobe Analytics. You can use the exact same event-based rules to trigger third-party marketing tags, like a Facebook or Google Ads conversion pixel. This is where your tracking becomes highly accurate and efficient.
Imagine you want to fire a Facebook "AddToCart" pixel. Instead of trying to trigger it based on a URL or a button click selector—which can be fragile and break easily—you just create a new rule in Launch.
- Event: Use the
Adobe Client Data Layerextension and listen for theaddToCartevent. - Action: Add a "Custom Code" action for your Facebook pixel.
Within this custom code block, you can now safely fire the fbq('track', 'AddToCart'); event. Better yet, you can use your Data Elements to pass dynamic values like product price and currency directly to the pixel, ensuring perfect parity with your internal analytics.
Managing Tag Dependencies with Rule Ordering
As your implementation gets more complex, you'll inevitably run into situations where one tag depends on another. A classic example is a marketing pixel that needs an ID that is first set by your analytics tool. This is where Rule Ordering becomes your best friend.
In Adobe Launch, every rule has an "Order" setting that defaults to 50. Rules with a lower number fire first. If you need your main Adobe Analytics pageView rule to fire before any marketing pixels, you could set its order to 20. Then, set the rules for your marketing tags to 50 or higher.
This simple numerical hierarchy prevents race conditions and ensures that by the time your Facebook and Google tags fire, all necessary data from the primary analytics beacon has been processed and is available. It's a fundamental practice for a stable and reliable implementation, and it's how you take full control of your Adobe Launch data layer.
Validating and Monitoring Your Data Layer
Getting your data layer implemented is a huge milestone, but the work doesn't stop there. Think of it like building a house: the foundation is poured, but now you have to protect it from the elements. Without ongoing governance, even the best data layer will degrade over time.
This section is all about quality assurance. We’ll cover the essential debugging and QA techniques you need to make sure your Adobe Launch data layer stays the single source of truth you built it to be.

We'll start with the hands-on methods for spot-checking your setup and then move into how automated observability can give you a 24/7 security detail for your data.
Manual QA with Browser Developer Tools
Your first line of defense is always your browser's developer tools. It's the most direct way to pop the hood and see exactly what's happening with your data layer in real time.
By opening the console, you can directly inspect the adobeDataLayer object. To see the complete picture at any given moment, just type adobeDataLayer.getState() into the console. This command gives you the fully computed state of every object and variable, which is a lifesaver for debugging data on page load.
For event-driven actions like clicks or form submissions, you can watch the event pushes as they happen. Many of us use browser extensions or simple custom snippets to listen for the adobeDataLayer:event and log its payload right to the console. It makes seeing the data tied to a specific user action incredibly simple.
Key Takeaway: Manual inspection using developer tools is indispensable for initial setup and debugging specific, isolated issues. It gives you a direct, unfiltered view of what your application is sending to the data layer.
While this hands-on approach is perfect for targeted checks, it’s not a scalable strategy for long-term health. You can't be everywhere at once, manually checking every page and interaction.
The Power of Automated Observability
This is where automated monitoring tools like Trackingplan become absolutely essential. If manual checks are like tapping a few bricks in your foundation, an observability platform inspects the entire structure, around the clock.
Trackingplan automatically discovers your data layer schema, continuously monitors every single event for errors, and shoots you an alert before bad data ever has a chance to pollute your analytics reports.
Instead of waiting for a stakeholder to point out a broken dashboard, you get proactive notifications about critical issues, such as:
- Missing Properties: An
addToCartevent fires, but theproduct.priceis suddenly null. - Schema Drift: A developer changes
productIDtoproductId, instantly breaking every rule and report that depends on the original name. - Type Mismatches: A price is sent as a string ("19.99") instead of a number (19.99), which can throw off all your revenue calculations.
Making the switch from reactive debugging to proactive monitoring is a game-changer for any team that's serious about maintaining high-quality data.
A Real-World Monitoring Use Case
Let's walk through a common scenario. Your marketing team just pushed a new campaign live. The next morning, you get a Slack alert from Trackingplan: "New value detected for property page.pageInfo.pageType." You click in and see the value is campain-page—a simple typo.
Without that alert, all the traffic to those new landing pages would have been miscategorized in Adobe Analytics, completely skewing your campaign attribution. The issue could have gone unnoticed for weeks. But with an alert system, you can pinpoint the problem, notify the right team, and get the typo fixed in minutes, not months.
Ensuring Data Accuracy and Resilience
Even with great monitoring, technical hiccups are a fact of life. The good news is that the Adobe Client Data Layer (ACDL) extension is designed with resilience in mind, built to handle race conditions by automatically re-processing up to 95% of historical data layer events. This is especially critical for high-traffic sites, where timing issues can impact 22% of implementations, according to a 2025 Adobe community benchmark.
I've also seen teams cut deployment risks by 60% by adopting small but powerful tricks, like adding a 'trigger-source': 'launch' attribute in their JSON pushes to prevent rules from firing by mistake during development.
For an even more robust setup, it’s worth exploring advanced techniques like server-side tracking. This can protect your data collection from browser-side issues and ad blockers, giving you another layer of validation by allowing you to compare client-side data with server-side logs.
By combining manual QA for initial debugging, automated observability for continuous governance, and resilient implementation practices, you create a complete system that guarantees your Adobe Launch data layer remains a trustworthy asset for your entire organization.
Frequently Asked Questions
When you're deep in an adobe launch data layer implementation, specific questions always seem to pop up. Let's tackle some of the most common challenges and sticking points I see on projects. My goal here is to give you practical, straightforward answers to help you get it right.
What Is The Difference Between The Adobe And Google Data Layers
The biggest difference really comes down to their core design philosophy. Think of Google's dataLayer as a simple array—a list of objects that you push information onto. It's straightforward, but that's about it.
The Adobe Client Data Layer (ACDL), or adobeDataLayer, is a much more robust, event-driven system. It was built from the ground up to solve common headaches, especially race conditions where tags fire before the data they need is actually available. The ACDL has helper methods built right in for pushing and listening to events, and you can grab the entire computed state of all your data at any given moment. This makes it far more reliable for the complex, asynchronous world of modern websites.
While you can run both on the same site, it takes careful management to keep them from tripping over each other.
How Do I Handle User Consent With The Data Layer
Here's the best practice: wire your Consent Management Platform (CMP) directly into your data layer. This is non-negotiable for clean, compliant tracking.
When a user makes a choice in your CMP, it should immediately push a dedicated consentUpdated event to the adobeDataLayer. The event payload needs to be clear, something like {consent: {analytics: 'granted', advertising: 'denied'}}.
From there, you just need to build rules in Adobe Launch that listen for that specific event. You can then use the data from the event in your rule conditions to either fire or hold back your analytics and marketing tags. This ensures your site's tracking behavior always respects the user's latest choice.
Can I Use A Data Layer On A Single Page Application
Absolutely. In fact, a data layer isn't just possible for Single Page Applications (SPAs)—it's the ideal solution. Since SPAs don't trigger traditional page loads when a user navigates, you have to rely on events to understand what's happening.
Your developers should be instructed to push a custom virtualPageView event to the data layer whenever a user moves to a new "view" in the app. That event needs to carry all the page details you'd expect from a normal page load. In Adobe Launch, you then create rules that listen for this virtualPageView event to fire your analytics beacons and other tags. It effectively lets you simulate a traditional page load within a dynamic environment.
For a wider view of how Adobe Launch fits into the broader Adobe ecosystem, you might find some useful answers in this FAQ on What Is Adobe Experience Cloud.
What Are The Most Common Data Layer Implementation Mistakes
I see the same handful of costly mistakes over and over again. They usually fall into one of three buckets:
- Inconsistent Naming: One developer uses
productIDand another usesproductId. A seemingly small difference, but it's guaranteed to break your rules and poison your reports. Pick a convention, like camelCase, document it, and enforce it religiously. - Not Being Event-Driven: So many teams stop after implementing the initial page load data. The real magic comes from capturing behavior. You absolutely must fire custom events for key interactions like
addToCart,formSubmission, orvideoPlayto get rich, actionable data. - Lack of Monitoring: Implementing a data layer and assuming it will just keep working is a recipe for failure. Code changes, schemas drift, and bugs creep in. Continuous, automated monitoring isn't a luxury; it's essential for catching issues before they corrupt your analytics and lead to bad business decisions.
A broken data layer is a silent killer for your analytics, leading to bad data and expensive mistakes. Trackingplan gives you a complete observability platform that automatically discovers your entire implementation and monitors it 24/7. Stop wasting time hunting down why dashboards are broken and get real-time alerts on everything from schema changes to PII leaks. Ensure your data is always accurate with Trackingplan.