Before you start, we recommend talking to our support team. They'll help you set everything up correctly from the start and avoid problems later.
To install it, you’ll need to:
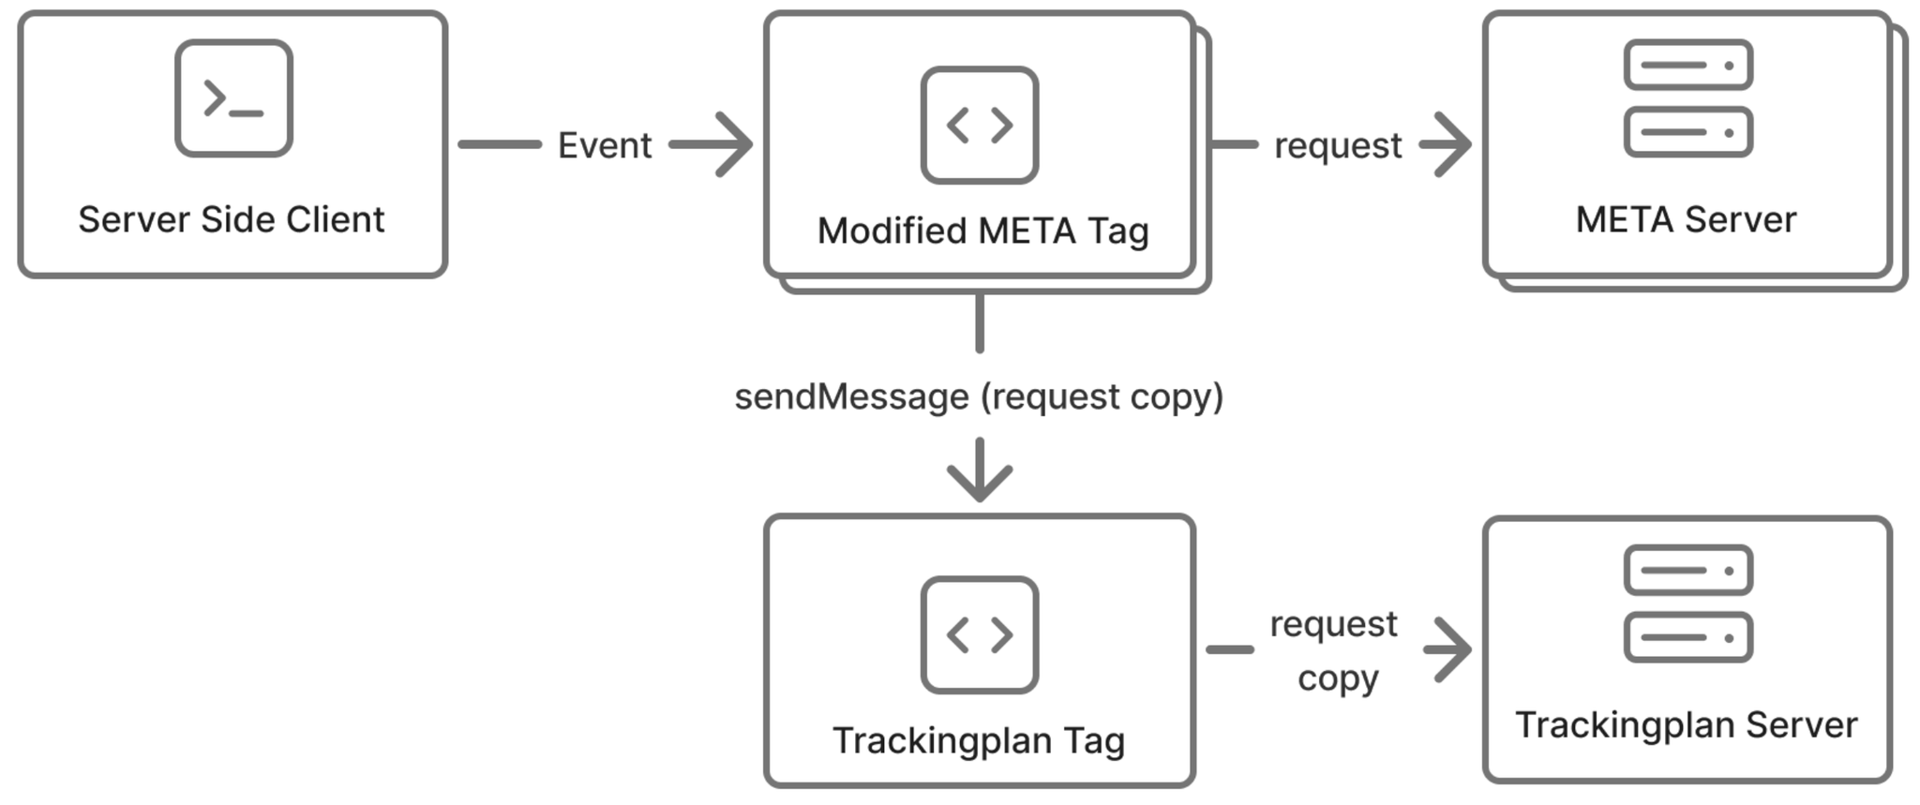
Prefer to watch? This video walks you through an installation from scratch:
How to Install the Trackingplan Tag
The Trackingplan tag captures GA4 requests and collects the messages from your modified tags, then sends it all to the Trackingplan server for monitoring.
You have two options: install it from the Community Templates, or import it manually with the .tpl file.
Manual Installation
Import the template into your SSGTM container
- Download the template from https://github.com/trackingplan/trackingplan-ssgtm-tag/blob/main/template.tpl
- In your SSGTM container, go to Templates → New → Import from file
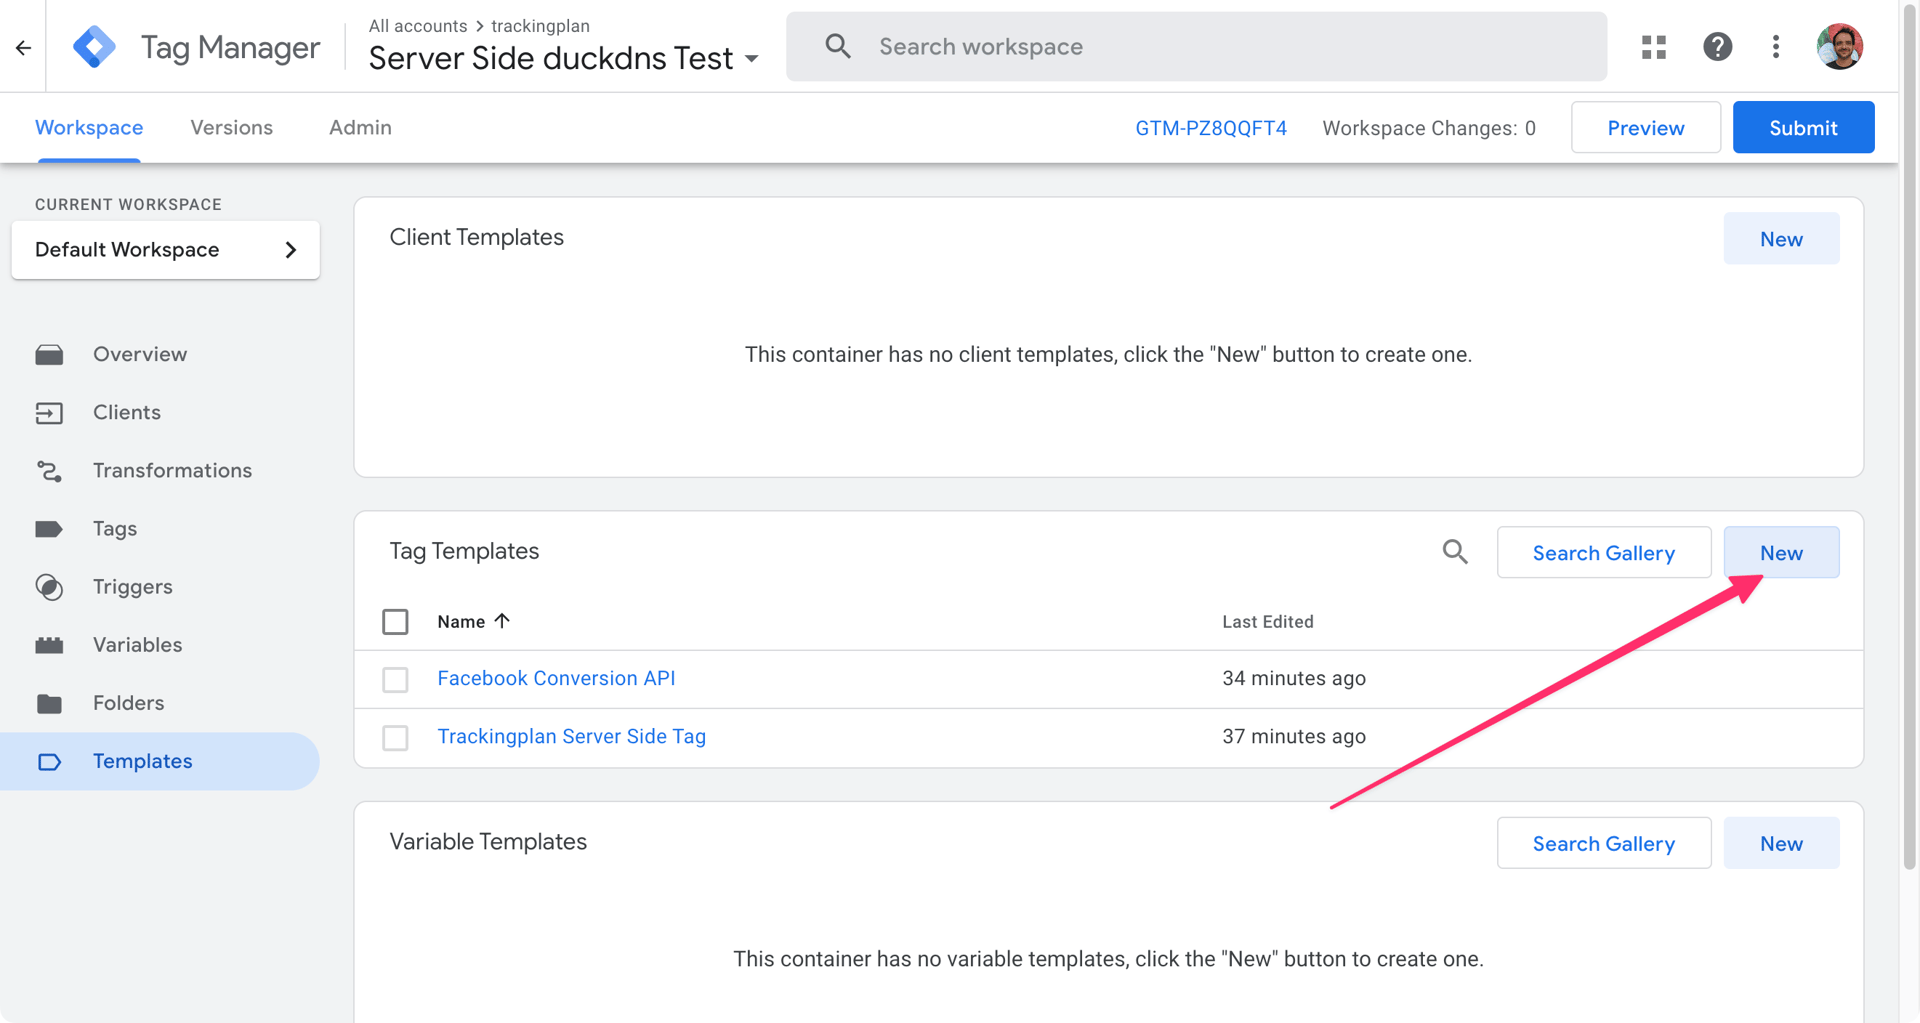
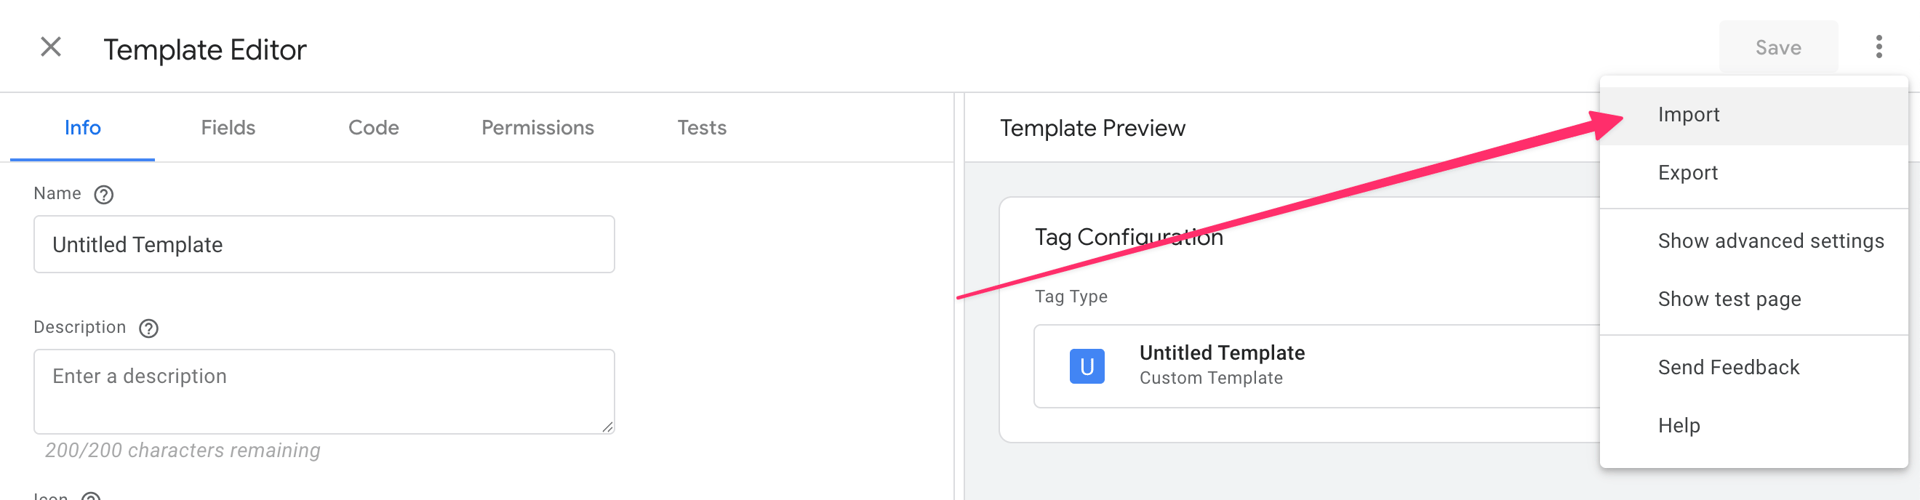
- Select the downloaded template file
- Save
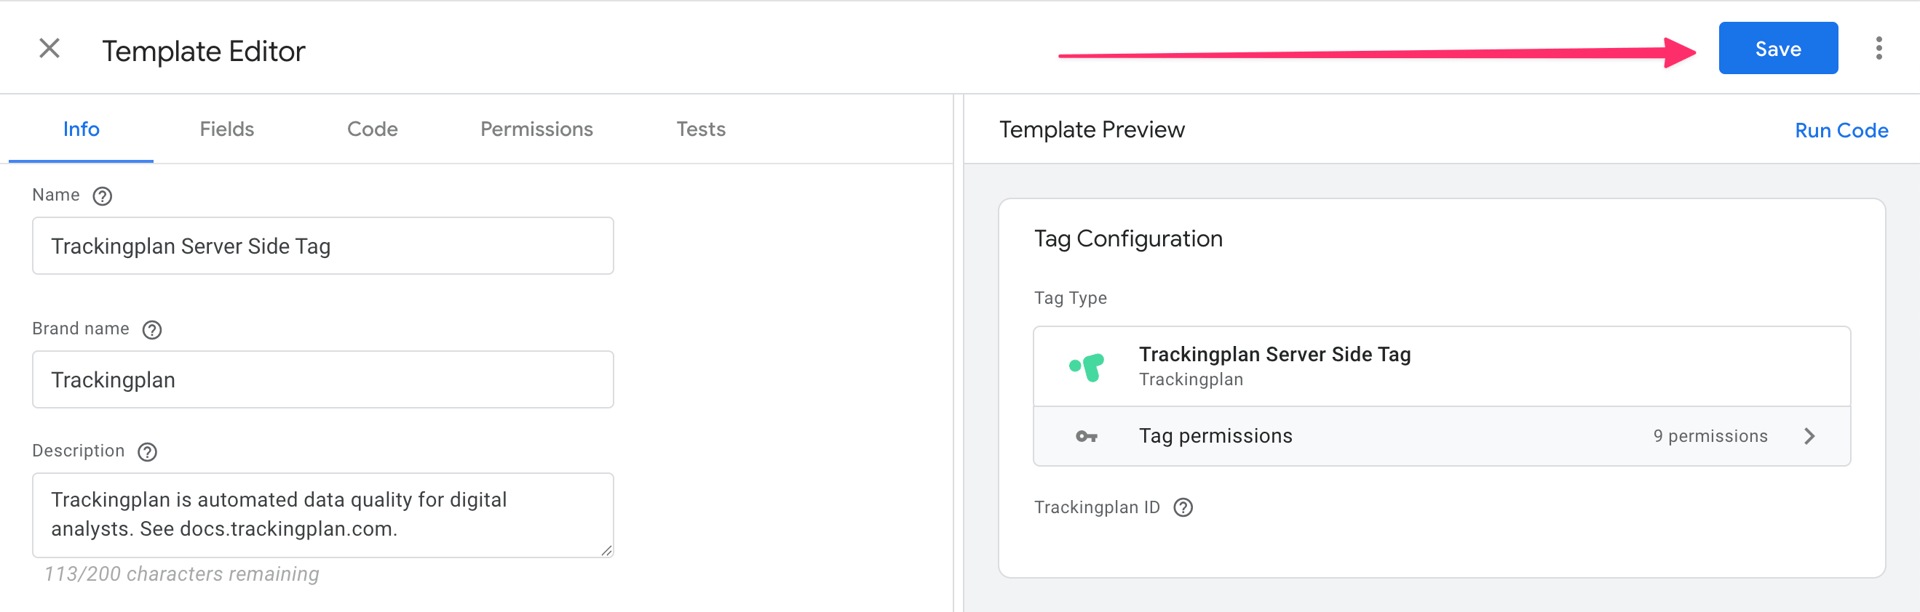
Create a new tag using the template:
- In your SSGTM container, go to Tags → New
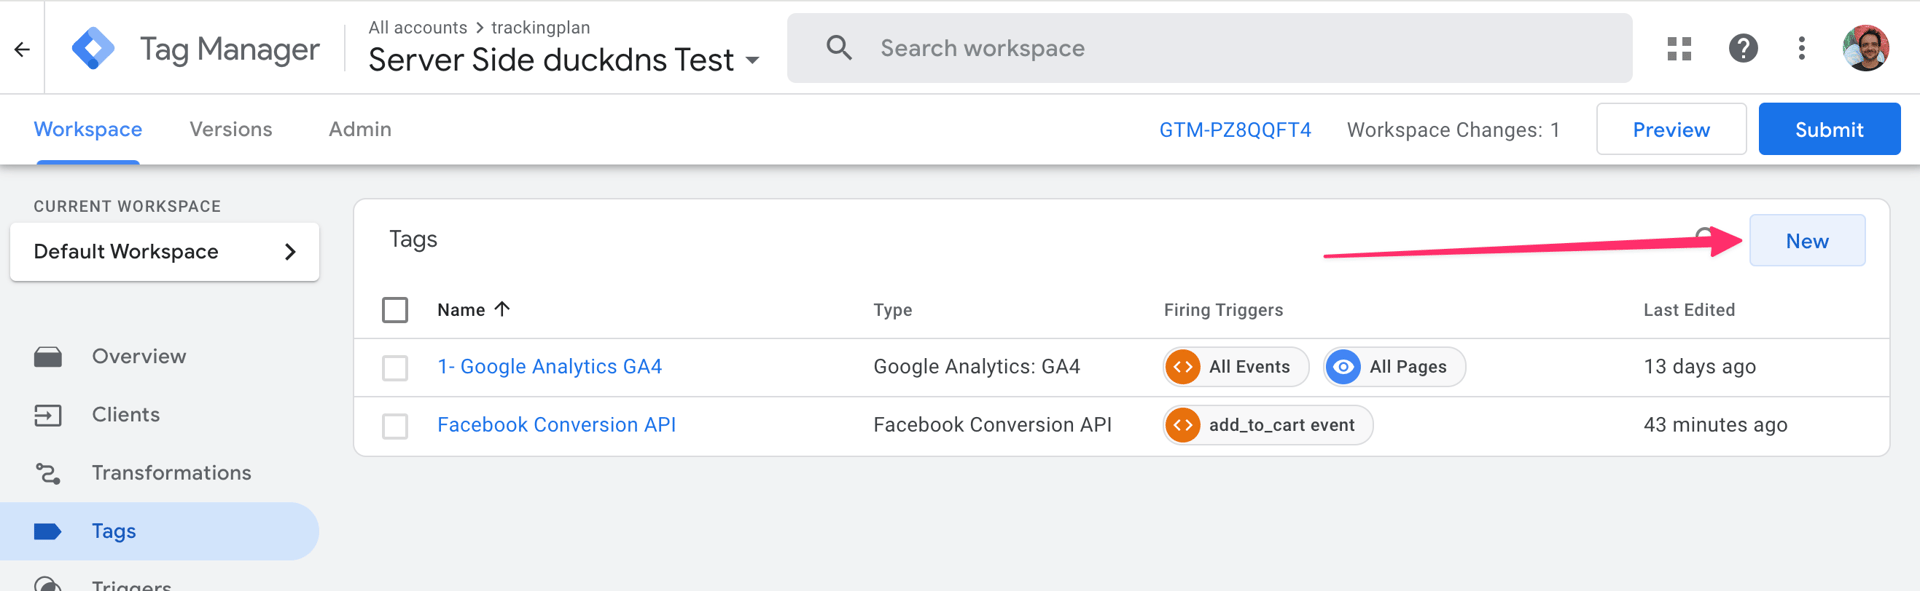
- Select the Trackingplan template
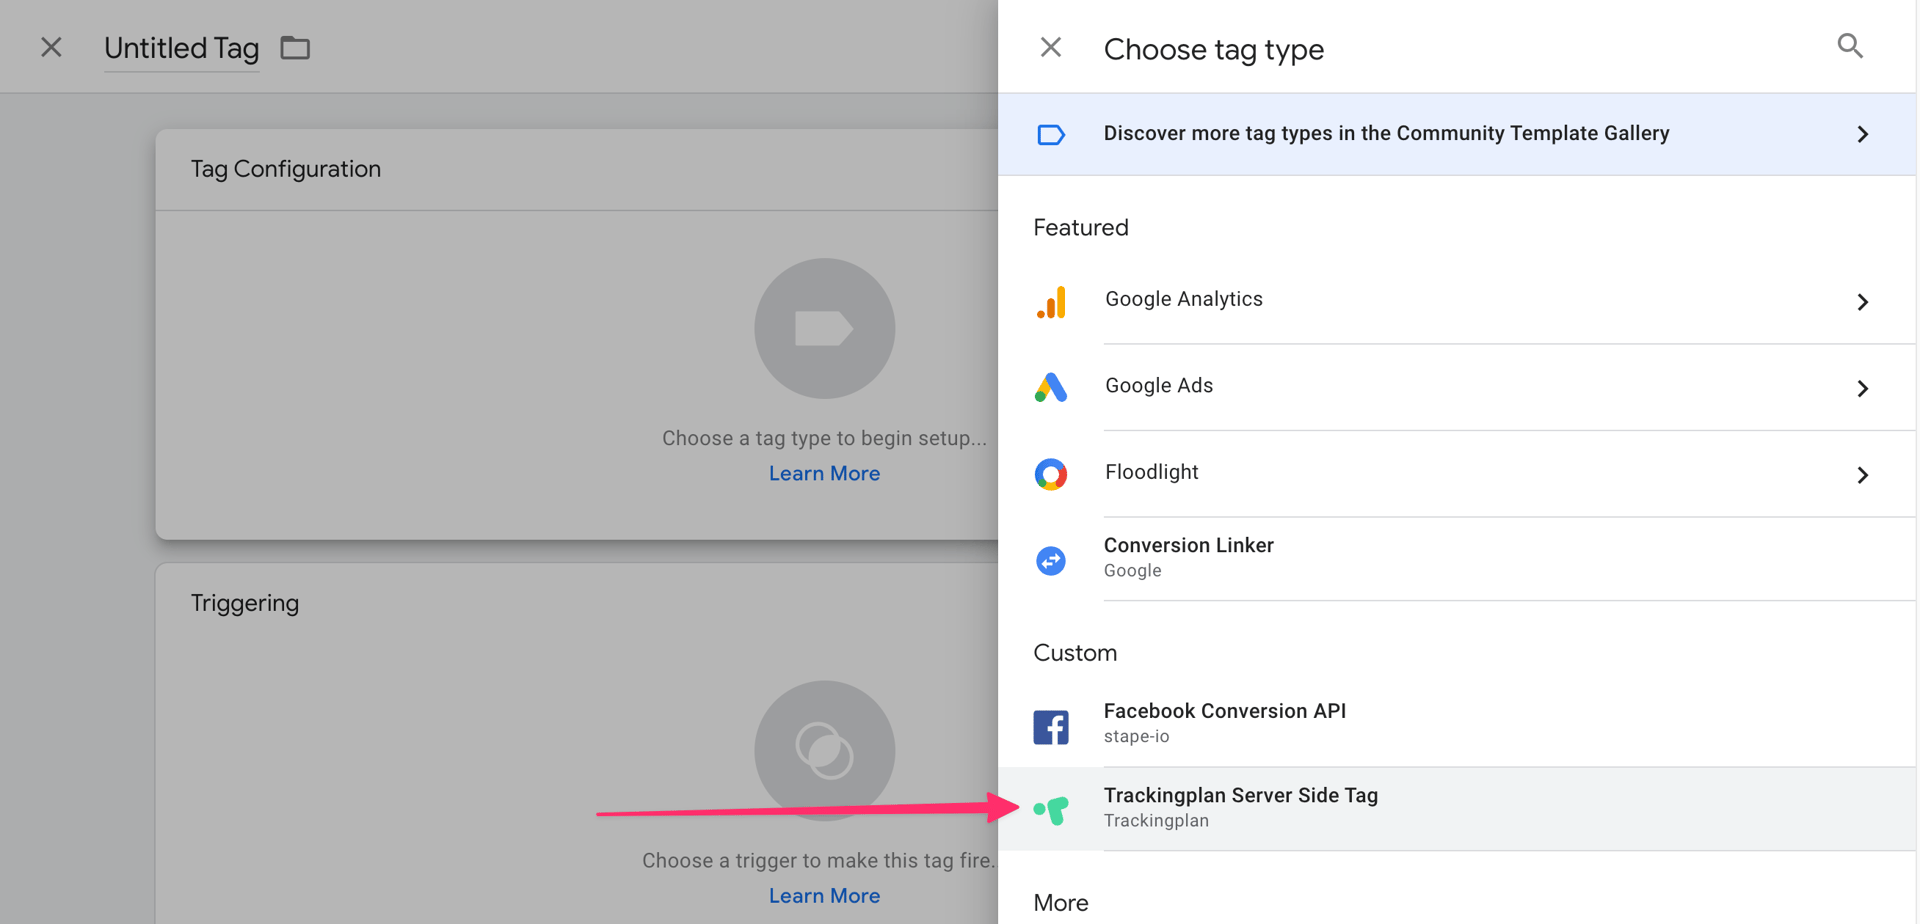
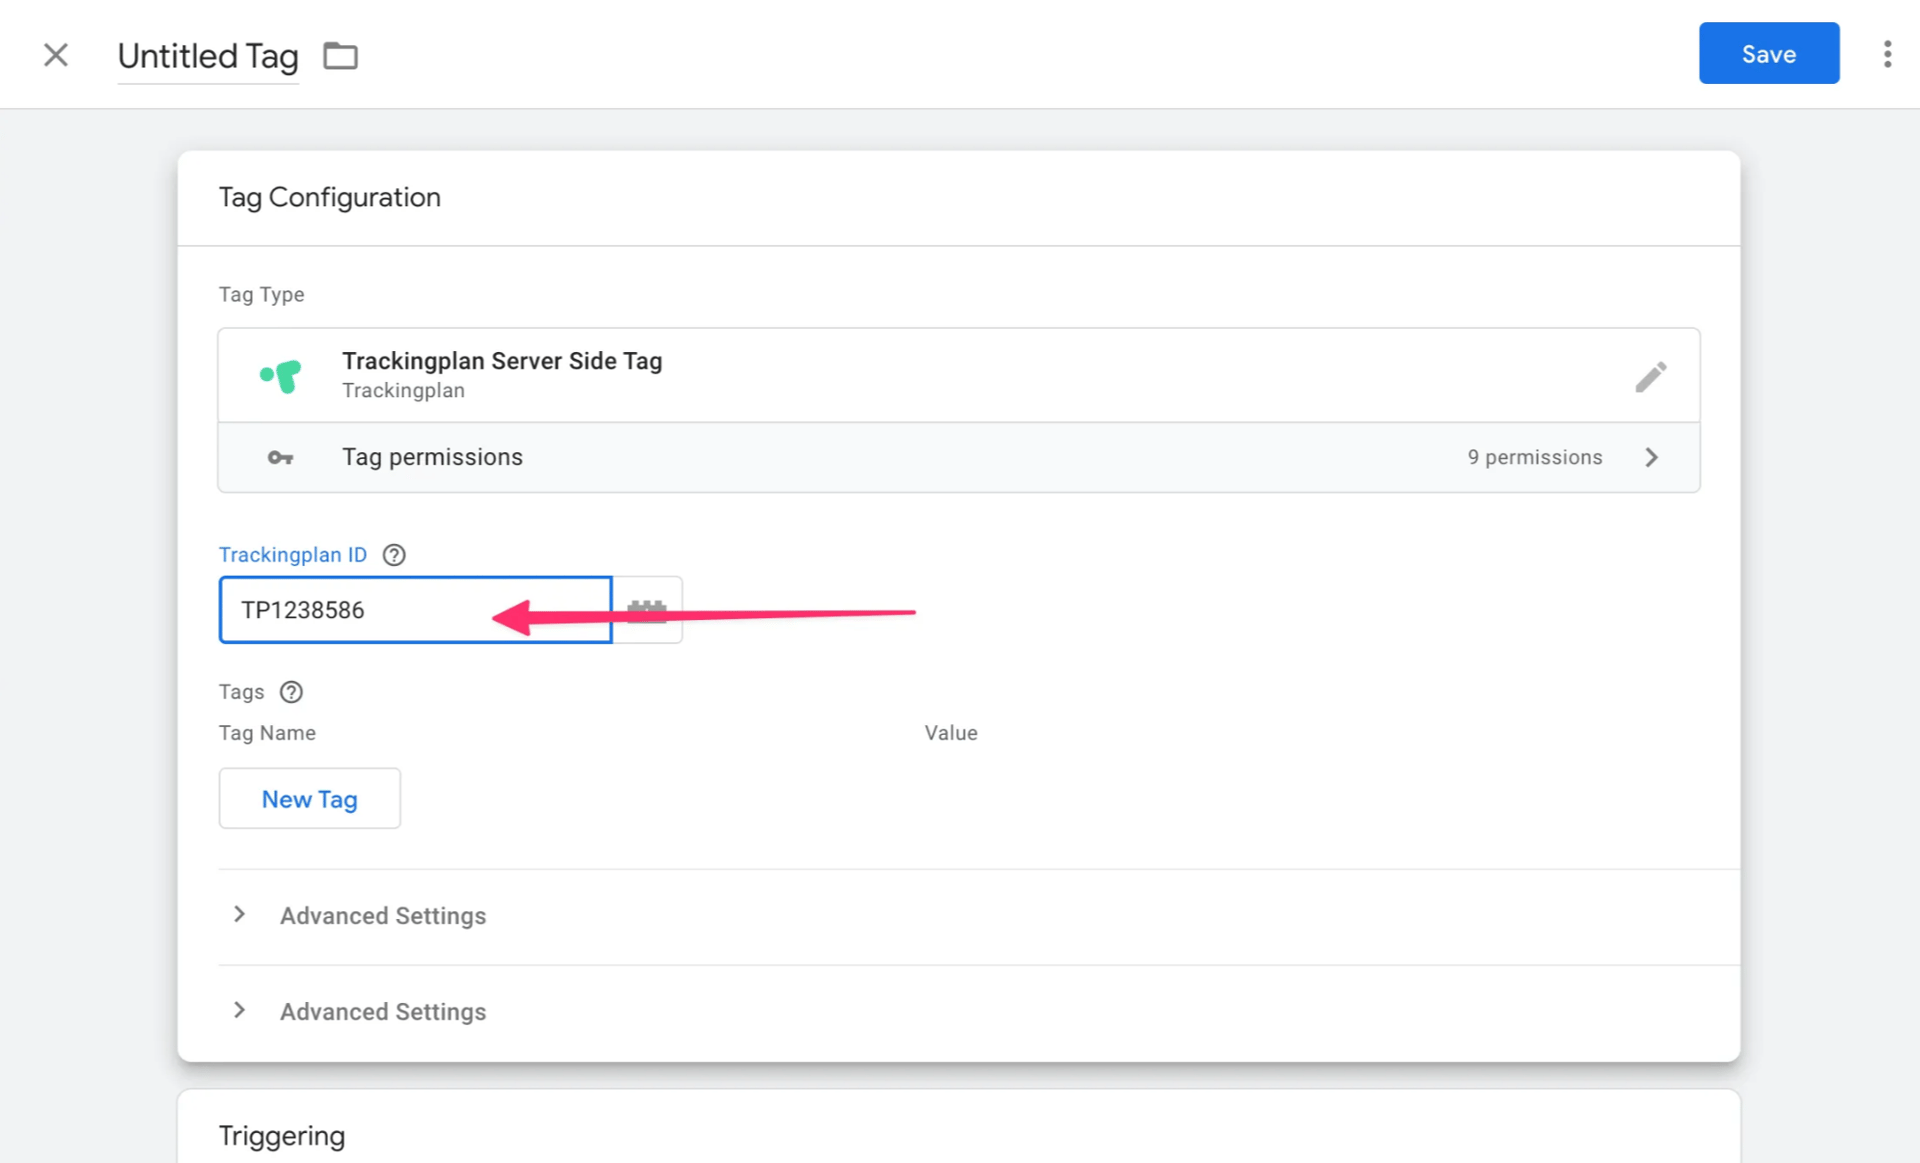
- Add your Trackingplan ID
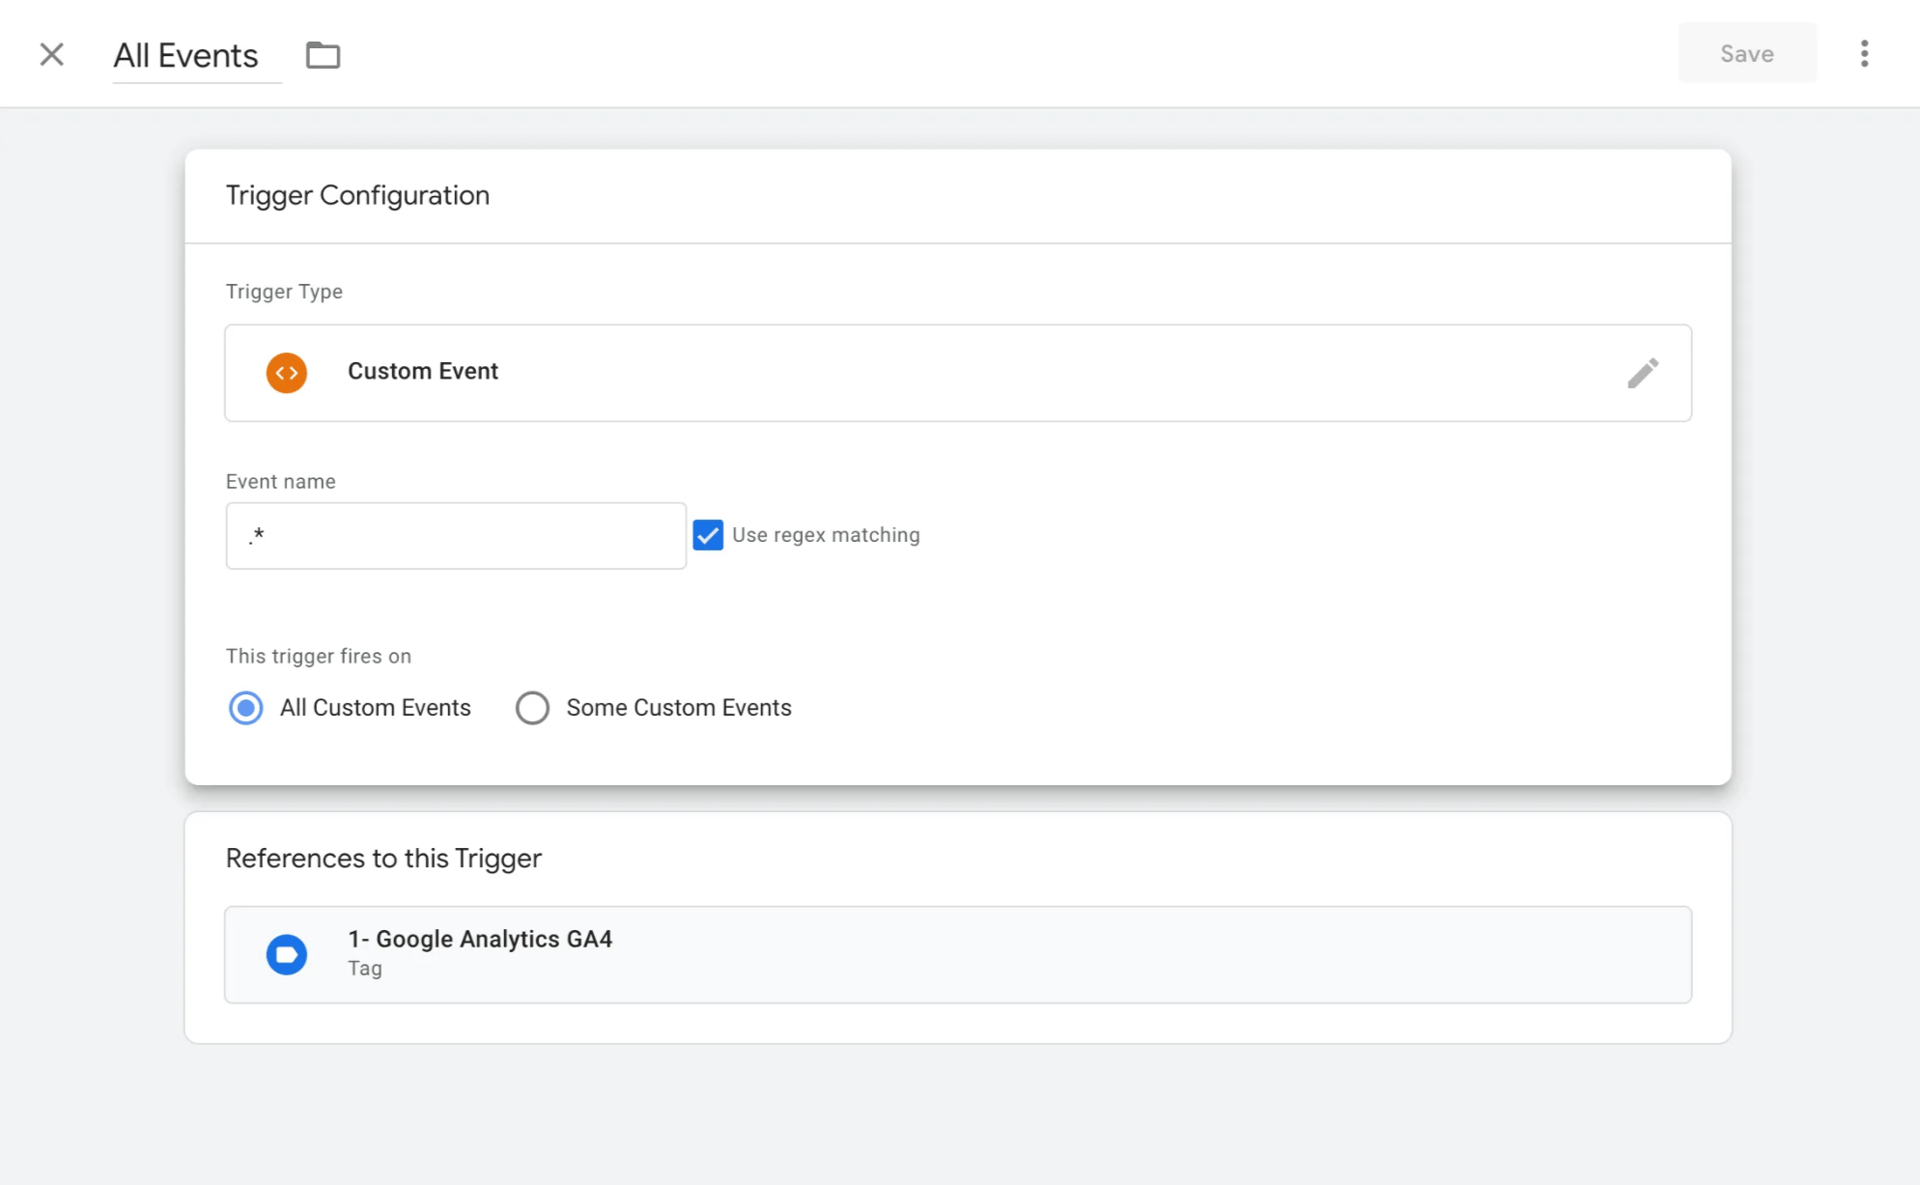
- Set appropriate trigger rules (typically "All Events”, “All Pages")
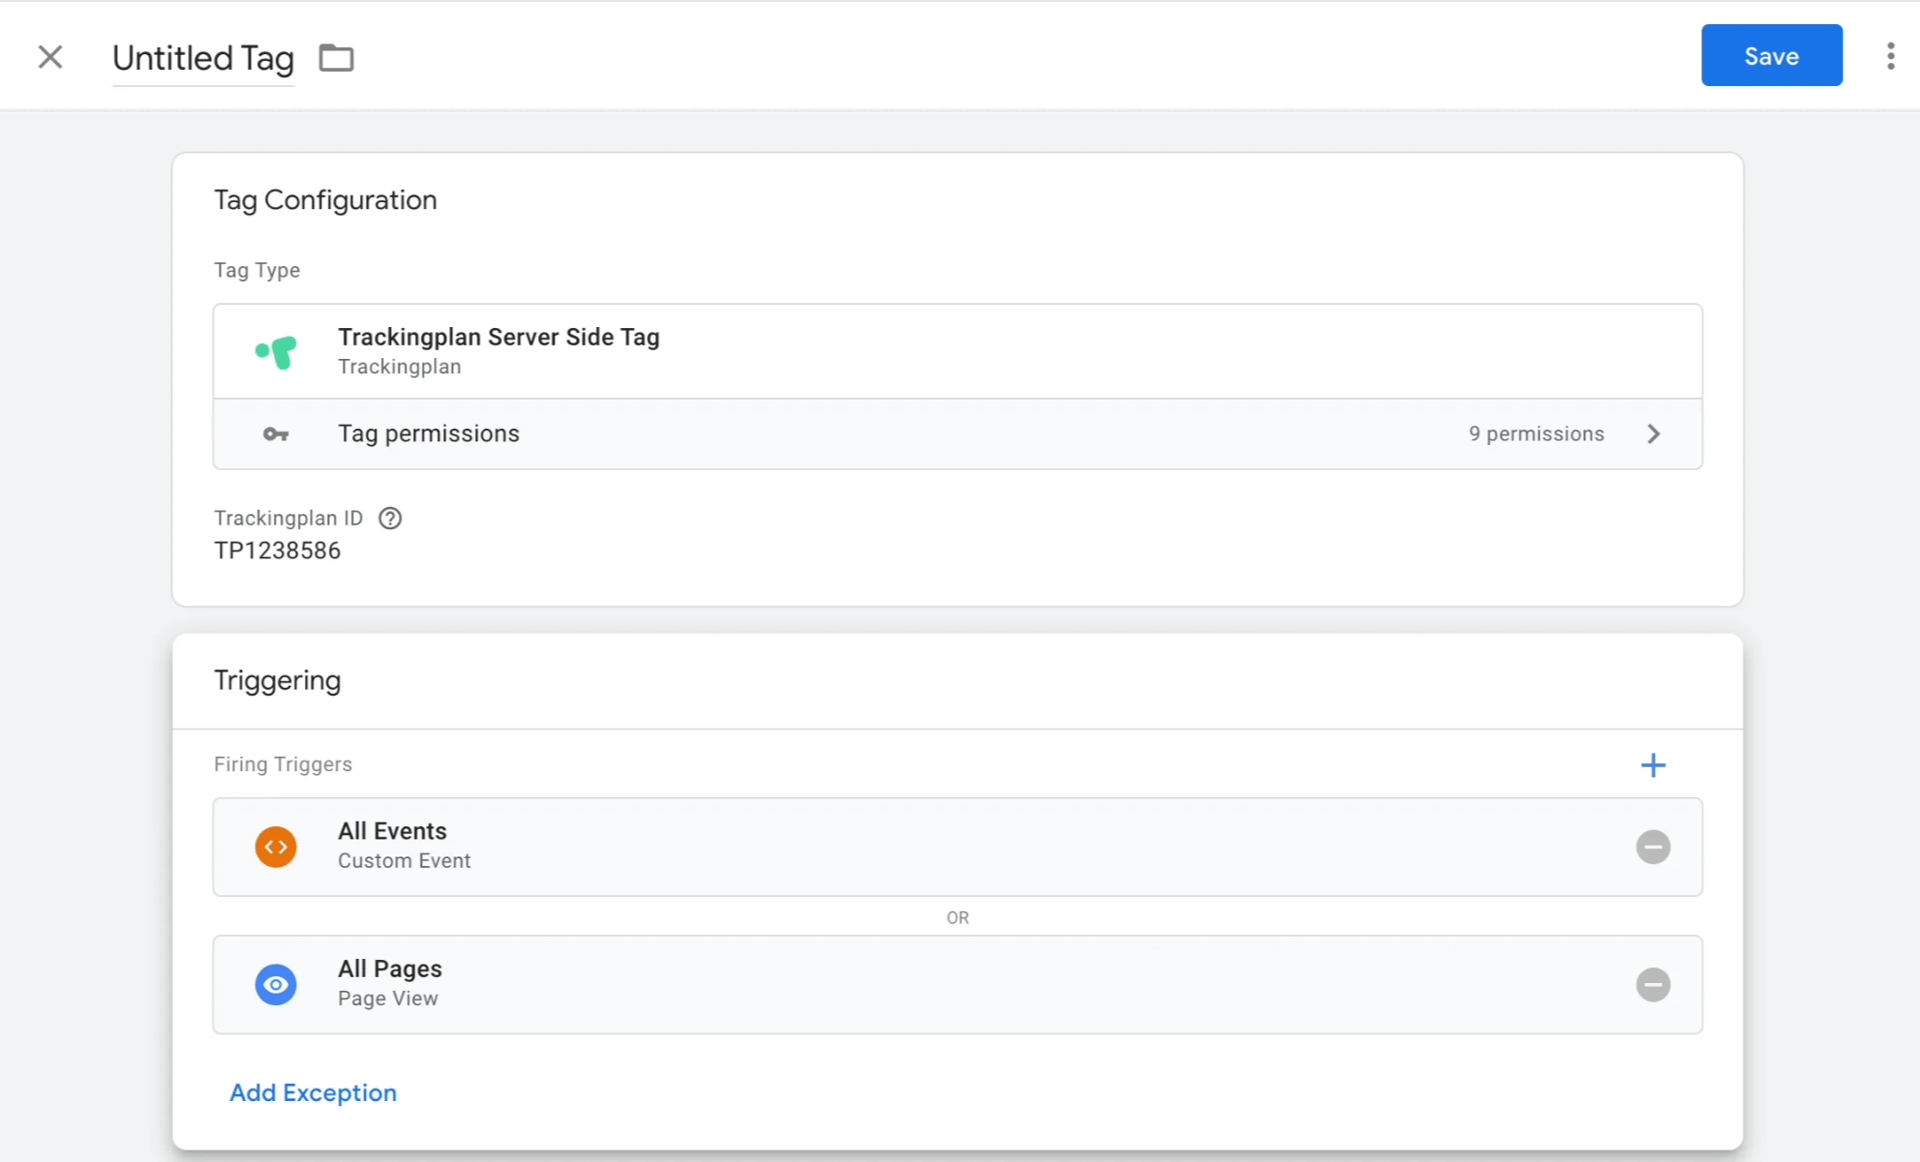
- Click Save
- Publish your container
Using Stape? If your ssGTM container is hosted on Stape, Trackingplan detects it automatically. Just add your Trackingplan ID: there is no domain to configure by hand.
How to modify the tags you want to monitor
Do this on every template you want Trackingplan to monitor.
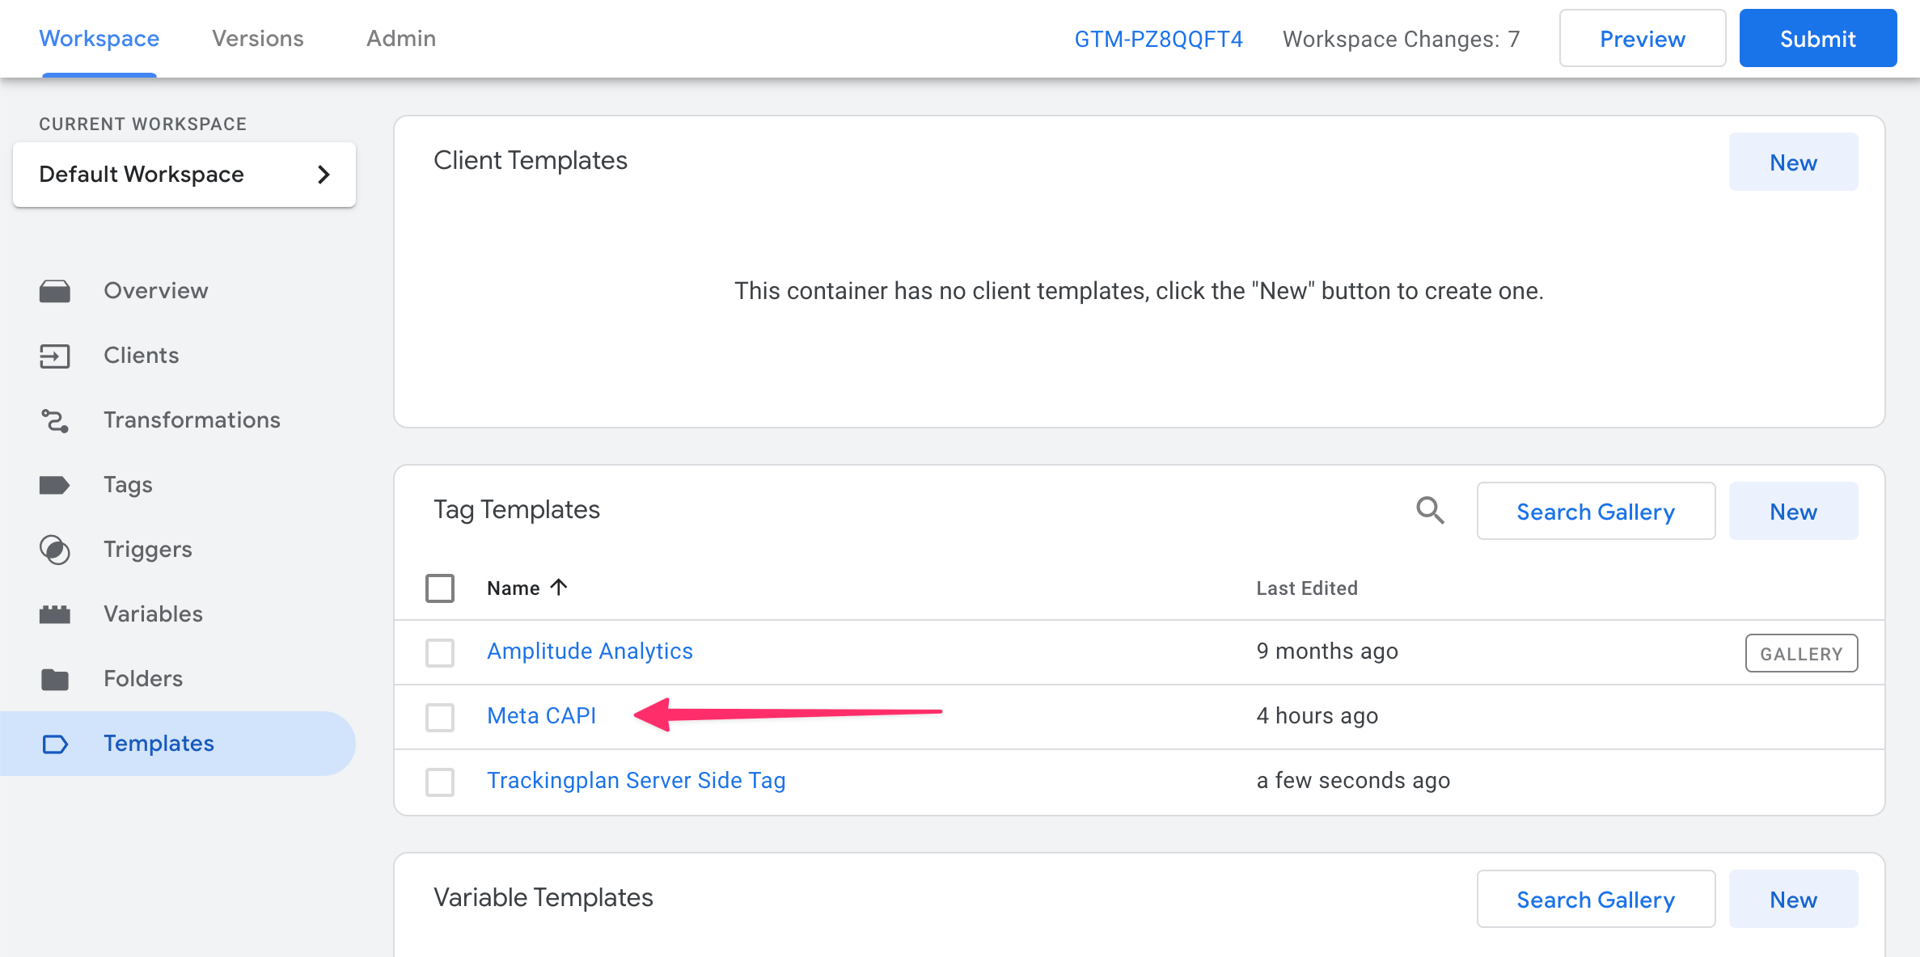
- Open the tag template (this works on any tag)
- Add the Trackingplan Snippet to the top of the template (see code below)
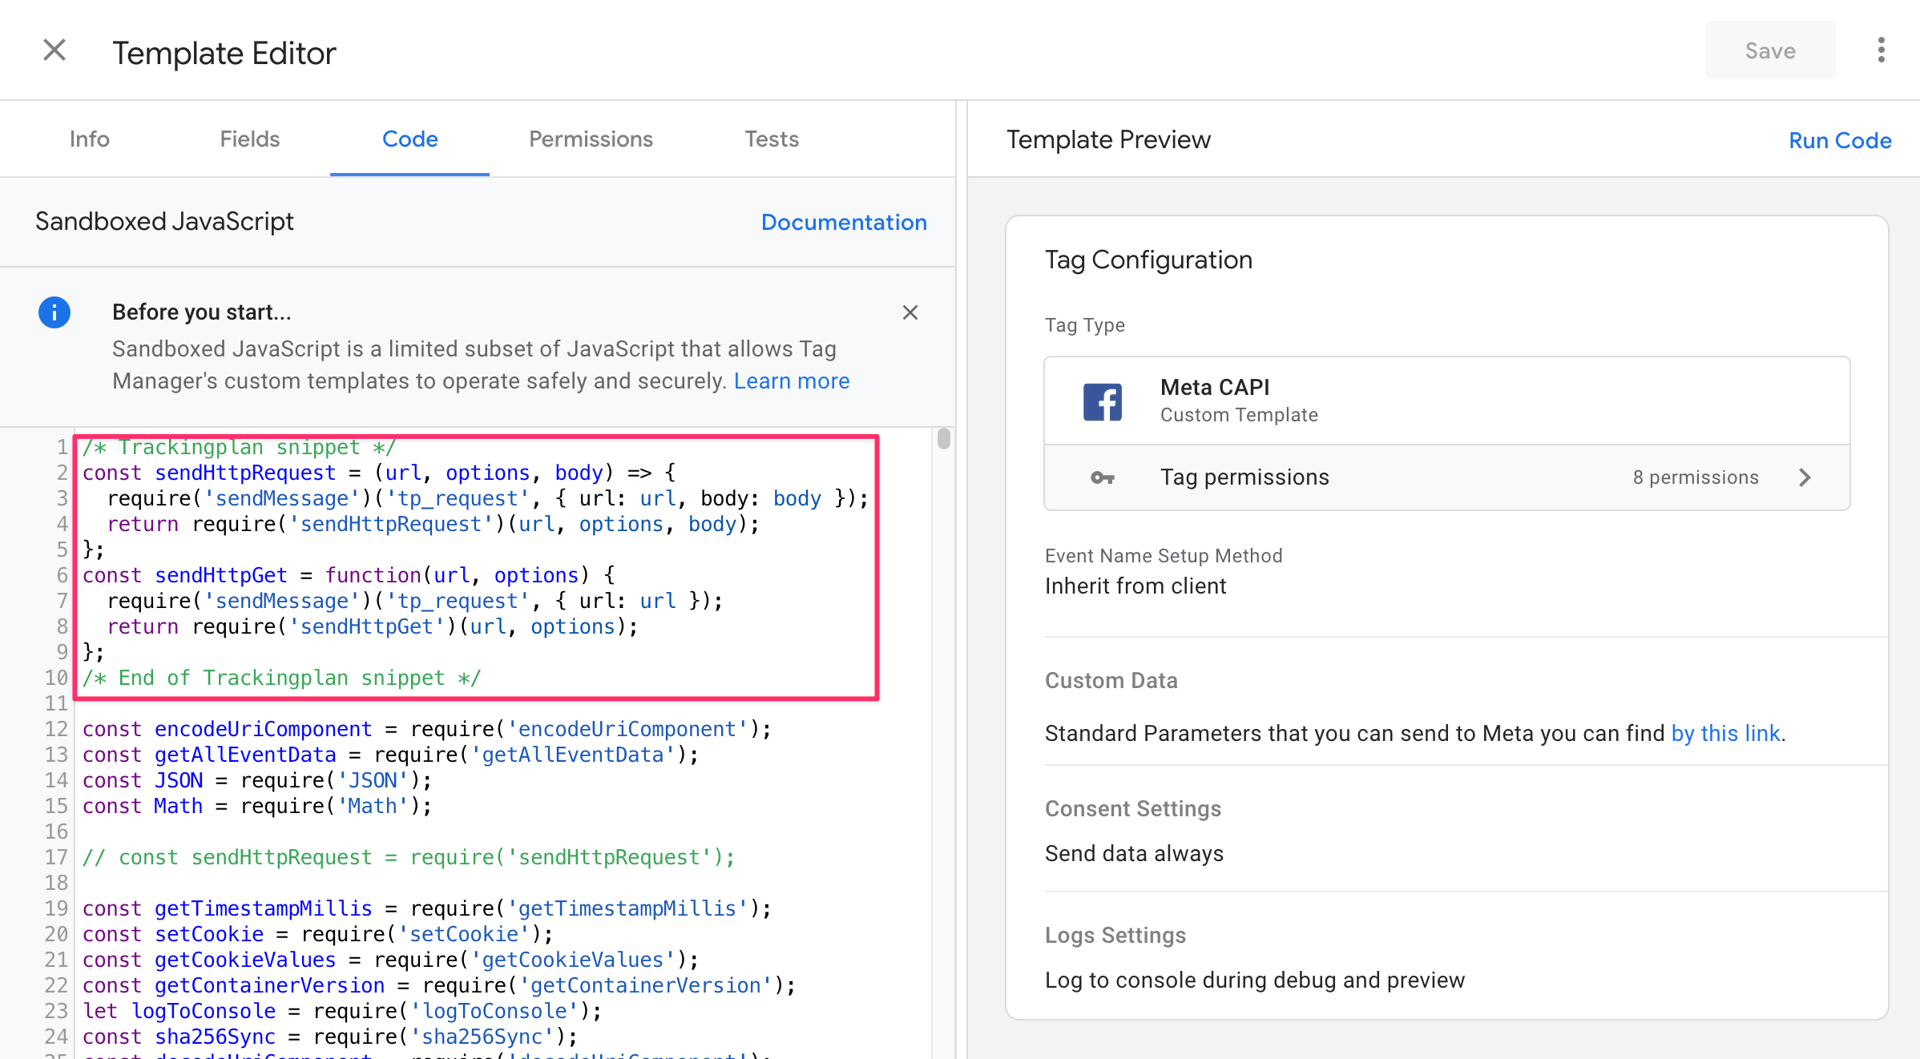
- Remove/Comment the original
sendHttpRequestandsendHttpGetmethods.

- Enable the Send/Receive message permission
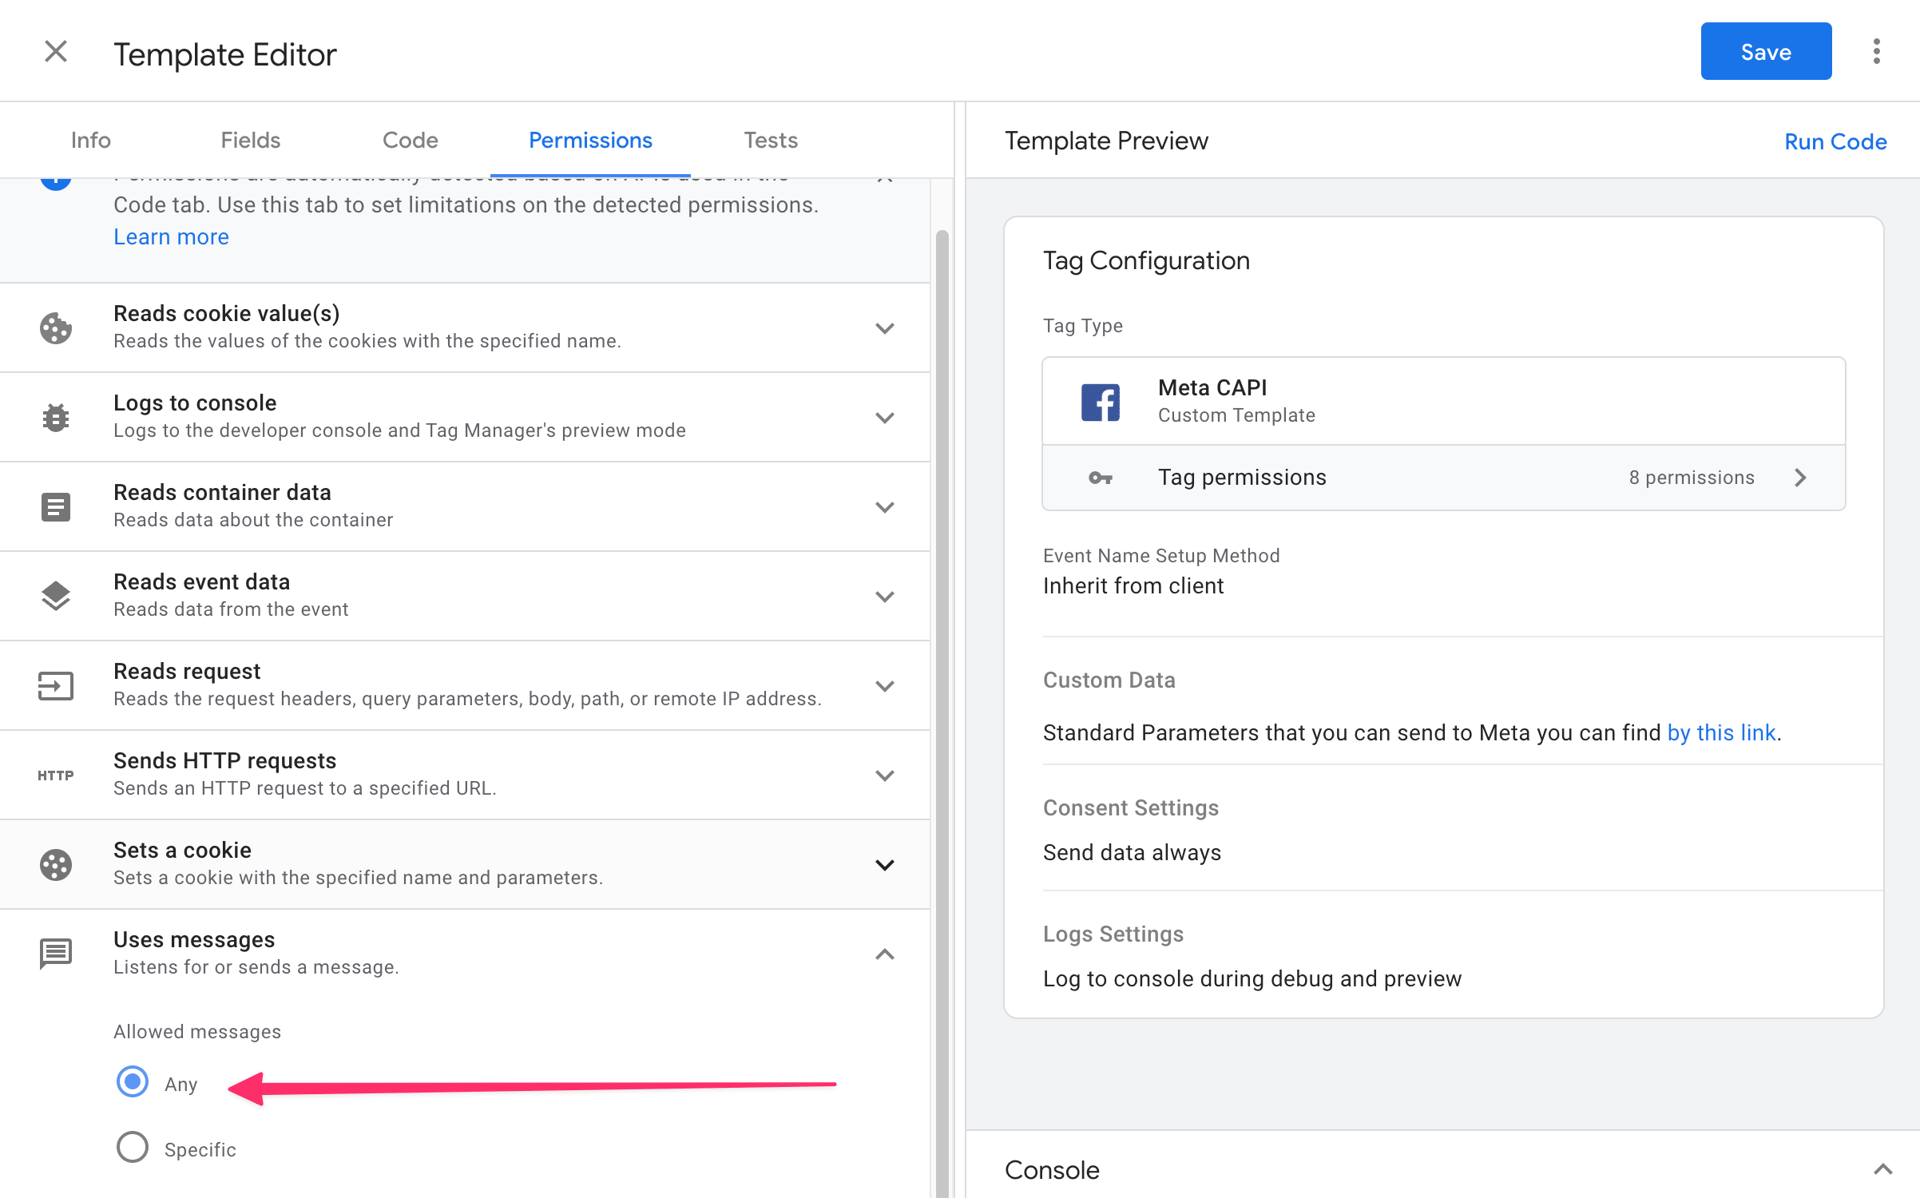
- Save

- Publish your changes
Trackingplan Snippet
/* Trackingplan snippet to be included in on top of templates to be monitored by Trackingplan */
const sendHttpRequest = (url, options, body) => {
    require('addEventCallback')(() => {
        require('sendMessage')('tp_request', { url: url, body: body });
    });
    return require('sendHttpRequest')(url, options, body);
};
const sendHttpGet = function (url, options) {
    require('addEventCallback')(() => {
        require('sendMessage')('tp_request', { url: url });
    });
    return require('sendHttpGet')(url, options);
};
/* End of Trackingplan snippet */
Using Custom domains
Many server-side tagging setups use first-party collection domains instead of the platforms' standard endpoints. If yours does, configure your custom domain with the
ssgtmparser ID so Trackingplan can identify and parse those requests.
Trackingplan recognizes requests sent to the standard collection domains of the analytics and marketing platforms it supports, automatically. Those domains map to destination parsers, which understand each platform's request format and turn the raw requests into the enriched event format you see across Trackingplan.
If your implementation sends data to a custom collection domain instead of the platform's default one, Trackingplan can't identify it automatically. In that case, configure the custom domain when you install Trackingplan.
To configure a custom domain, you need:
- The custom domain that your implementation sends requests to (for example, your own collection domain instead of the platform's default endpoint).
- The parser ID that tells Trackingplan which platform those requests belong to (for example,
ssgtmfor a server-side GTM endpoint ortealiumfor a Tealium Collect endpoint).
The parser value is not the name you'll see in Trackingplan. It is the internal identifier that tells Trackingplan how to read requests from that domain.
For example, say your server-side GTM container receives requests at metrics.example.com. Trackingplan can't tell what that domain serves, so you tell it:
customDomains: [
  {
    domain:"metrics.example.com",
    parser:"ssgtm"
  }
]
From then on, Trackingplan treats every request to metrics.example.com as a server-side GTM request and parses it with the ssgtm parser.
Some common parser IDs include:
Platform | Parser ID |
|---|---|
Server-side Google Tag Manager |
|
Stape |
|
Tealium |
|
Adobe Analytics |
|
Adobe Target |
|
Jentis |
|
Piano |
|
These are only common examples. Not sure which parser ID fits your setup? Contact the Trackingplan team and we'll help you find it.
How to debug & verify everything is running properly
To check everything is running properly, look for the following in preview mode:
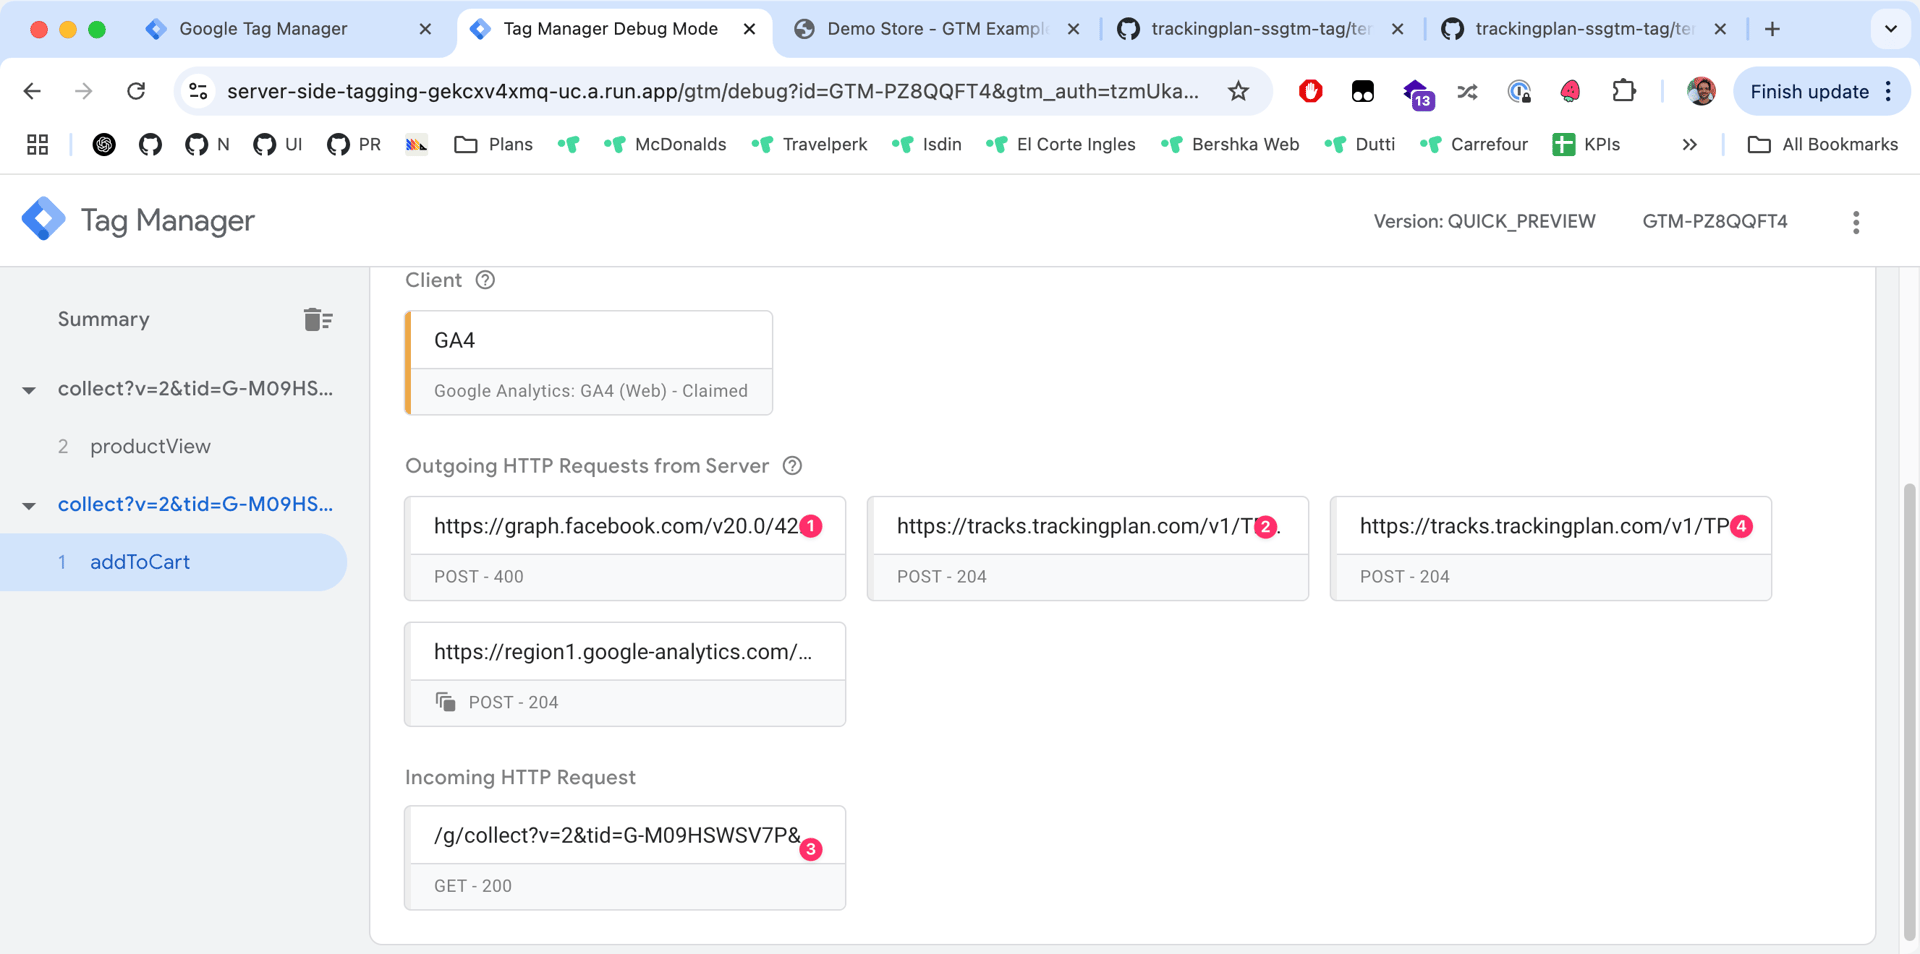
- Each time one of your modified tags sends a request (1 in the image), a Trackingplan request appears in its payload (2 in the image).
- For each Incoming Request (3 in the image), there is a matching Trackingplan request (4 in the image).